One of my favorite places to get inspiration for my garden is the Chicago Botanic Garden. It’s one of the places I mentioned when I was recently asked, “What is Chicago known for?” If you know me, then you know I had to talk about Chicago’s gardens when asked that question. I love the way Chicago has lived up to its motto, chosen over 200 years ago: “Urbs in Horto,” which means “City in a Garden.”
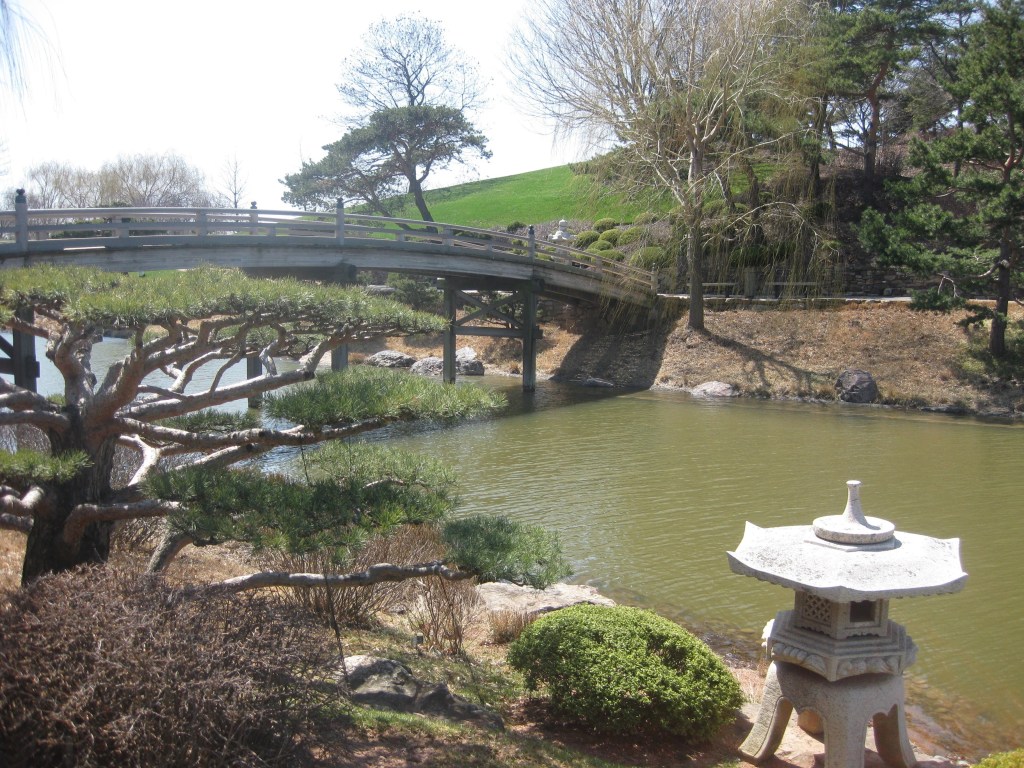
Japanese Garden
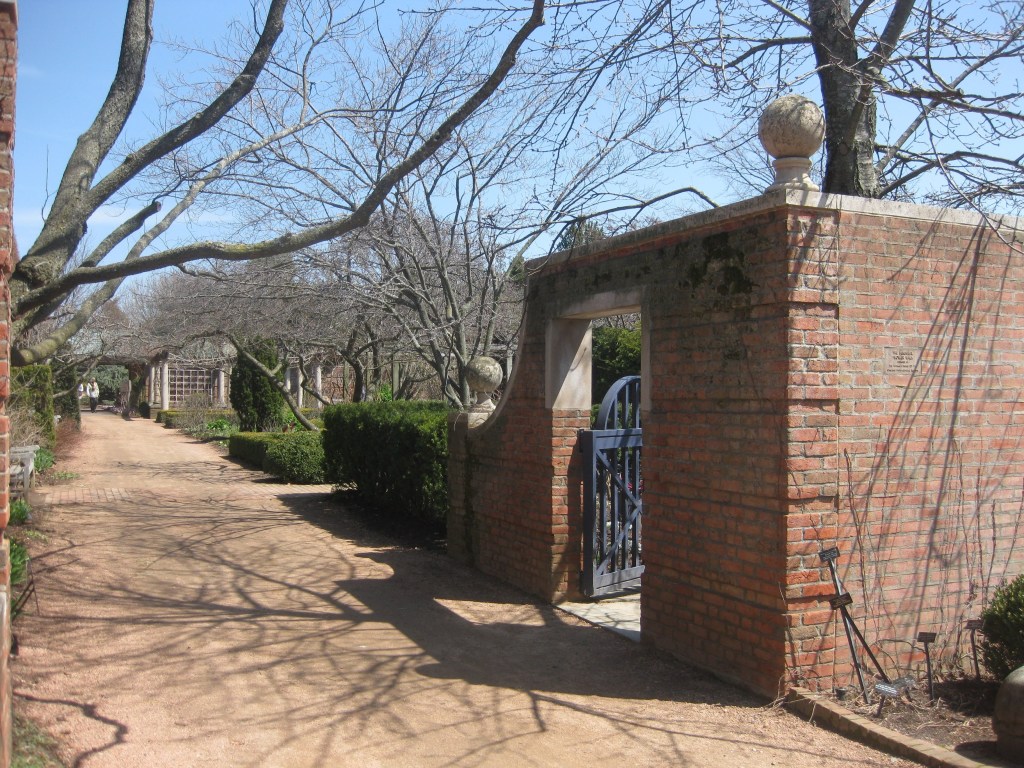
The Chicago Botanic Garden is one of the largest gardens in the Chicago area. It actually has many gardens—28, in fact, plus 4 natural areas. But that doesn’t stop me from adapting their ideas to my own small lot. Just like the Chicago Botanic Garden has its Japanese Garden and its English Walled Garden, I have my Stratford Cottage Garden and my Mackinac Island Garden.
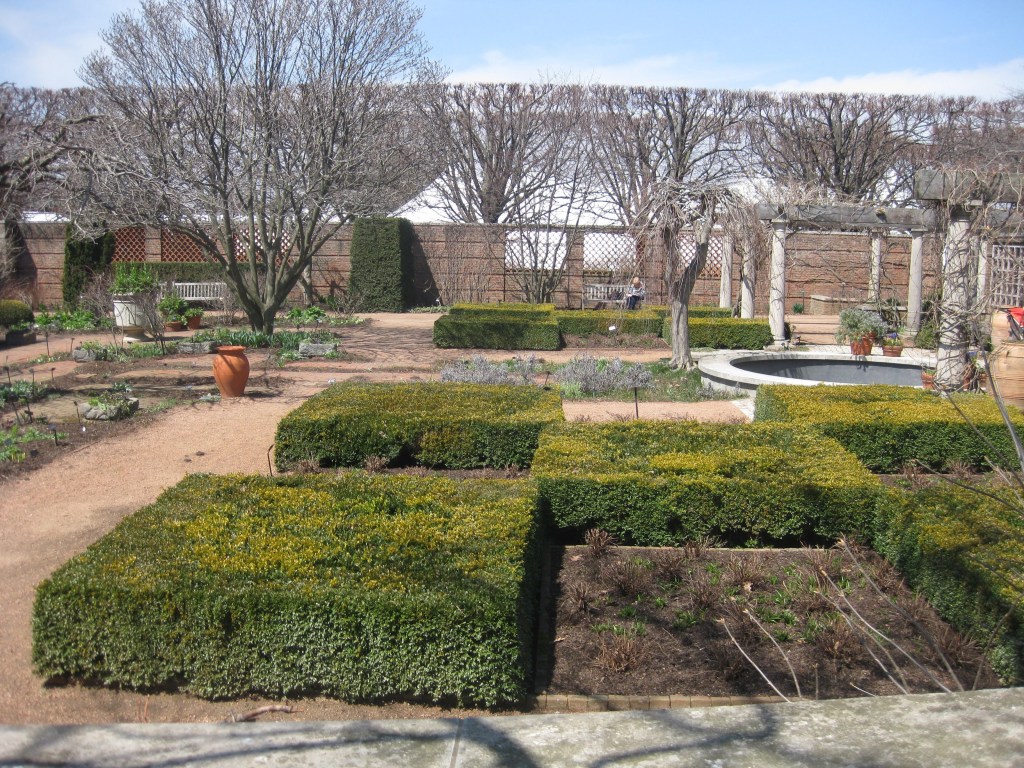
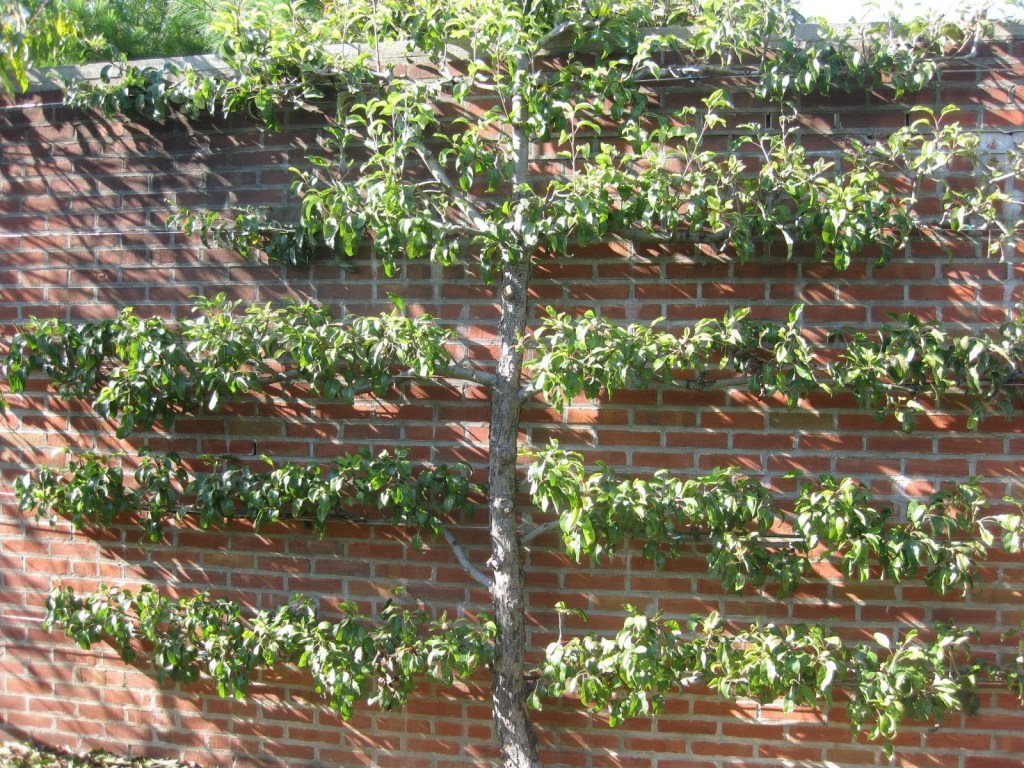
English Walled Garden
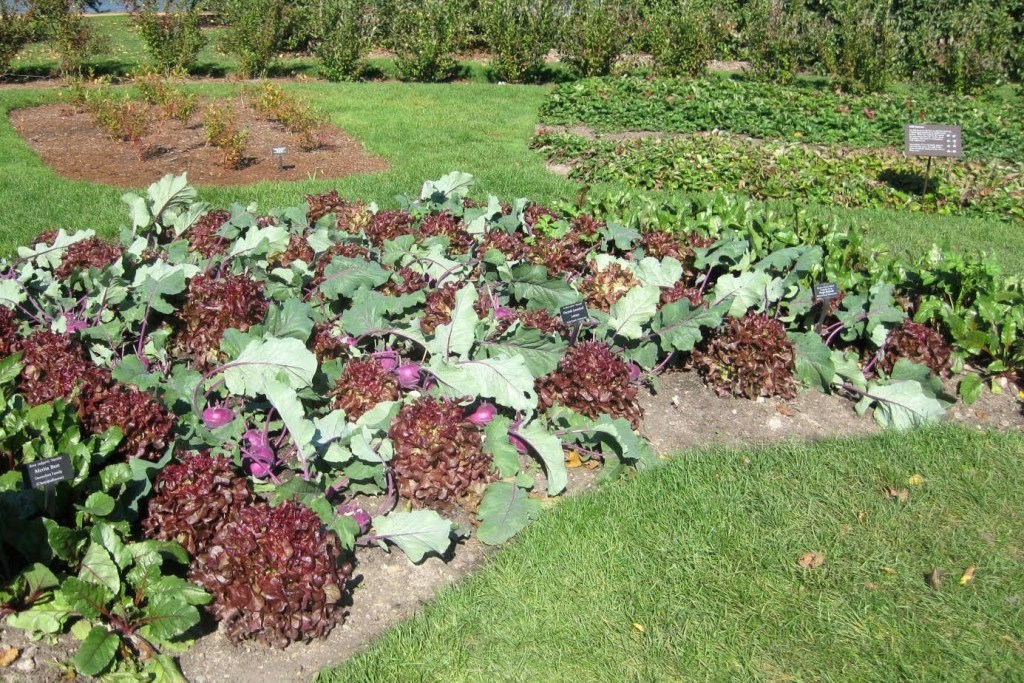
My favorite garden at the Chicago Botanic Garden is the Regenstein Fruit & Vegetable Island. It employs organic cultural methods, like the victory gardens of the past. This garden showcases all kinds of edible plants and shows that they are beautiful and can be used in ornamental ways. It’s a great place to get ideas not only for my Slava Ukraini Victory Garden but also for my ornamental beds.
Debbie Rea at the 2018 Grand Garden Show on Mackinac Island
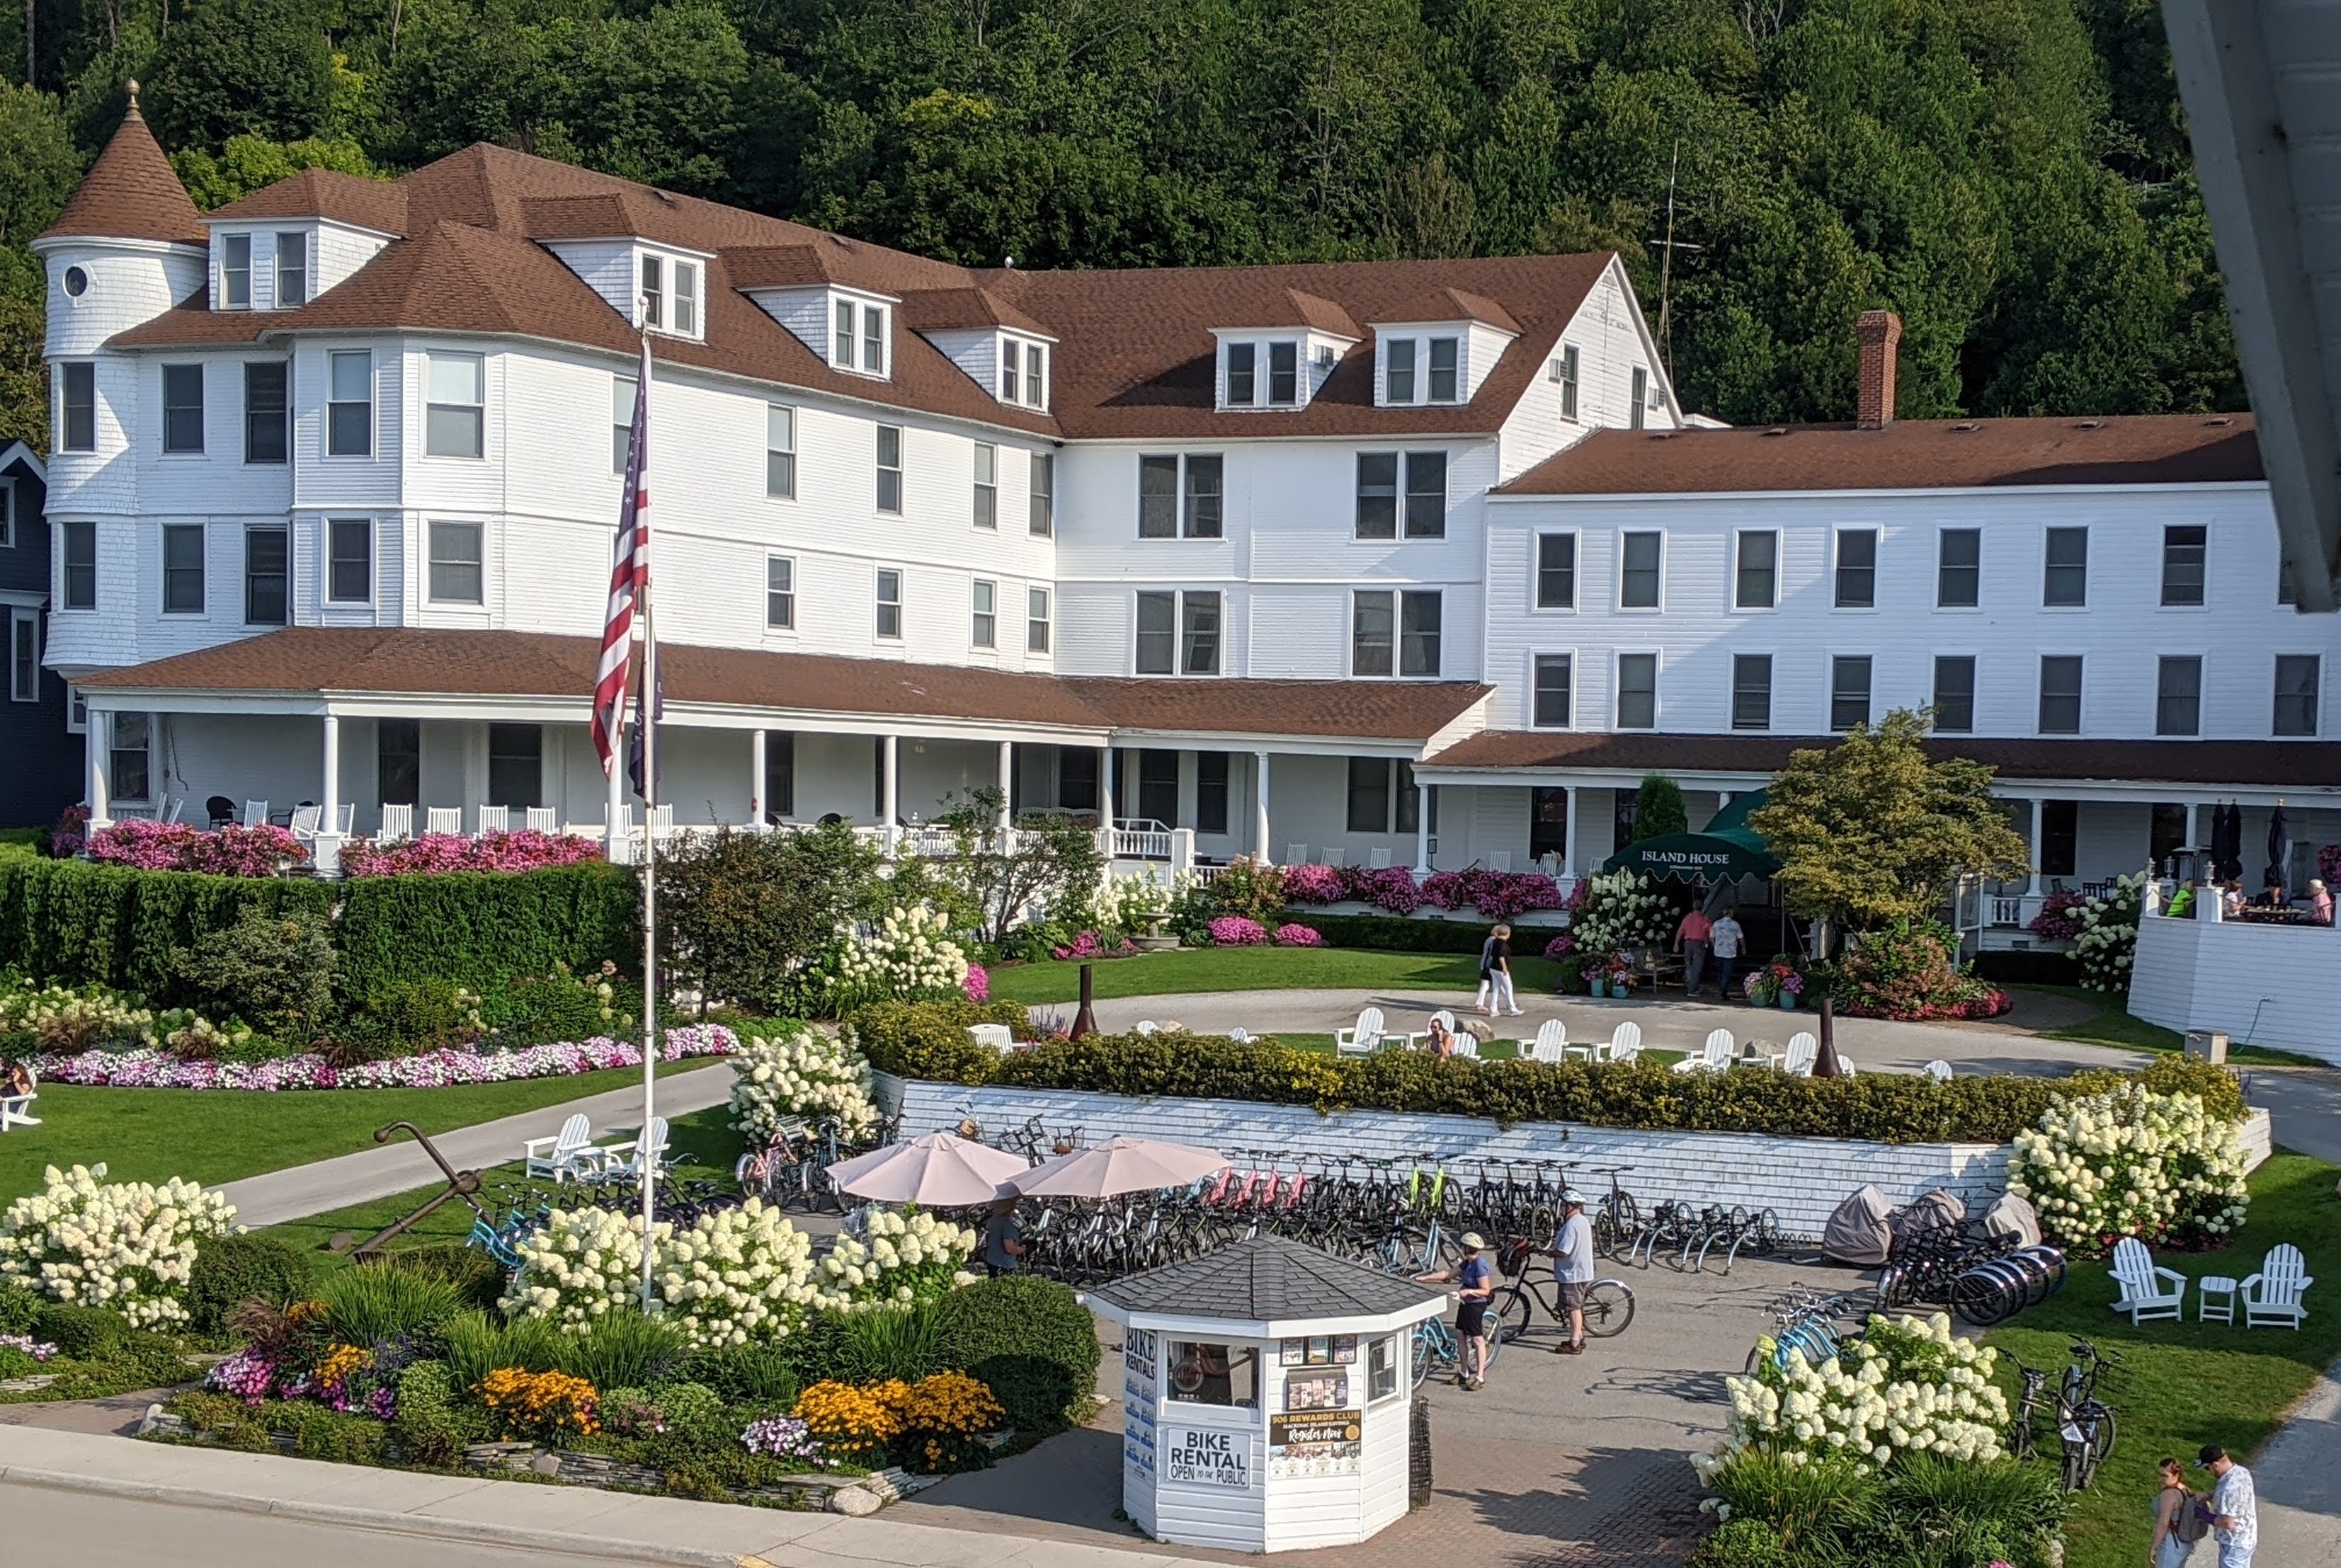
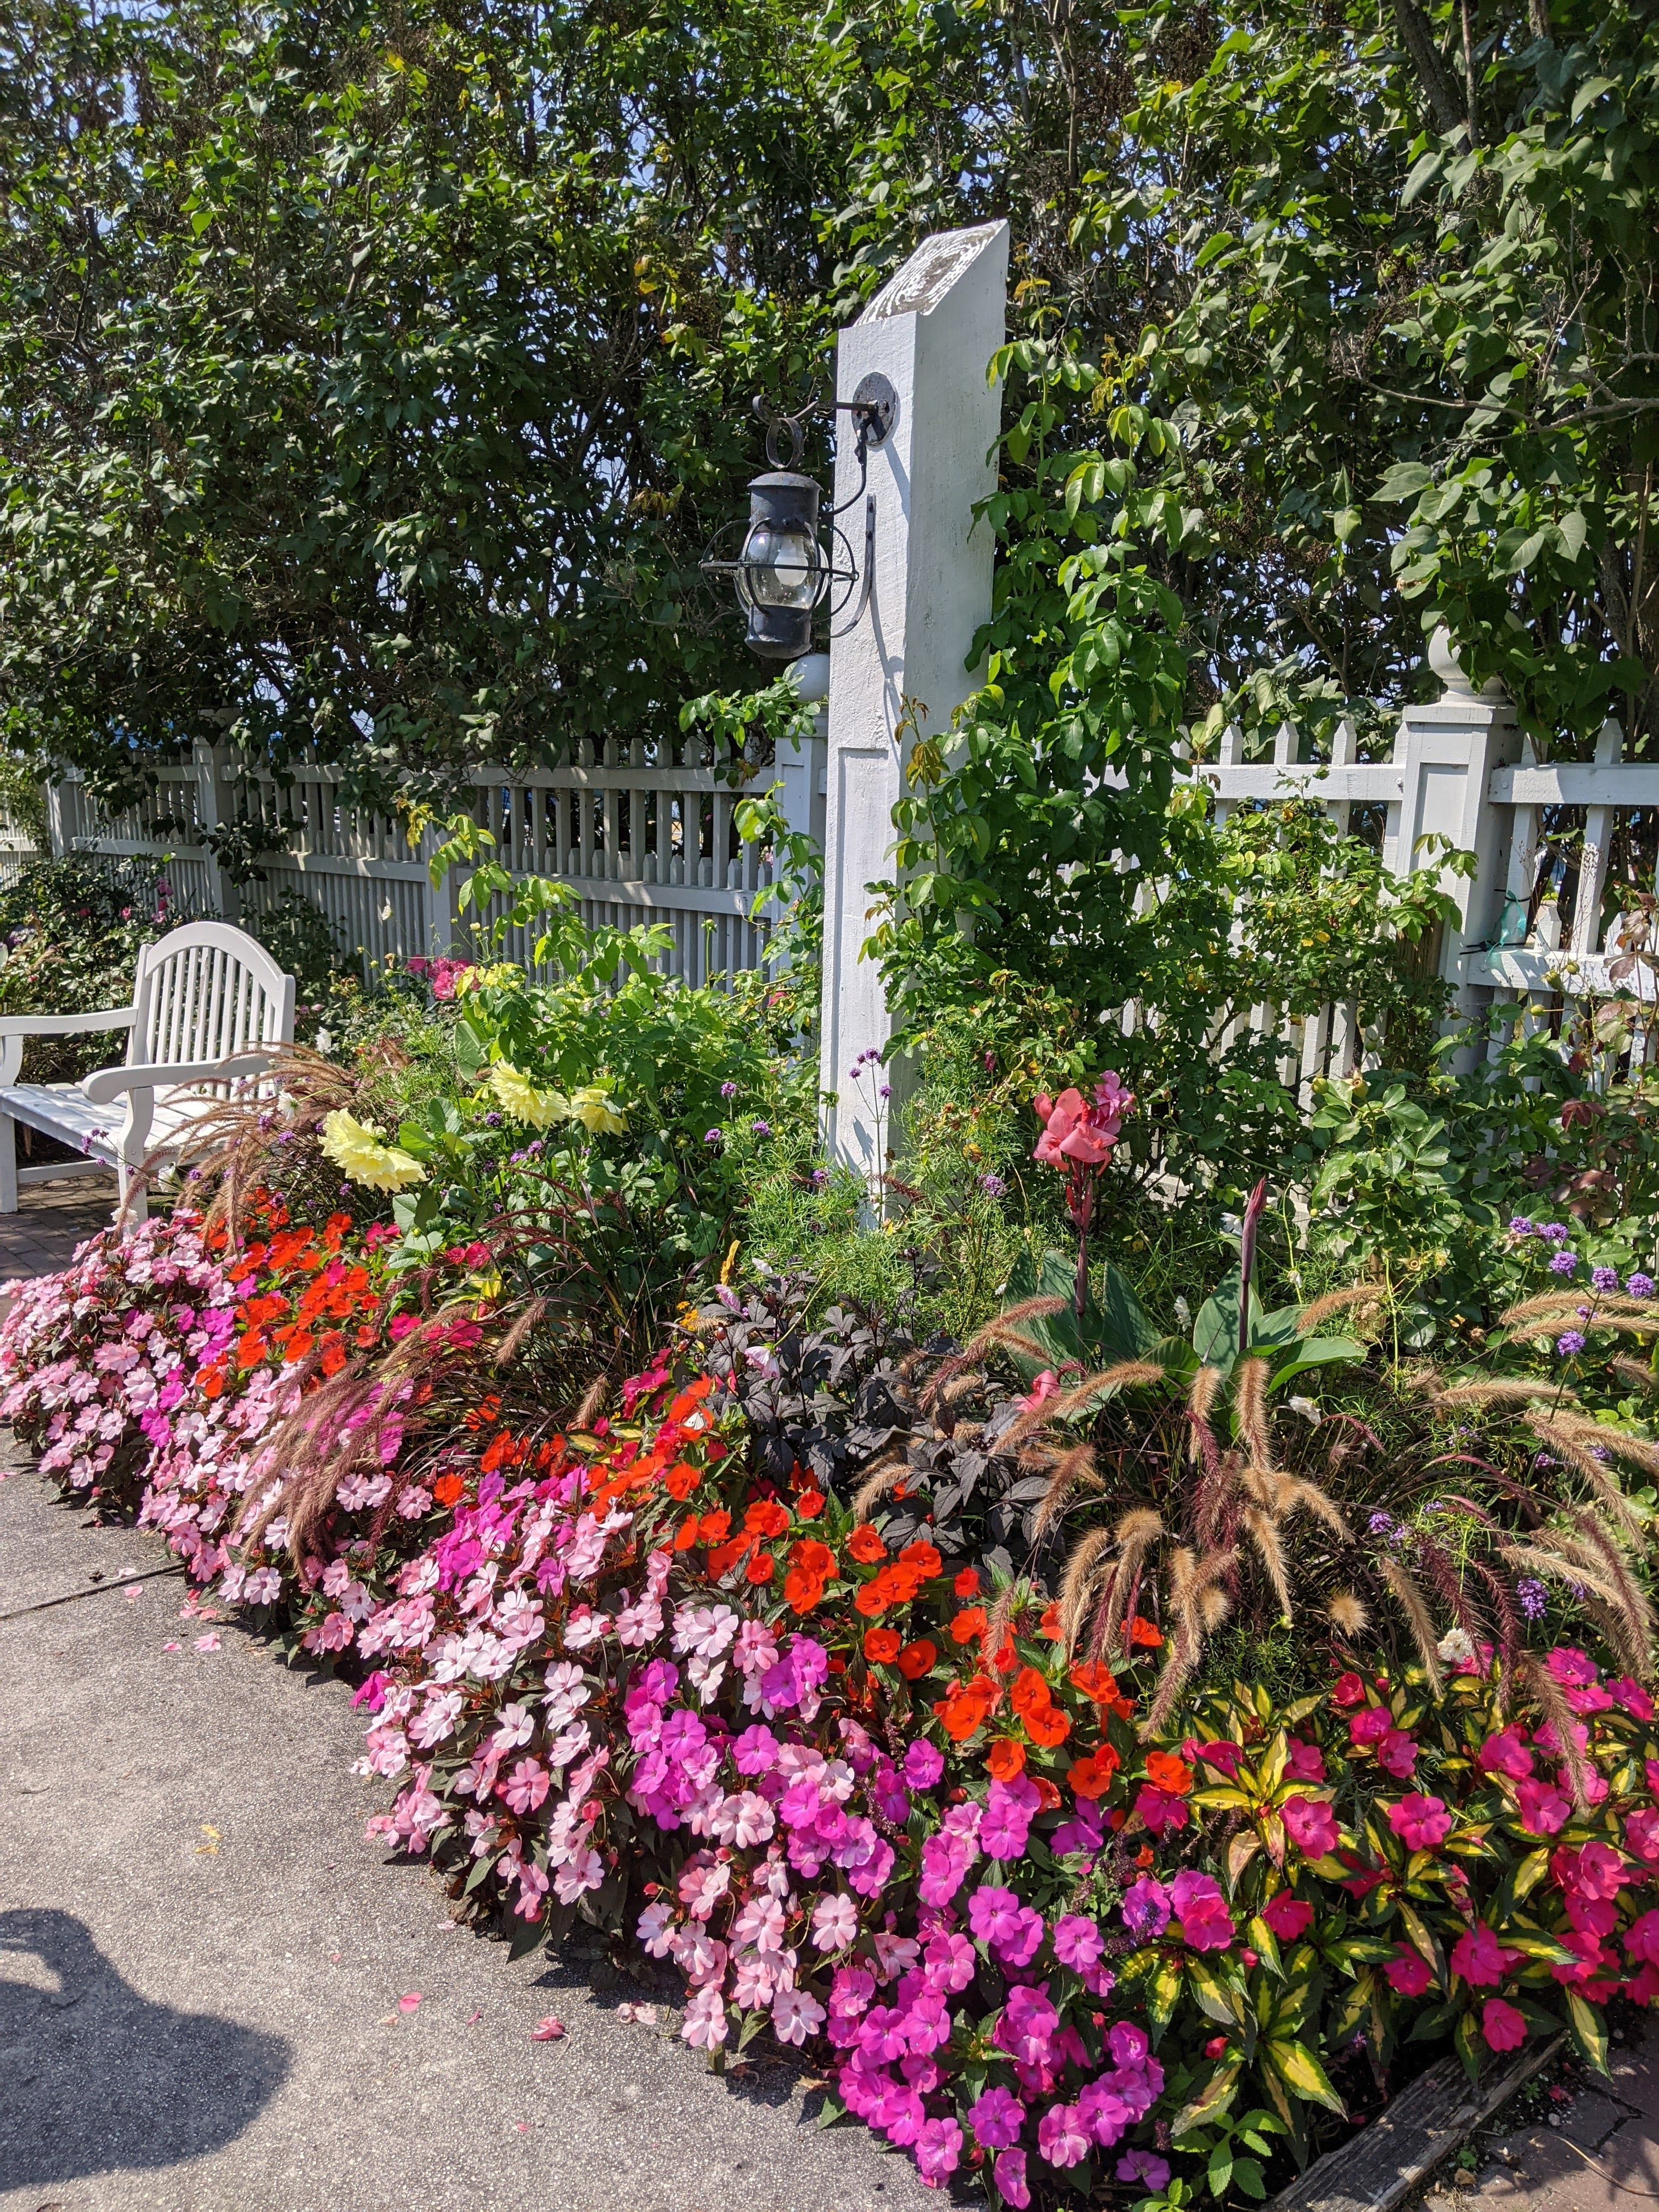
Have you ever heard of The Grand Garden Show on Mackinac Island? It’s a terrific garden show, begun in 2013, that is hosted by Proven Winners® at the Grand Hotel on Mackinac Island. It includes garden seminars and lovely receptions at the superbly elegant Grand Hotel. The seminars feature presentations by well known speakers, and there are a good number of giveaways, such as gardening tools from Corona Tools and plants from Proven Winners. And the best part, in my opinion, is the garden tours around Mackinac Island, which allow you to enter and tour the backyards of private residences on the island, as well as the grounds of the Grand Hotel and other establishments.
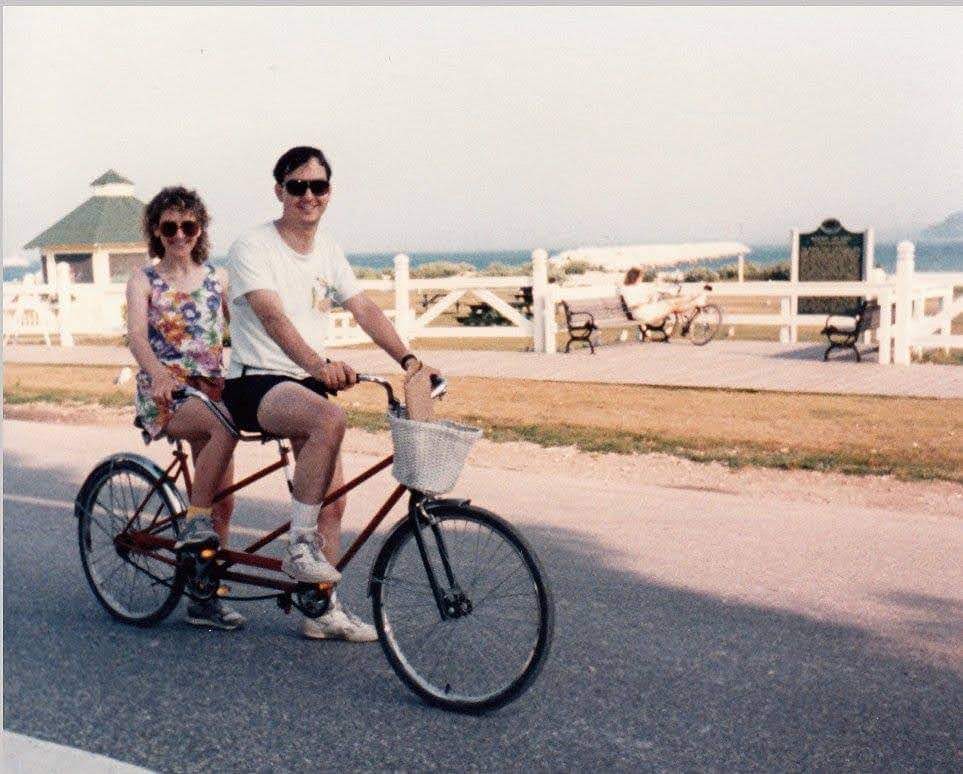
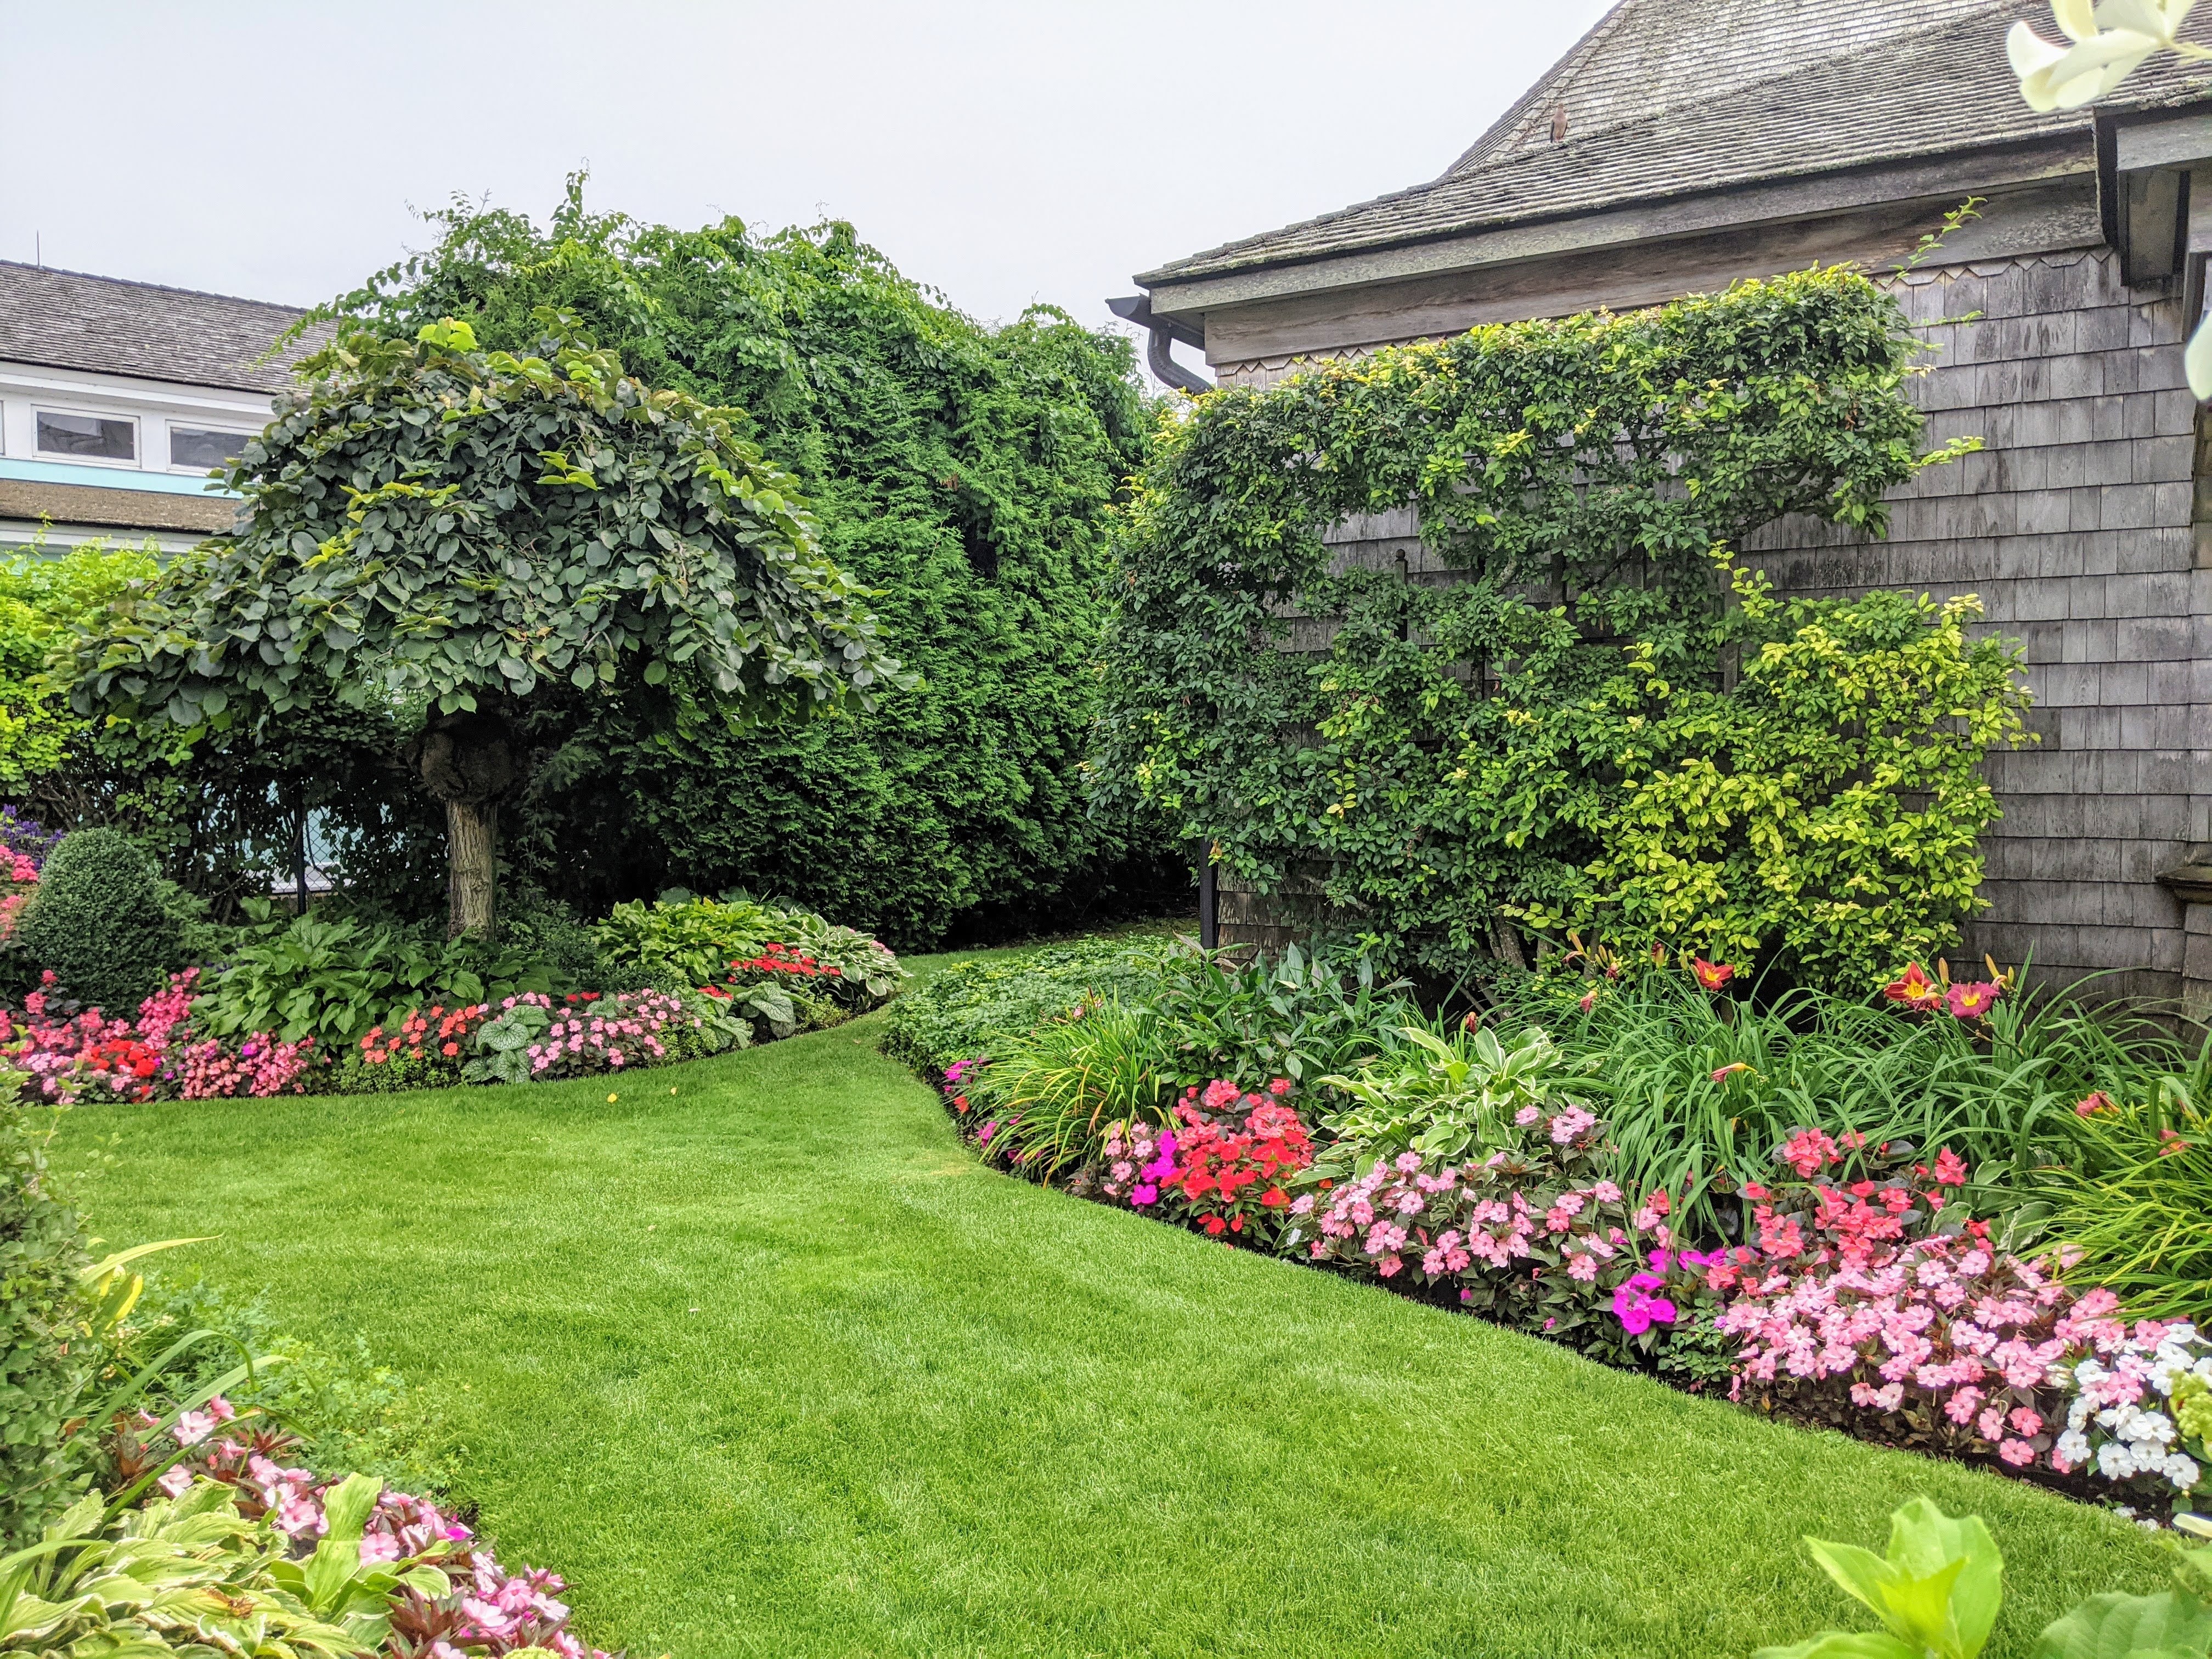
If you’ve followed me for a while, you know that Mackinac Island, Michigan, is a very special place for my husband and me because we honeymooned there in 1991. I was not a gardener when I first became a wife, but Stan had long been calling me “the gardener wife” by the time we returned to Mackinac Island in 2016 for our 25th anniversary. That’s why I was thrilled that the Grand Garden Show is held in late August, right around the time of our anniversary, August 24th. We got to stay at the Grand Hotel and attend the Proven Winners Grand Garden Show, which was in its fourth year. Then we returned and did it again for our 27th anniversary in 2018. It was during this garden show that I decided to name the new garden we were creating in our side yard the “Mackinac Island Garden.”
We had hoped to go to the Grand Garden Show again for our 30th anniversary. Due to COVID, however, they did not have a Grand Garden Show on Mackinac Island last year. But we still went to Mackinac Island on what we called our “30th Anniversary Extravaganza Trip,” and it was wonderful. The trip was leisurely and elegant as Stan booked us to stay in gorgeous bed and breakfasts along the way there and back. And I turned this trip into my own Grand Garden Show by visiting and taking photos of all the lovely gardens we saw. I created videos from the highlights, and those are linked in the descriptions below. You may also click on any of the photos below to get a better look at them on your device. I hope you enjoy The Gardener Wife Grand Garden Show!
Goldberry Woods Garden
The first B&B we stayed at was Goldberry Woods in Union Pier, Michigan. It’s not far from Chicago, and it’s the perfect place for folks who love fresh garden-grown food. Julie Haberichter, the innkeeper/gardener, uses their harvests year round to make delectable farm-to-table meals for guests staying in the inn and cottages. All of the eggs, vegetables, fruits, and even the honey used in her fabulous garden-to-table breakfasts are produced right there at Goldberry Woods. Julie is an expert organic gardener, and the extent and variety of the garden here is amazing.
South Haven Garden
I knew we would be near the South Haven garden of my Instagram friend, Tanner, so I arranged to meet her and see her extensive garden in person. Her kids say that she’s an “organized hoarder” and they are not kidding. It was a delight to hear how she put together all the treasures she’s found on her antiquing adventures to create a great variety of gardens, filled with flowers and charming vignettes. Many feature sweet little “houses” constructed from beautiful windows and architectural pieces. And of course there are greenhouses, too. Stunning!
Mackinac Gardens Tandem Tour
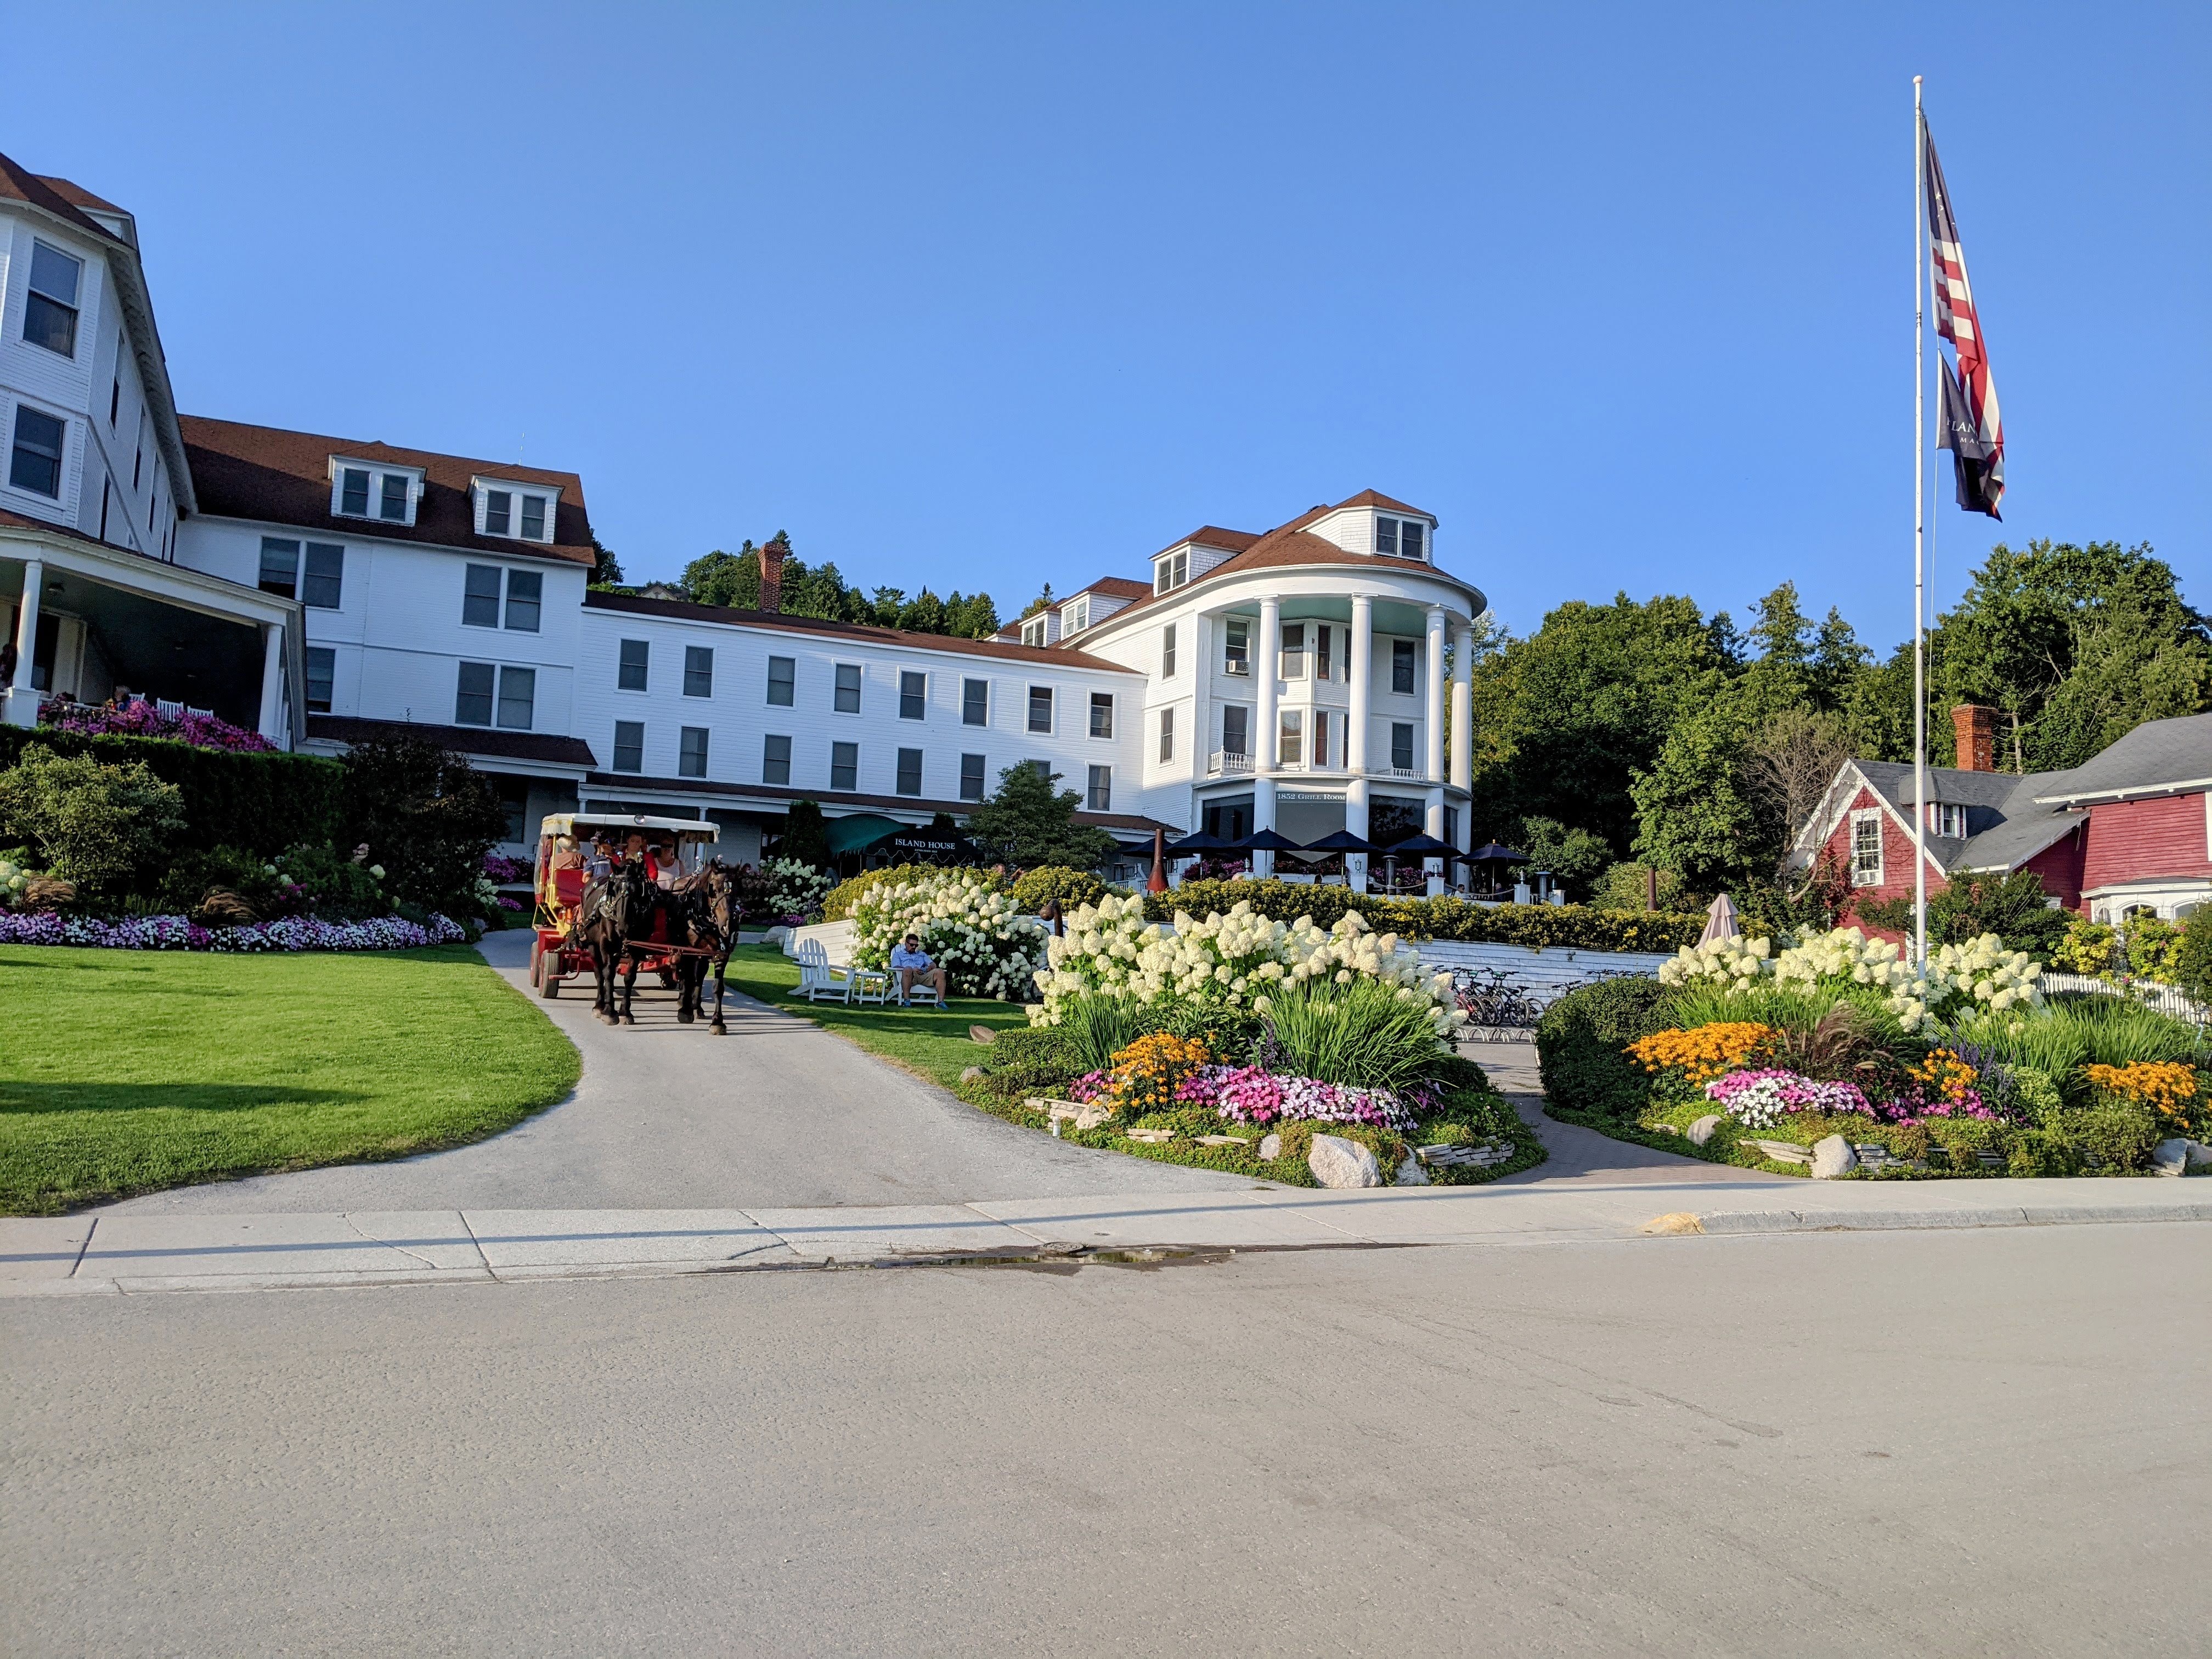
On our first morning on Mackinac Island, we went on a tandem bike ride—like we had done during our honeymoon! We revisited the famous Arch Rock, and we reenacted our honeymoon photo at Windermere Point. We stopped along the way so that I could take photos of the Mackinac gardens we passed, as well as the other sites.The last few garden photos of this video were taken at the B&B we stayed at on Mackinac Island, the Bay View Inn.
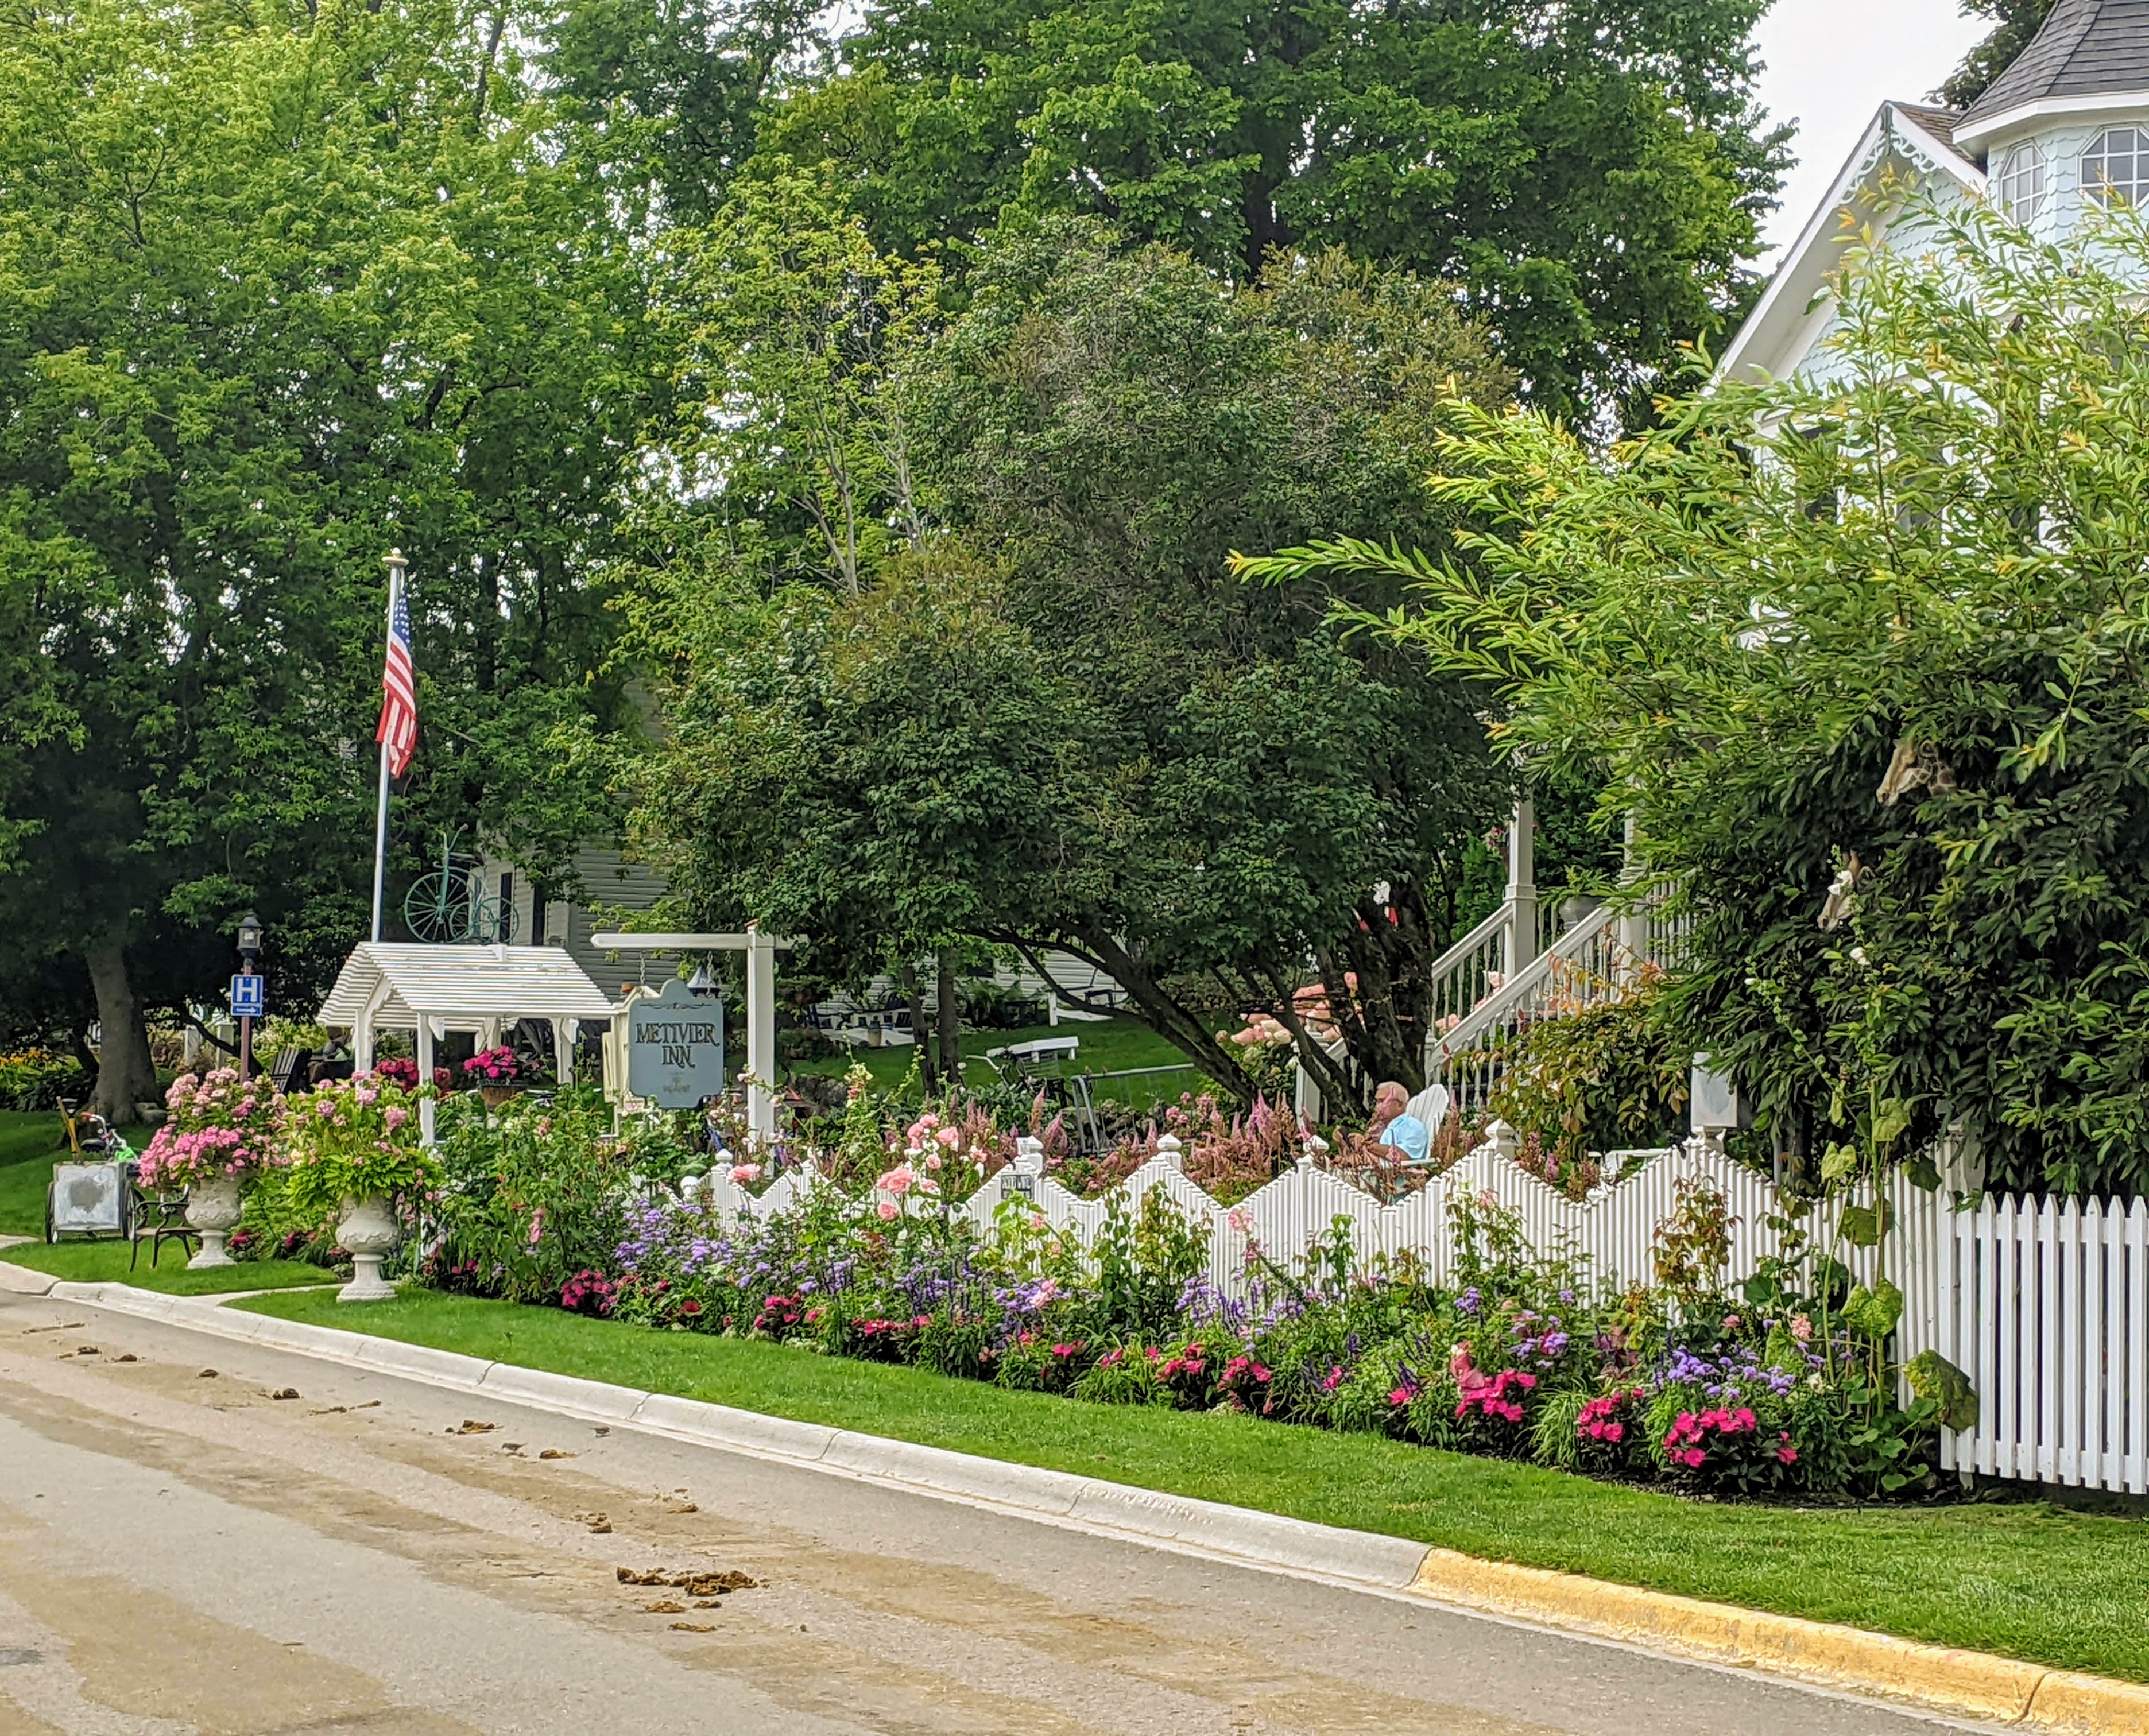
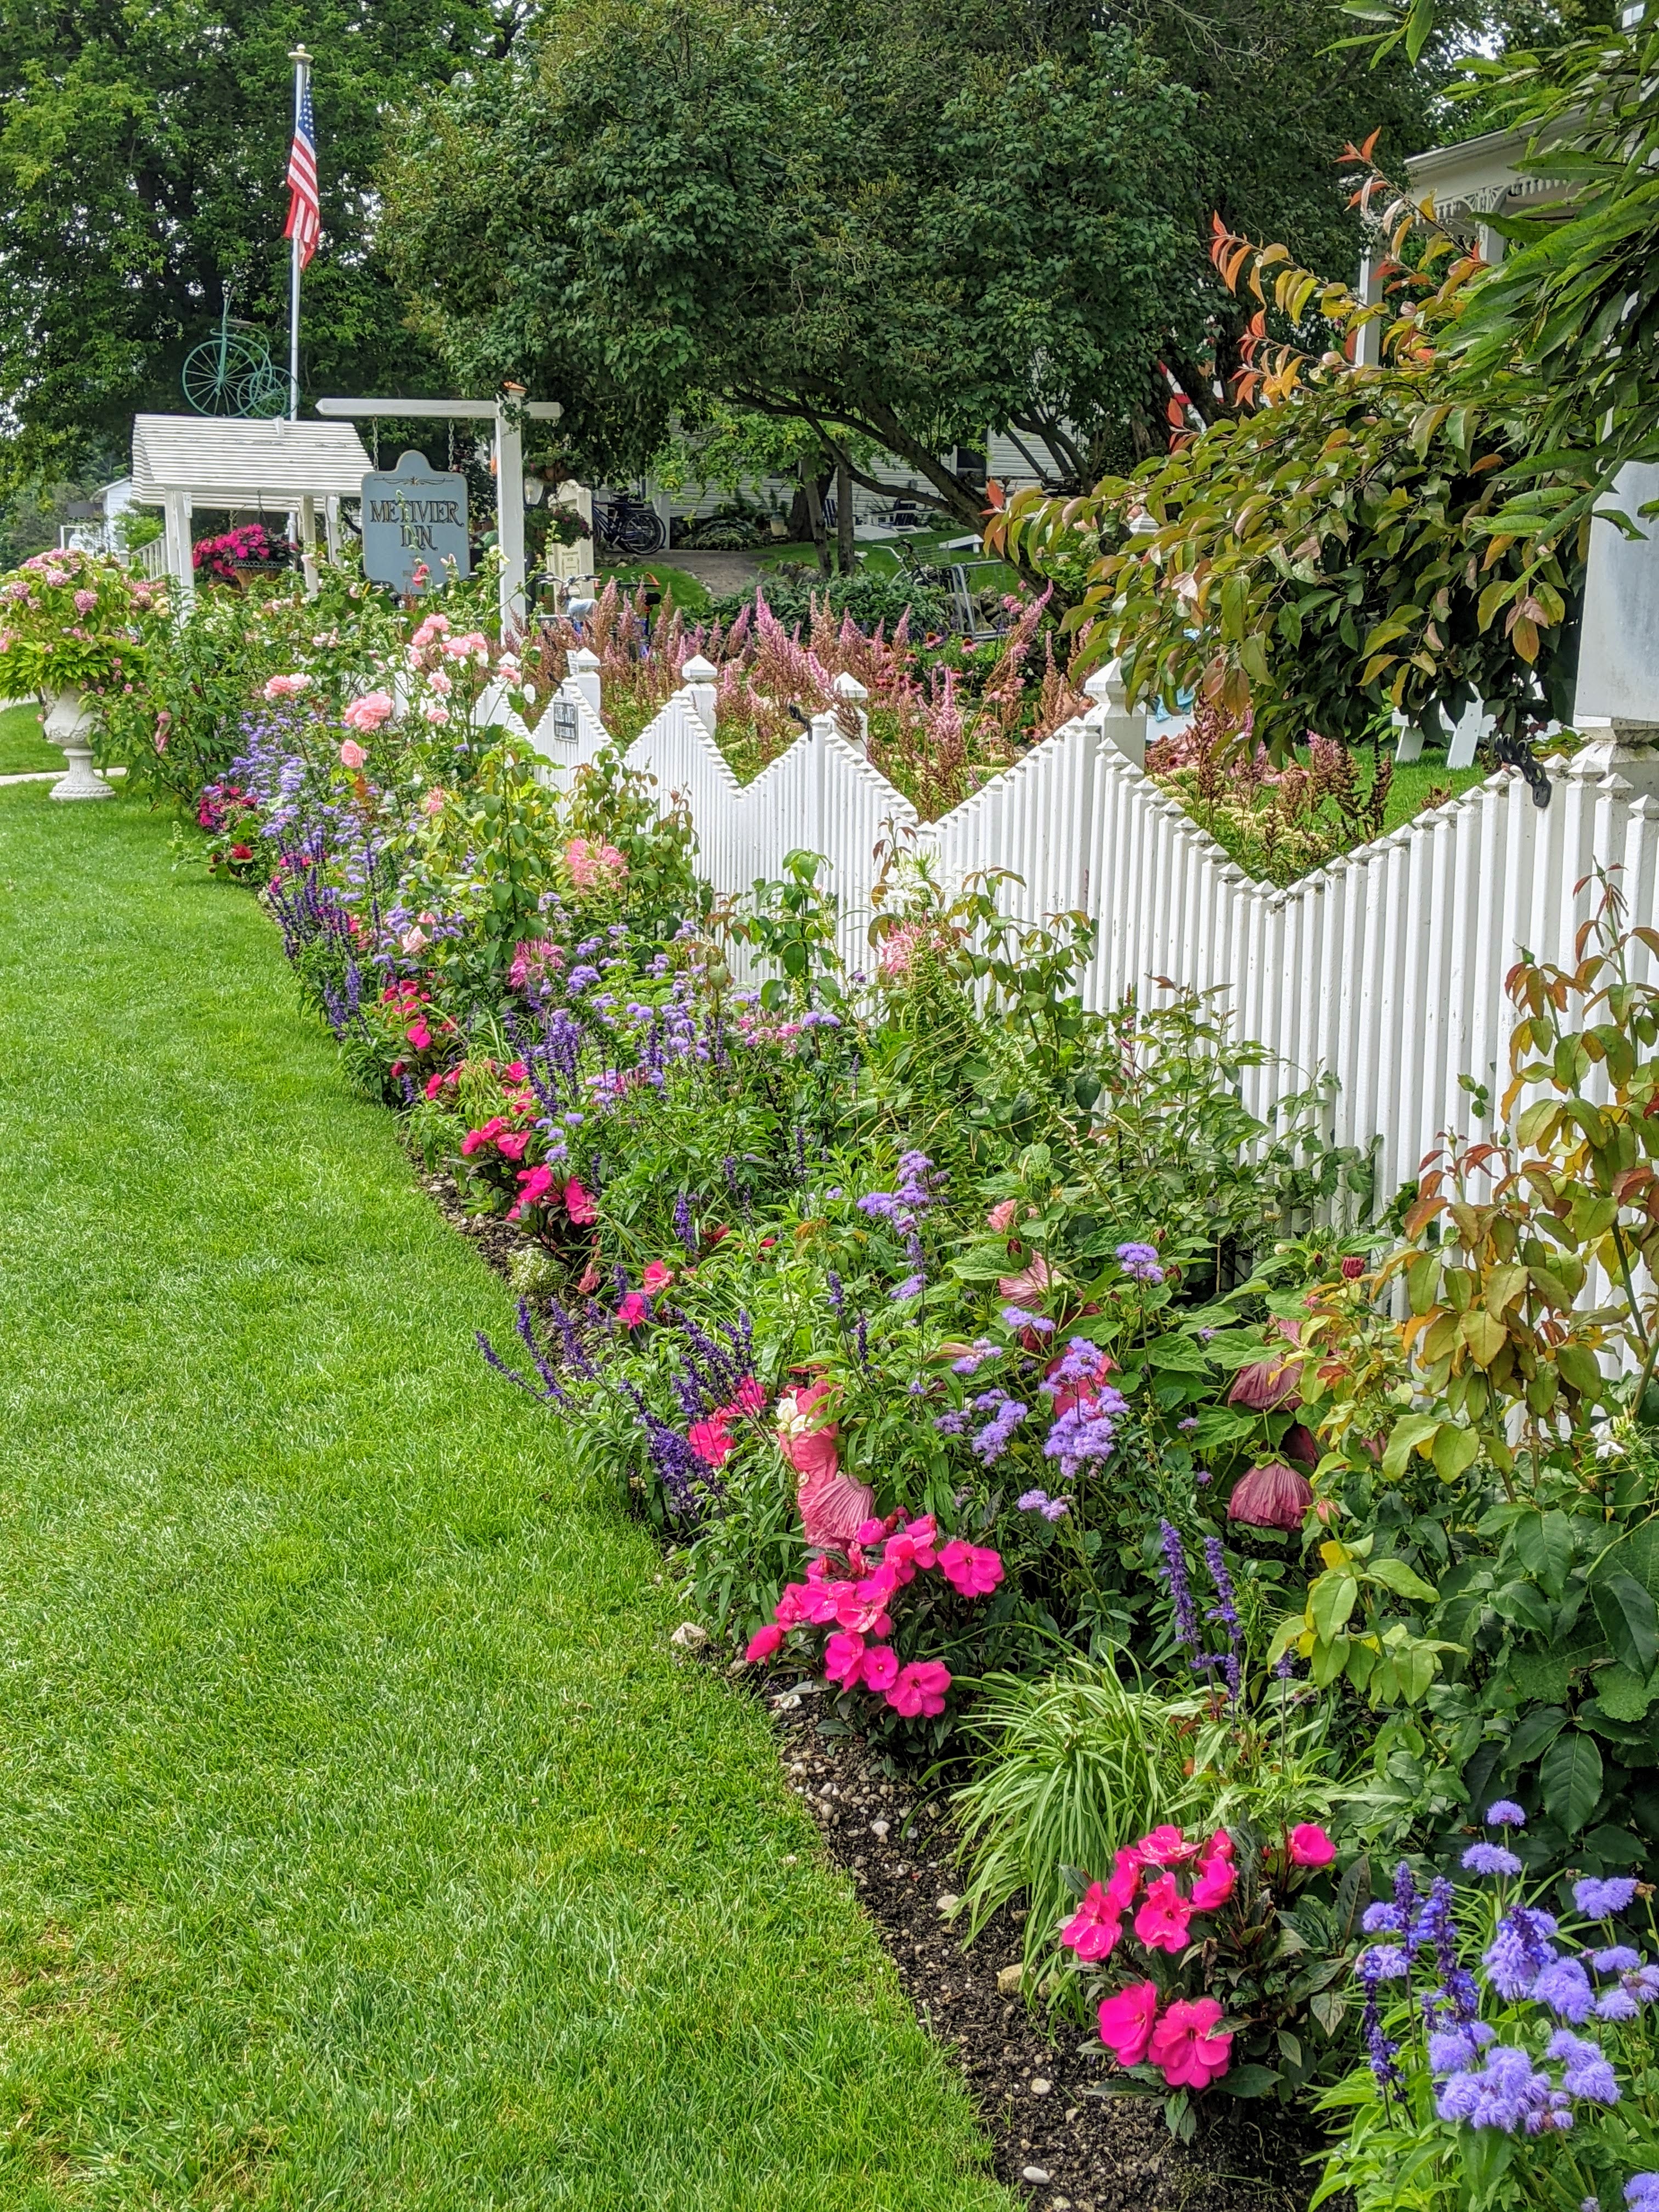
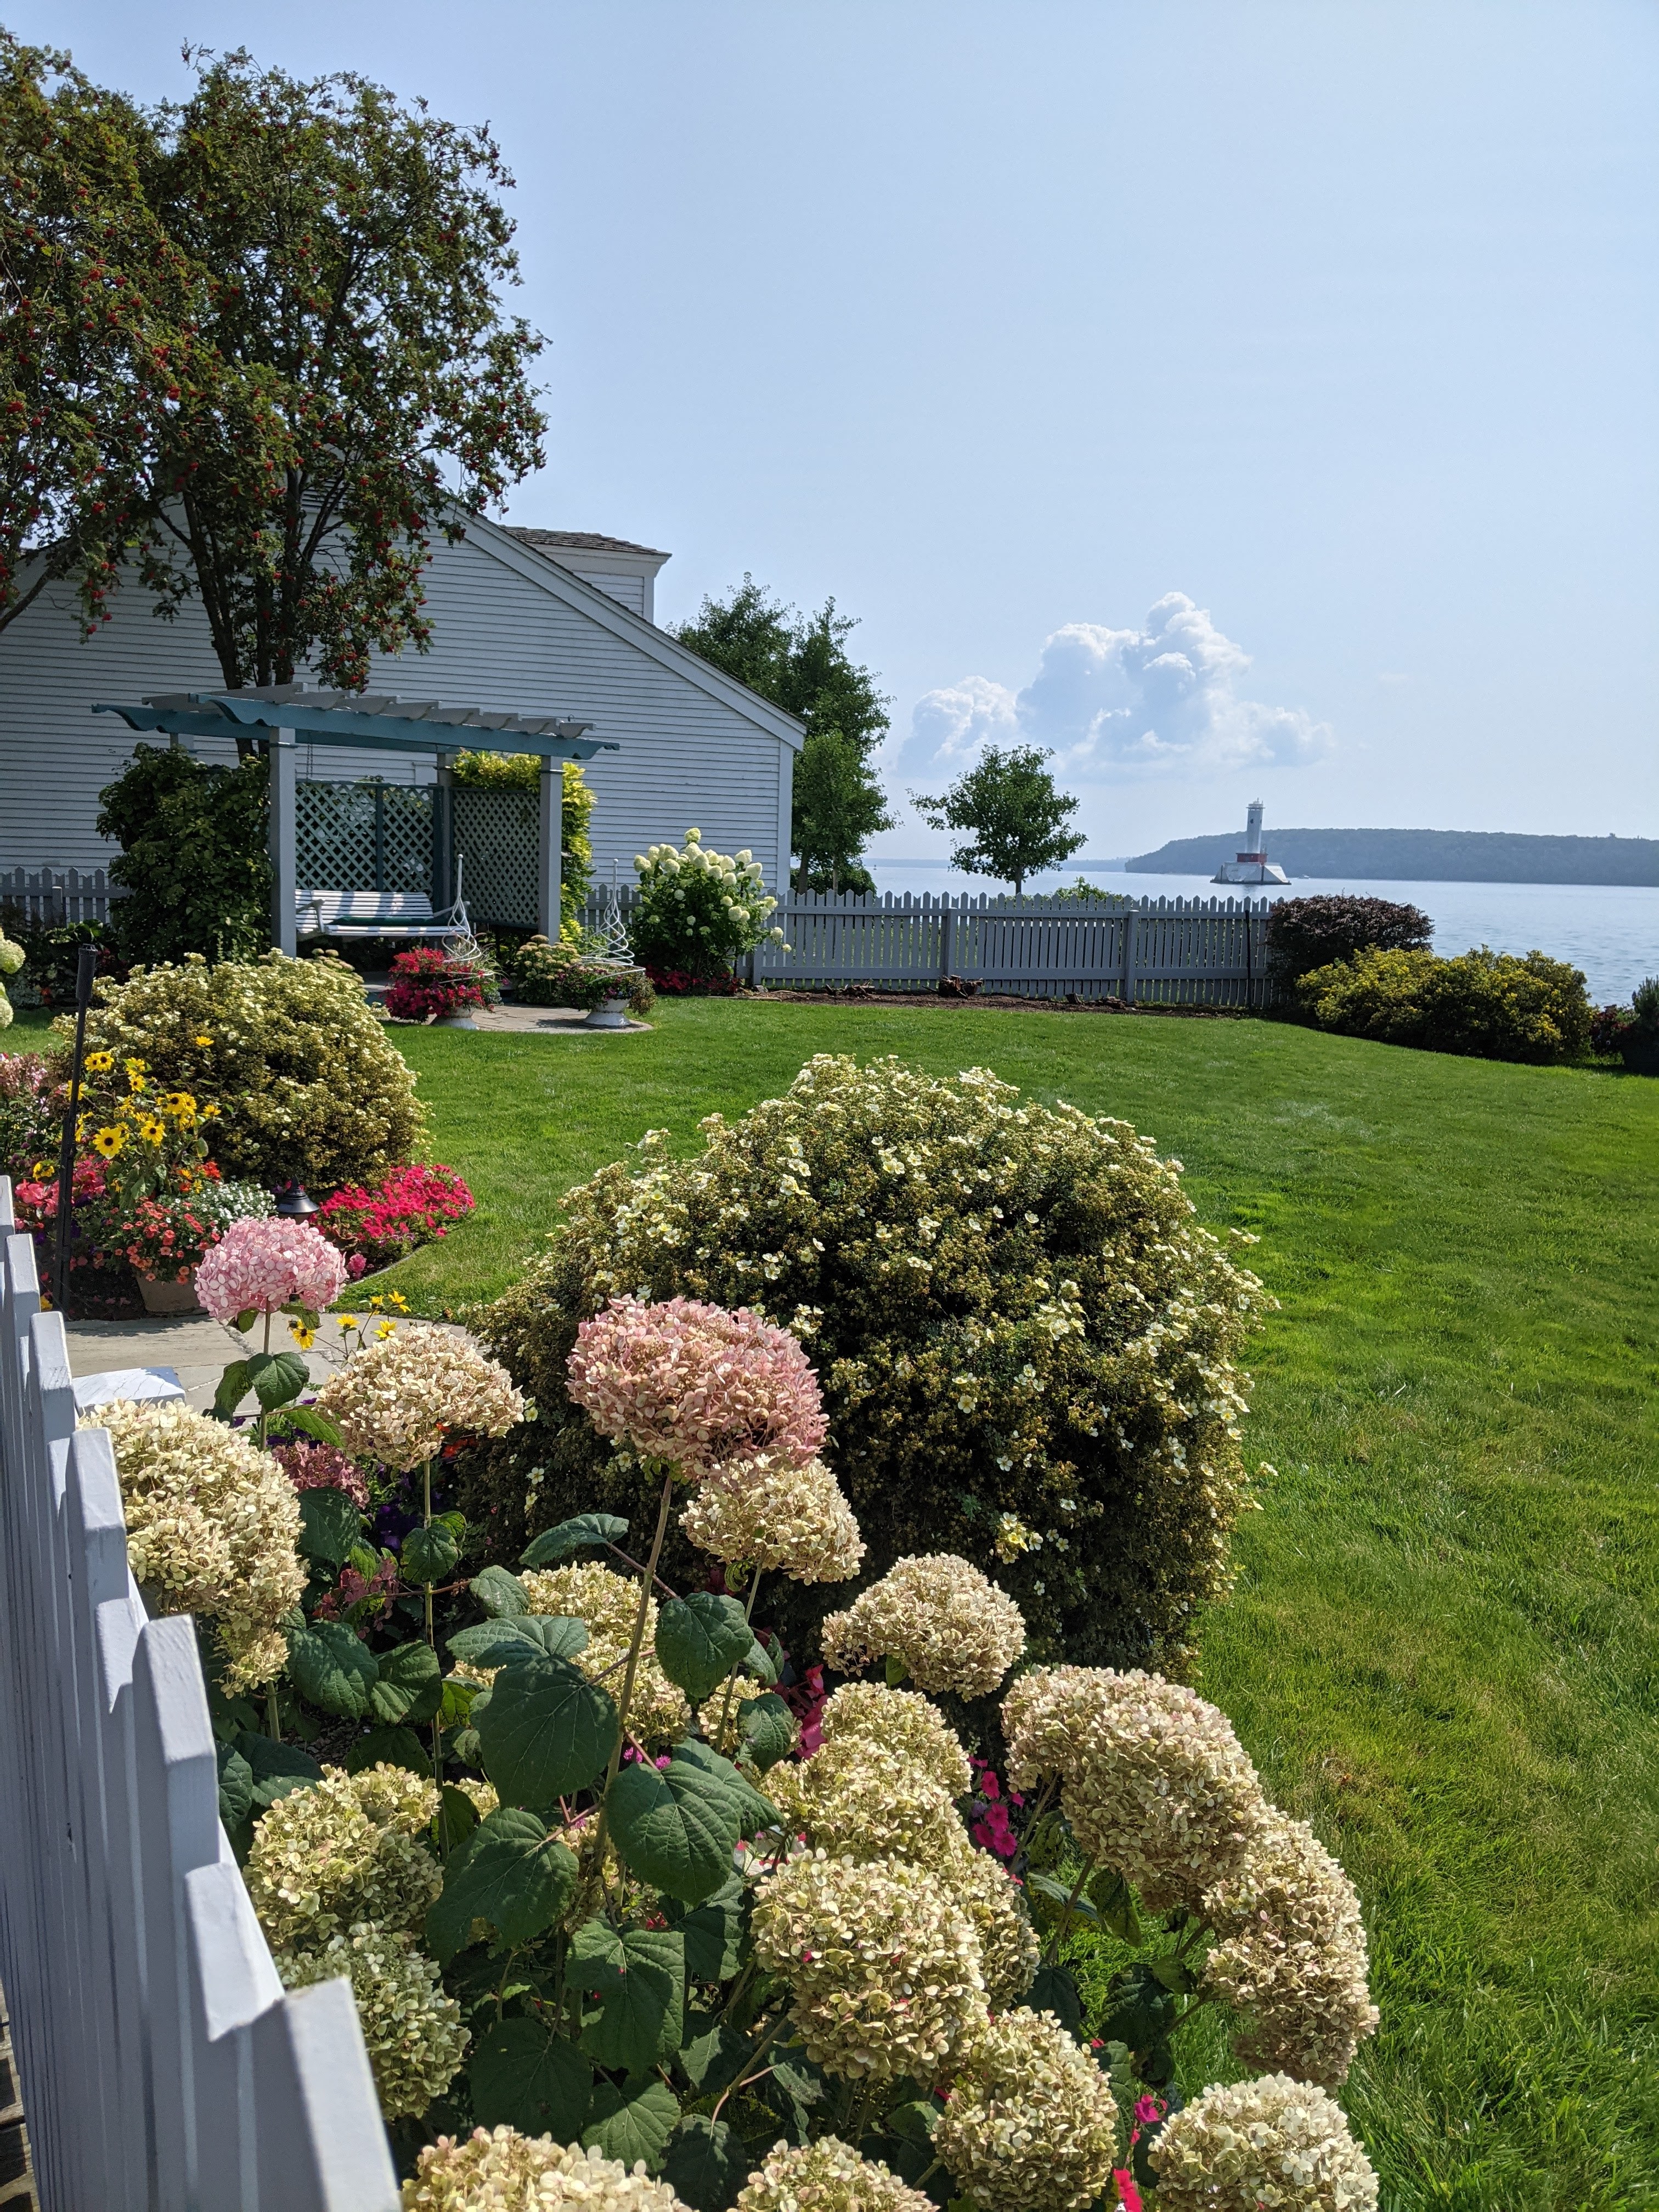
Bay View B&B
Pointing to our balcony on the Bay View Inn
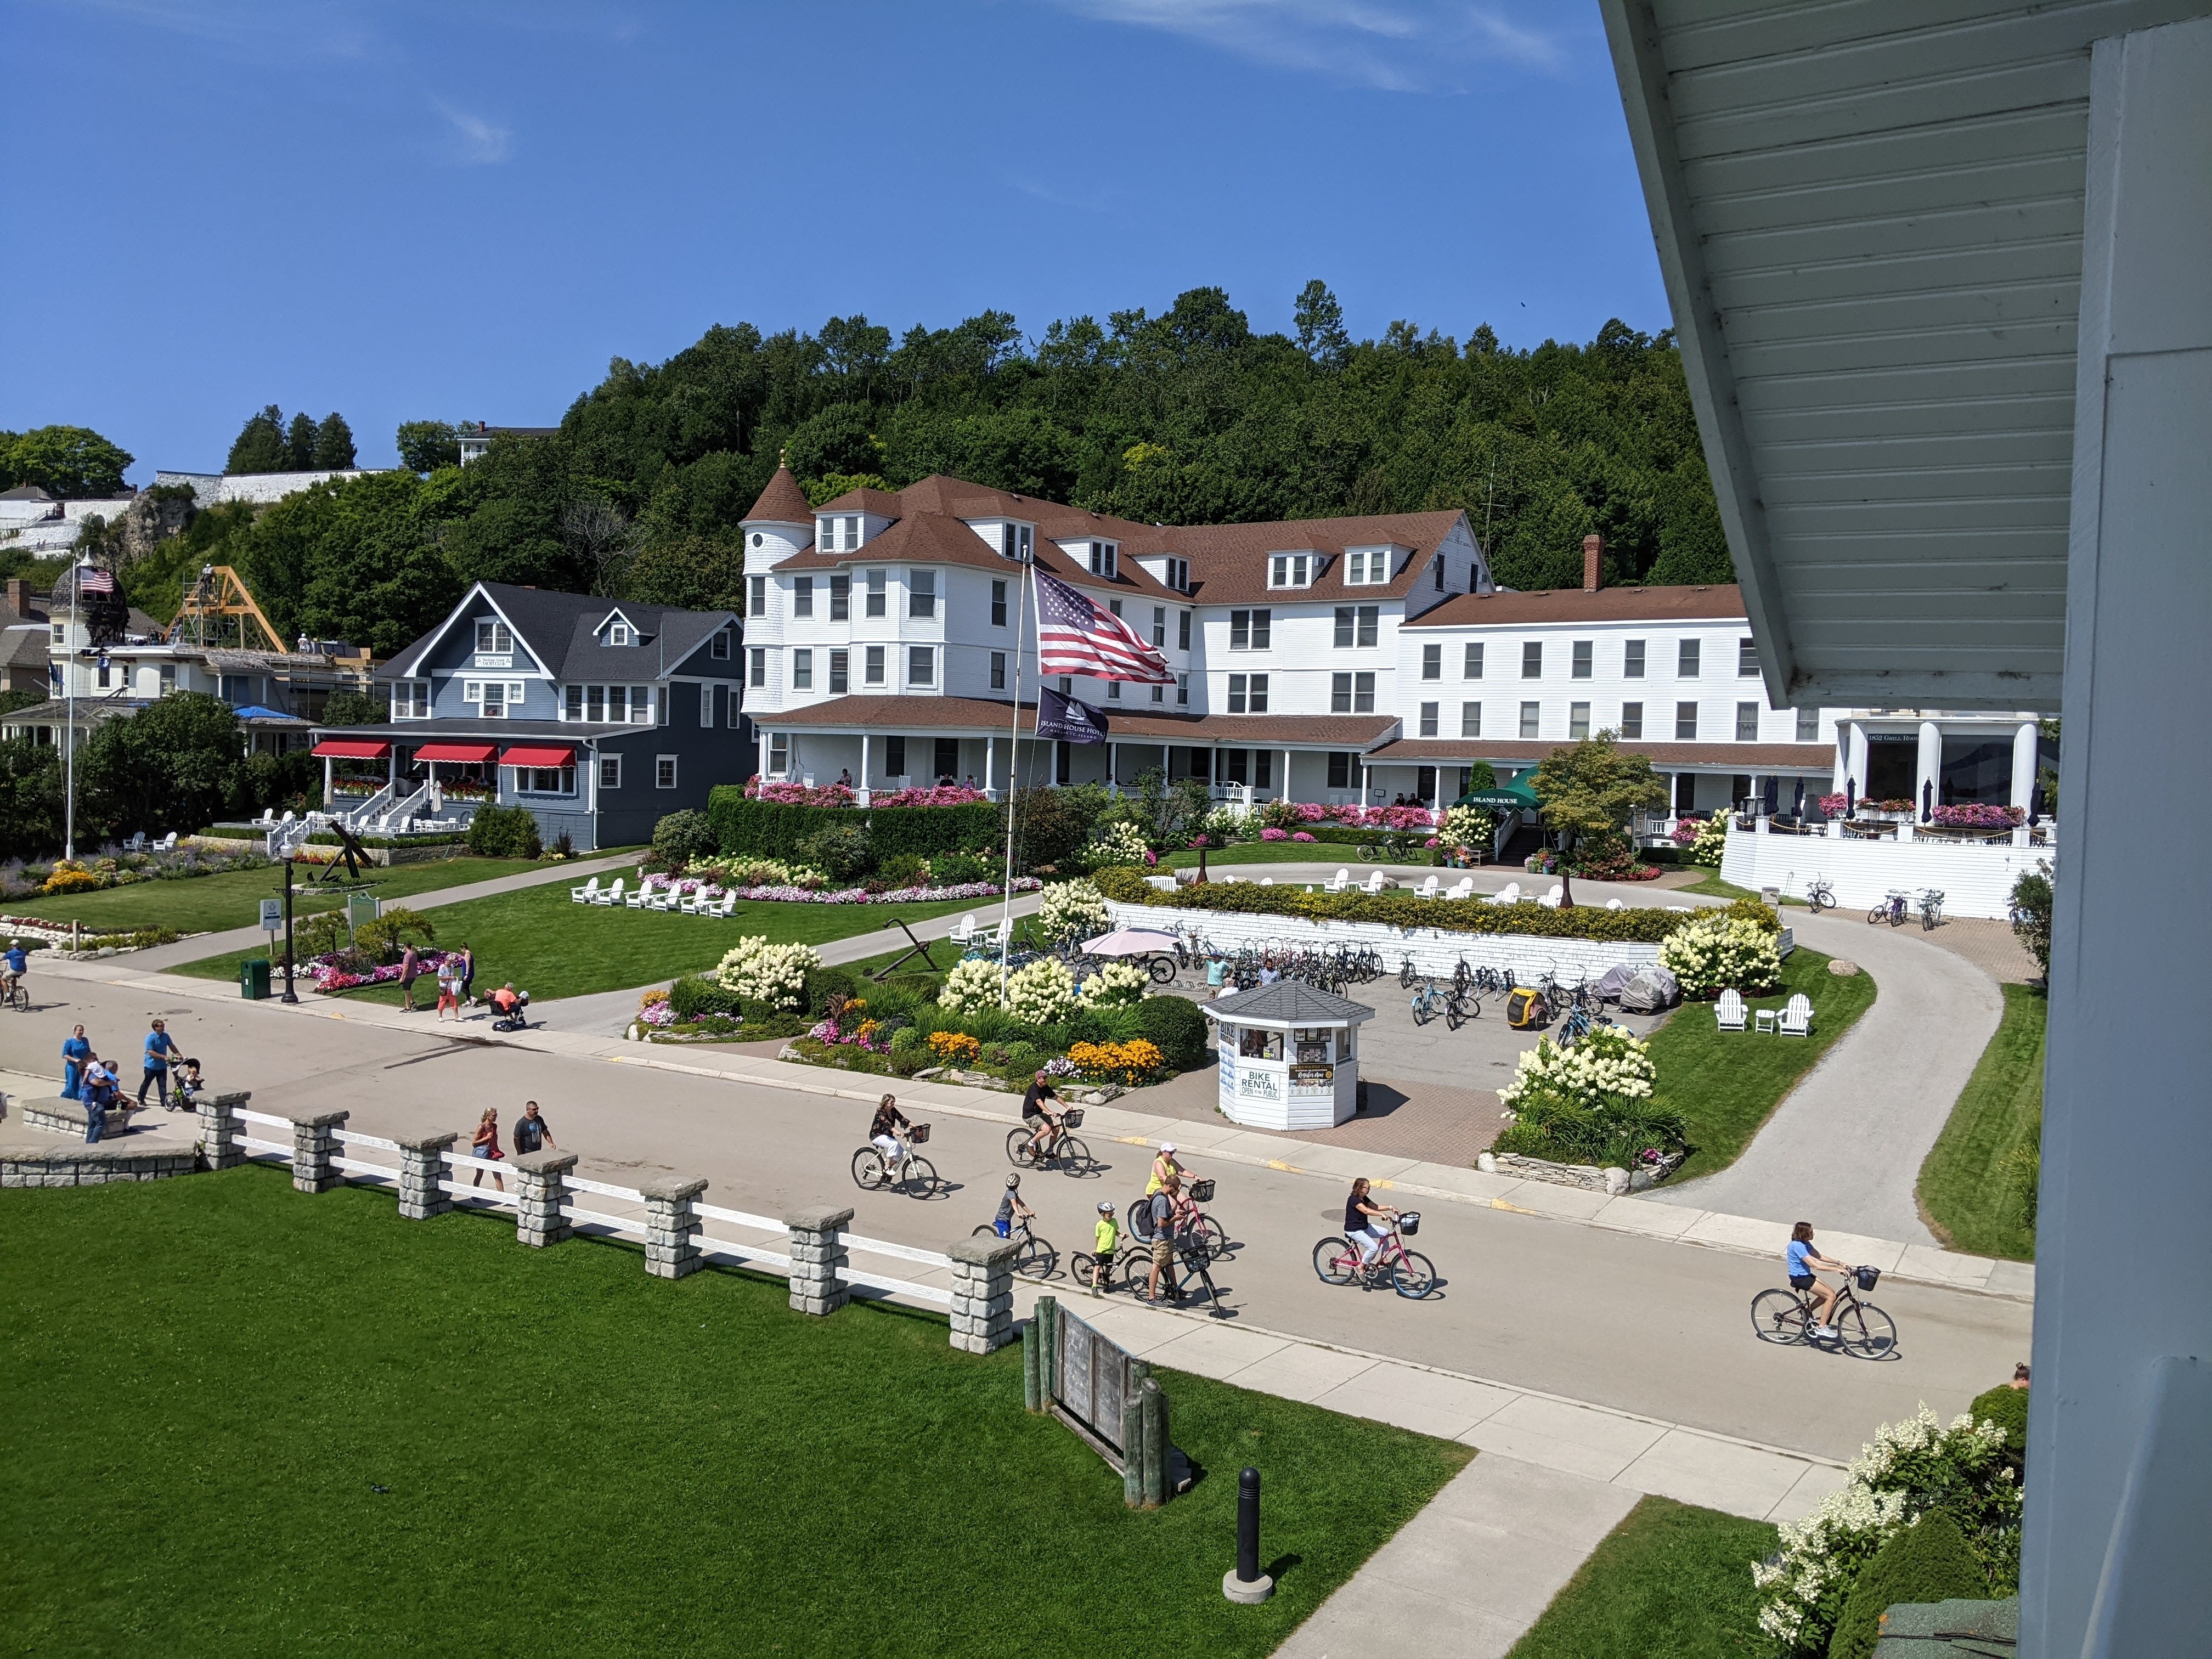
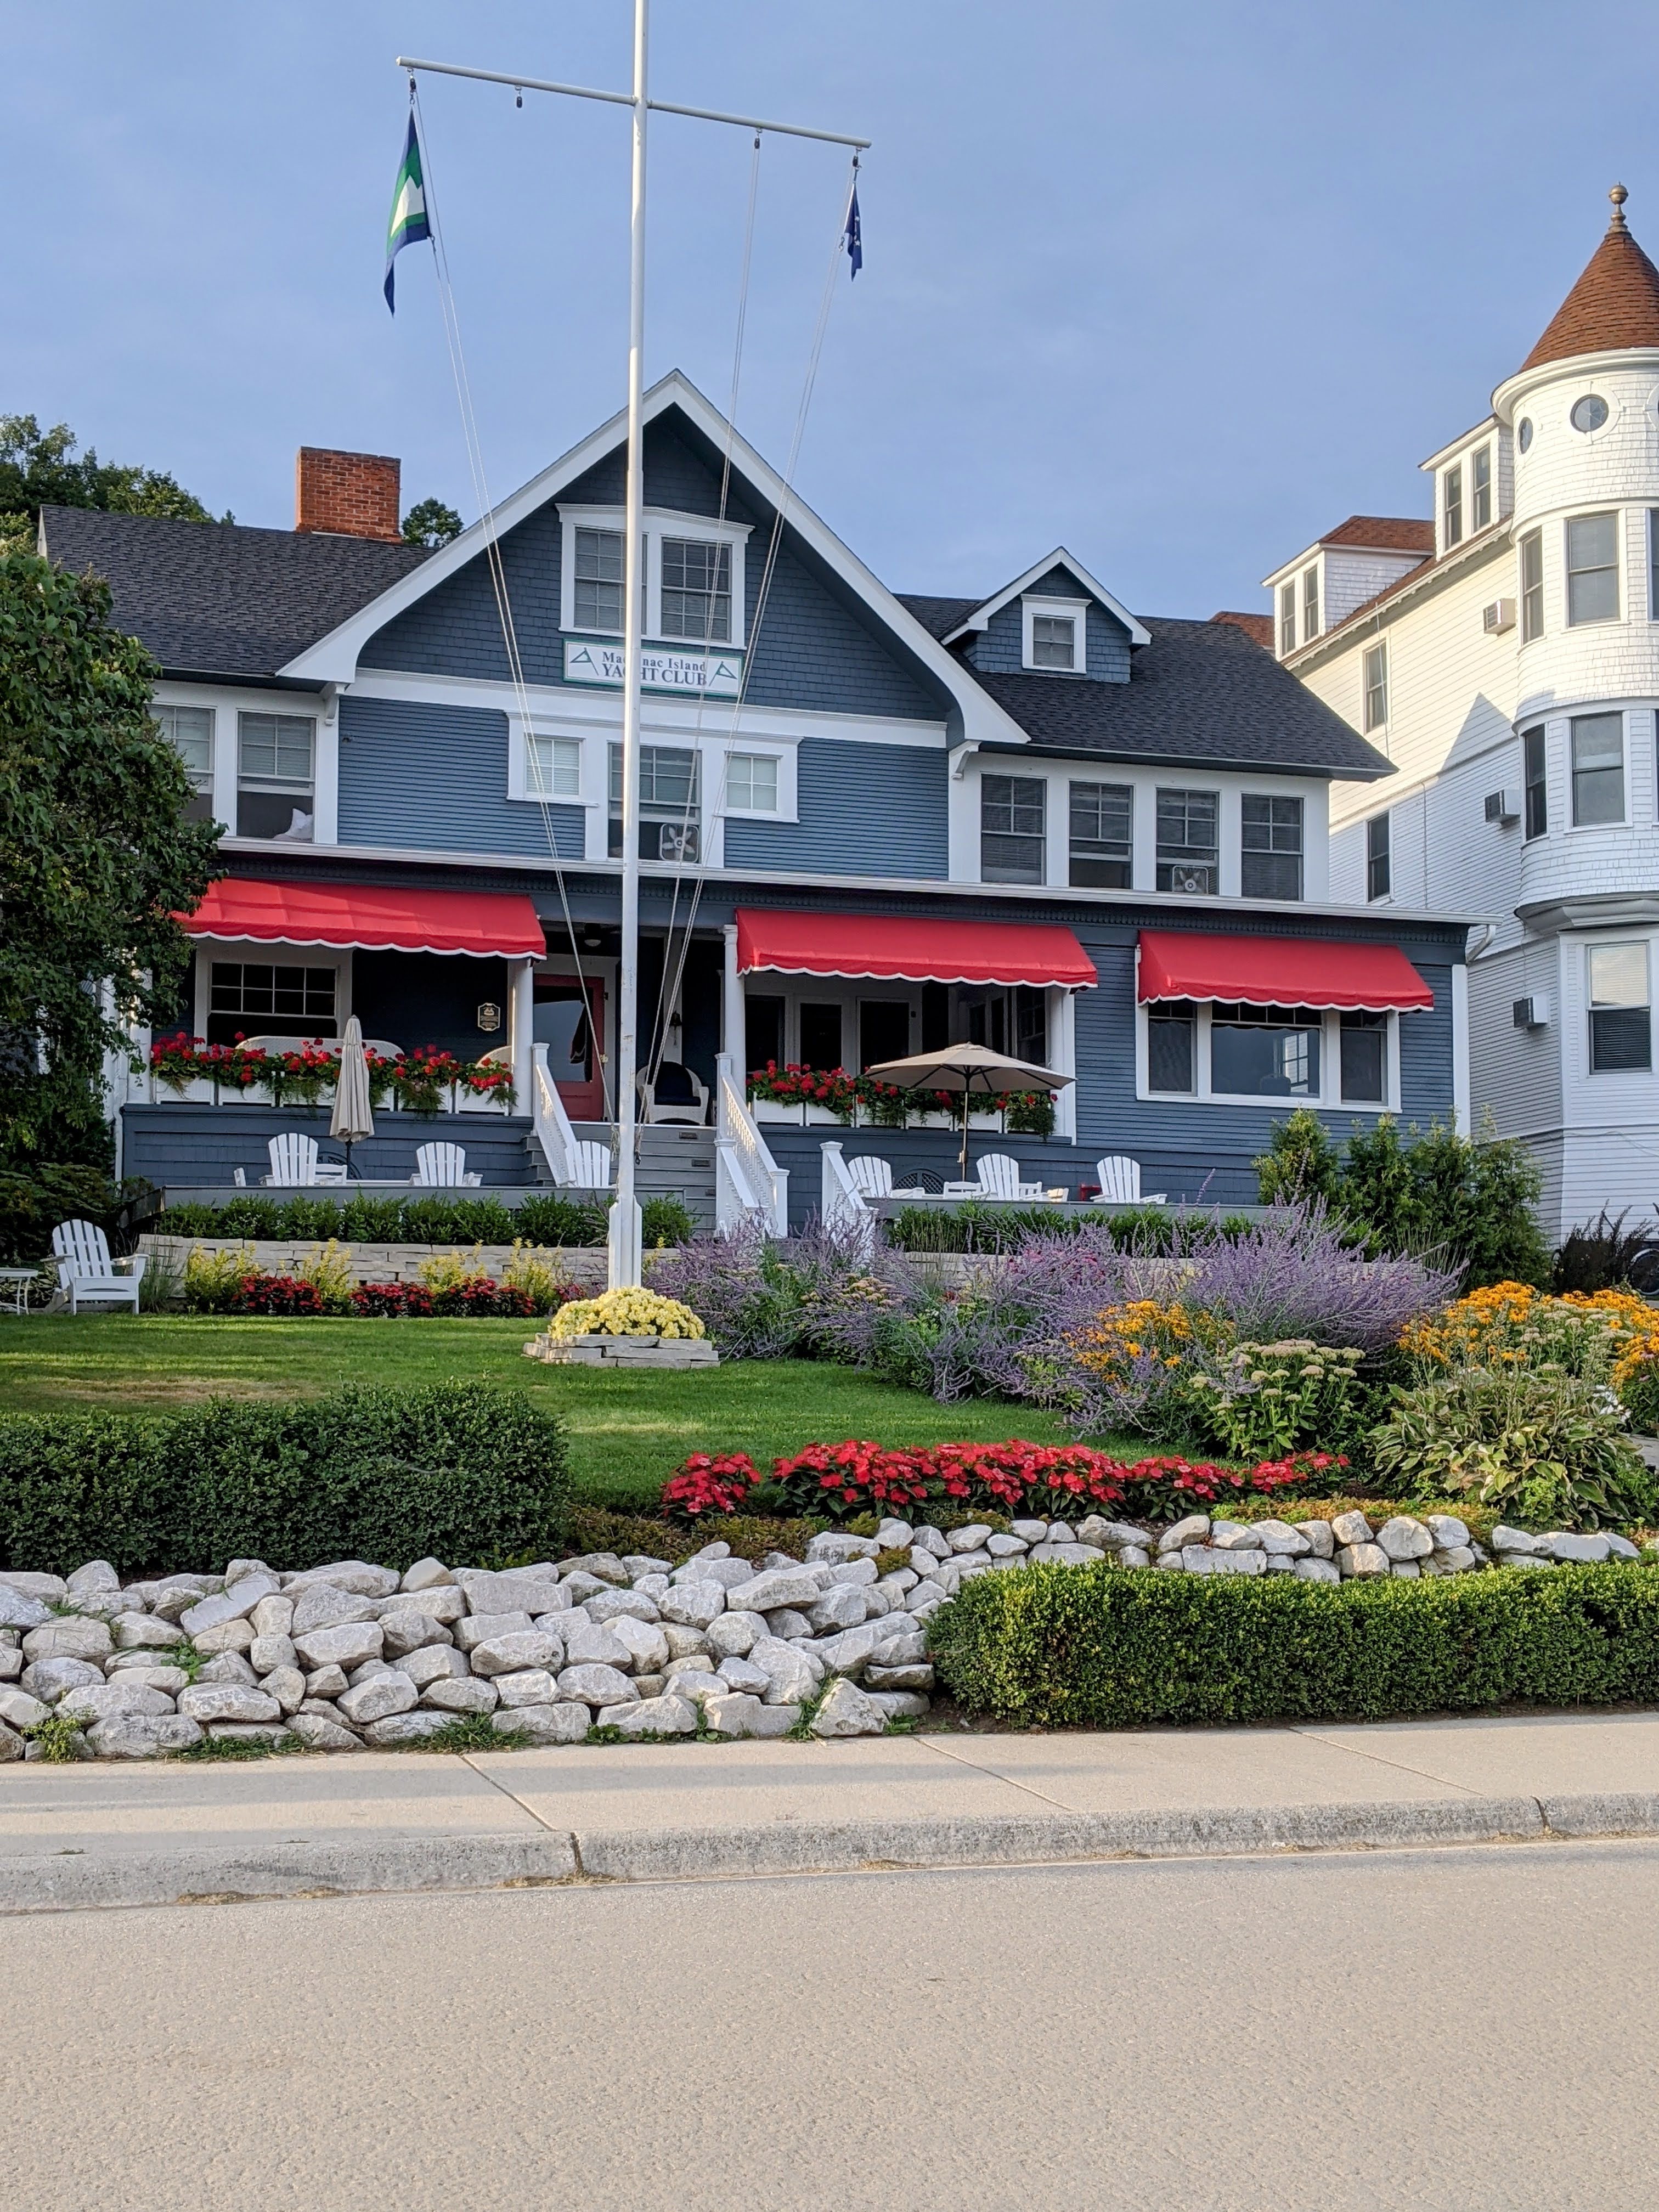
This B&B was exquisitely decorated inside and out. They spoiled us with cookies every afternoon and a pastry and ice cream dessert each evening. Our room featured a private balcony from which we could see the bay to the left and the gardens of the Island House and the Yacht Club to the right, plus Fort Mackinac further back and even a corner of the Grand Hotel sticking out from the bluff beyond the fort. Here are some sunset pictures that I took from our balcony, followed by several pictures of that balcony. I got such a kick out of being able to see our room from half of the island! The photo of me pointing to our balcony was taken at Fort Mackinac.
Views from our private balcony—
Here’s a closer look at the gardens of the Mackinac Island Yacht Club and the Island House Hotel, which we could see right from the balcony. To the left of the yacht club, we could also watch the construction progress on the roof of the Brigadoon Cottage, a private residence that had caught on fire almost three months earlier.
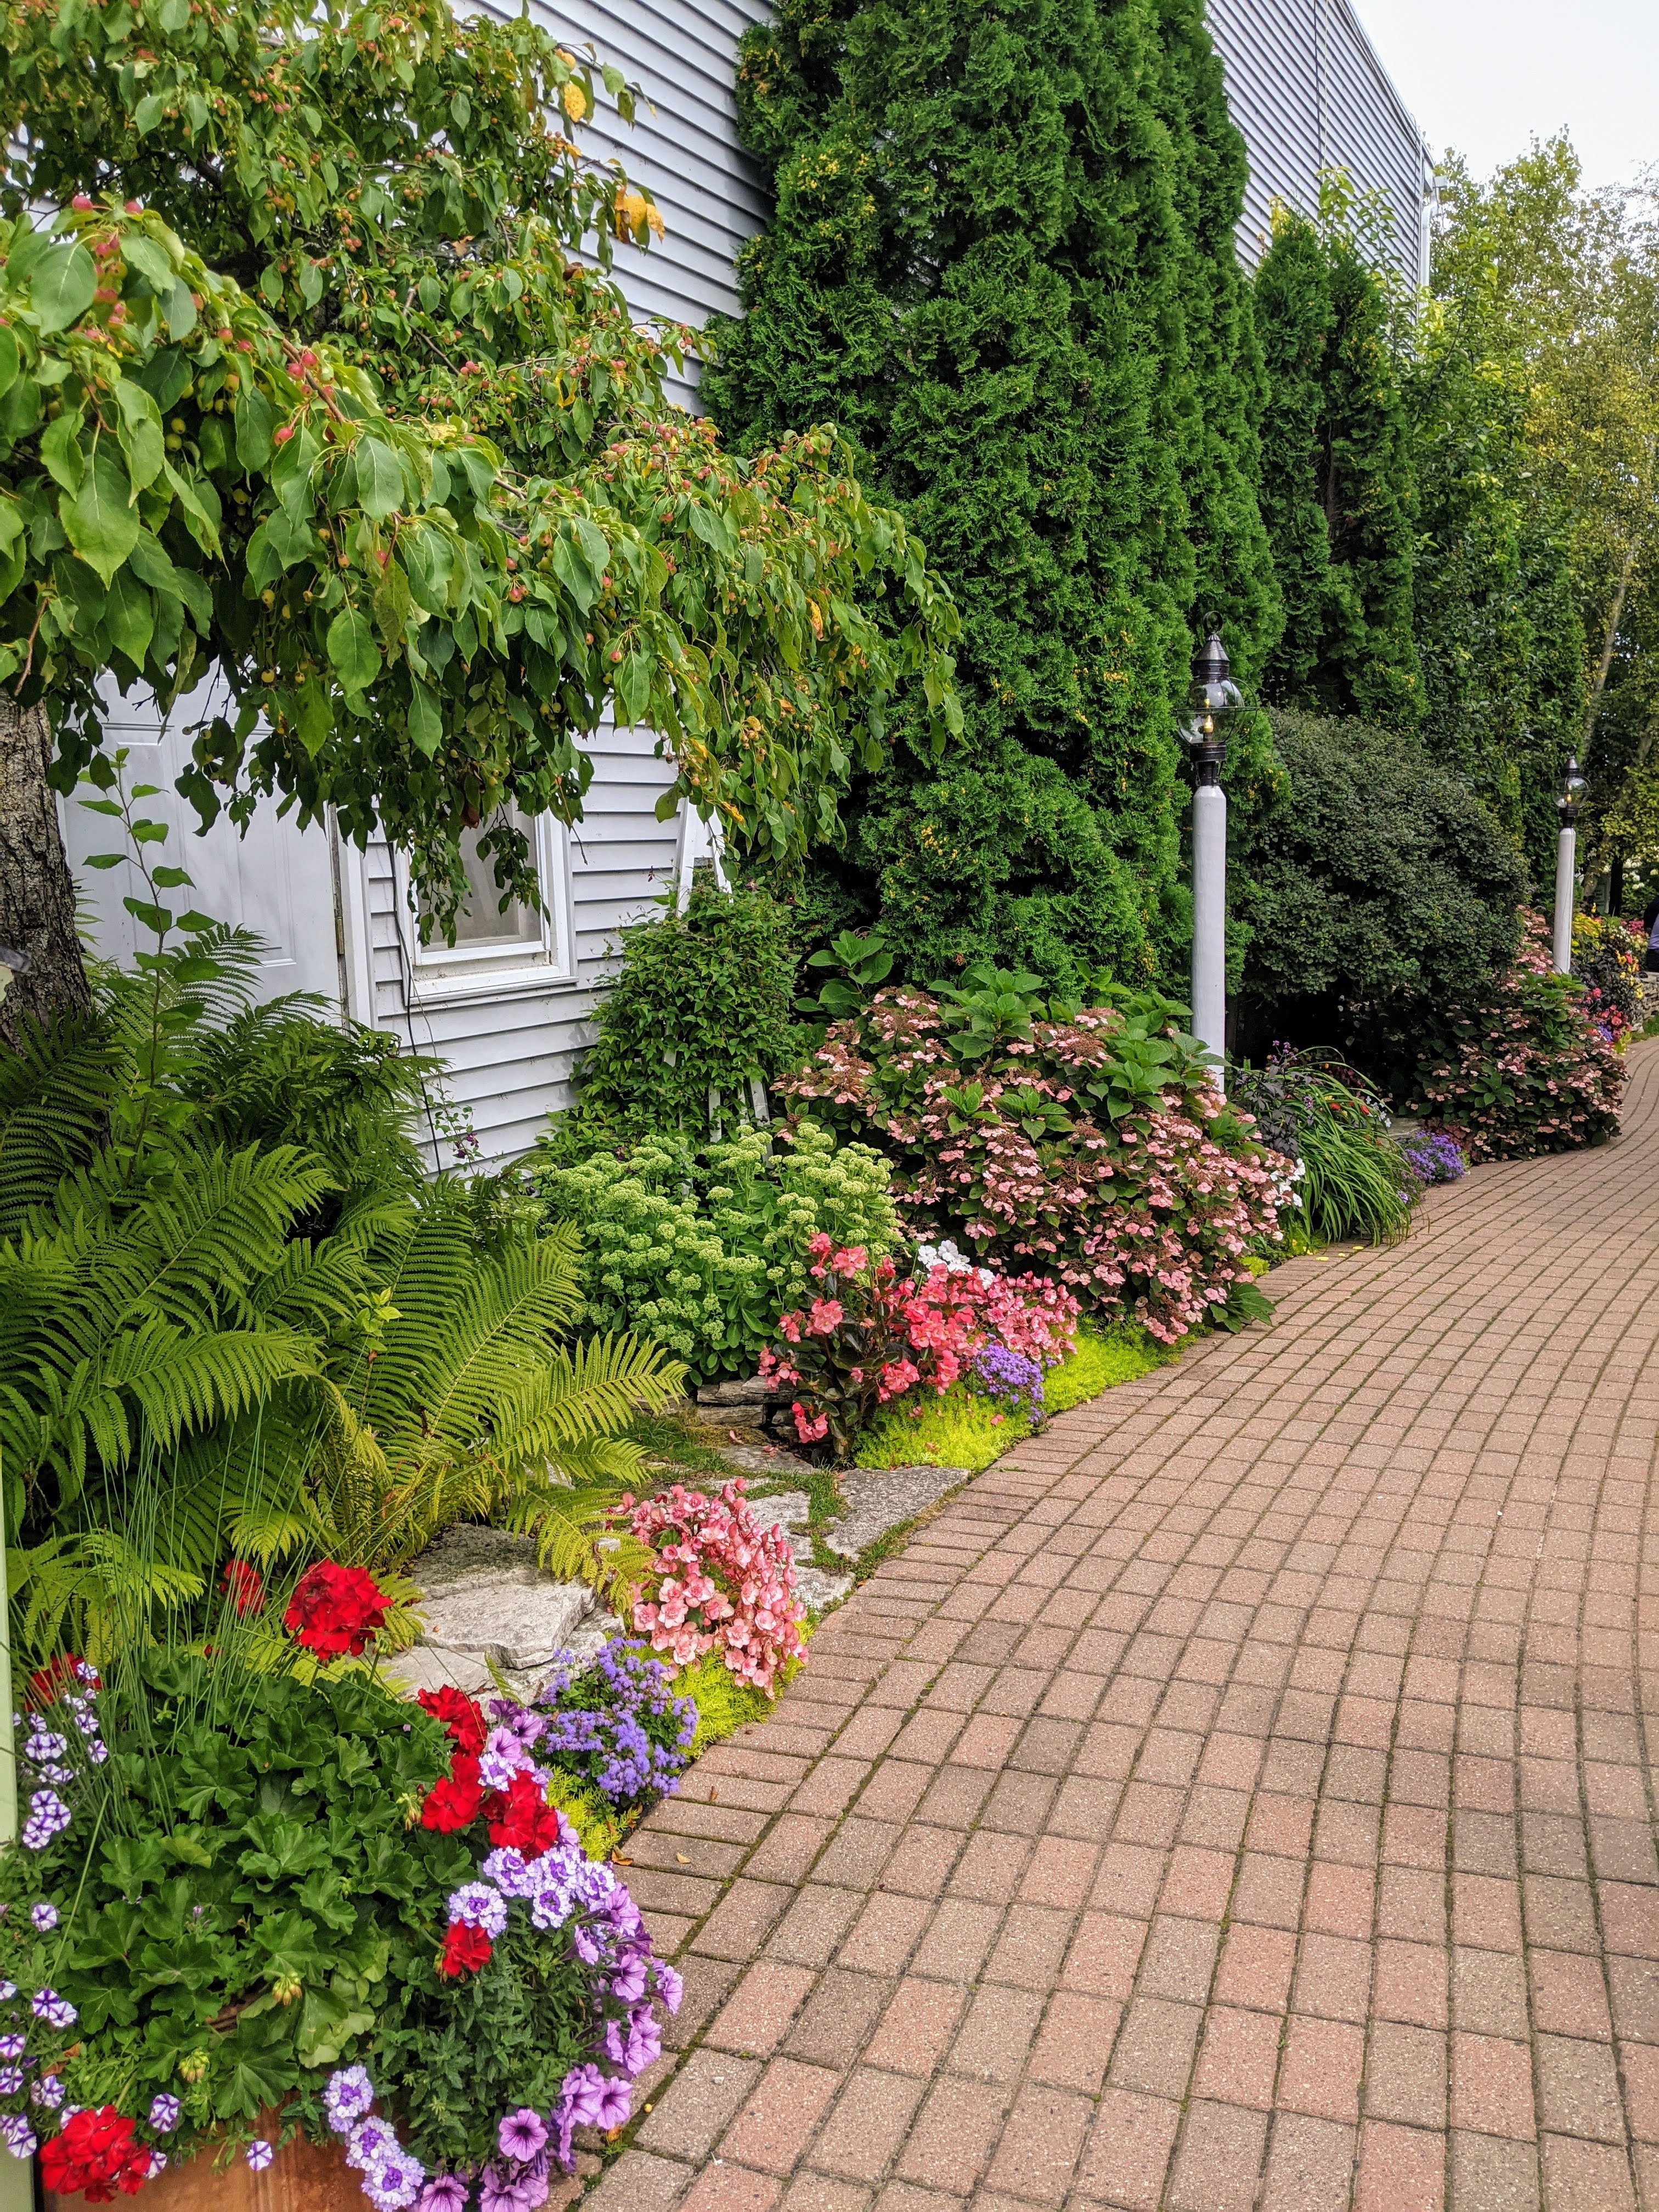
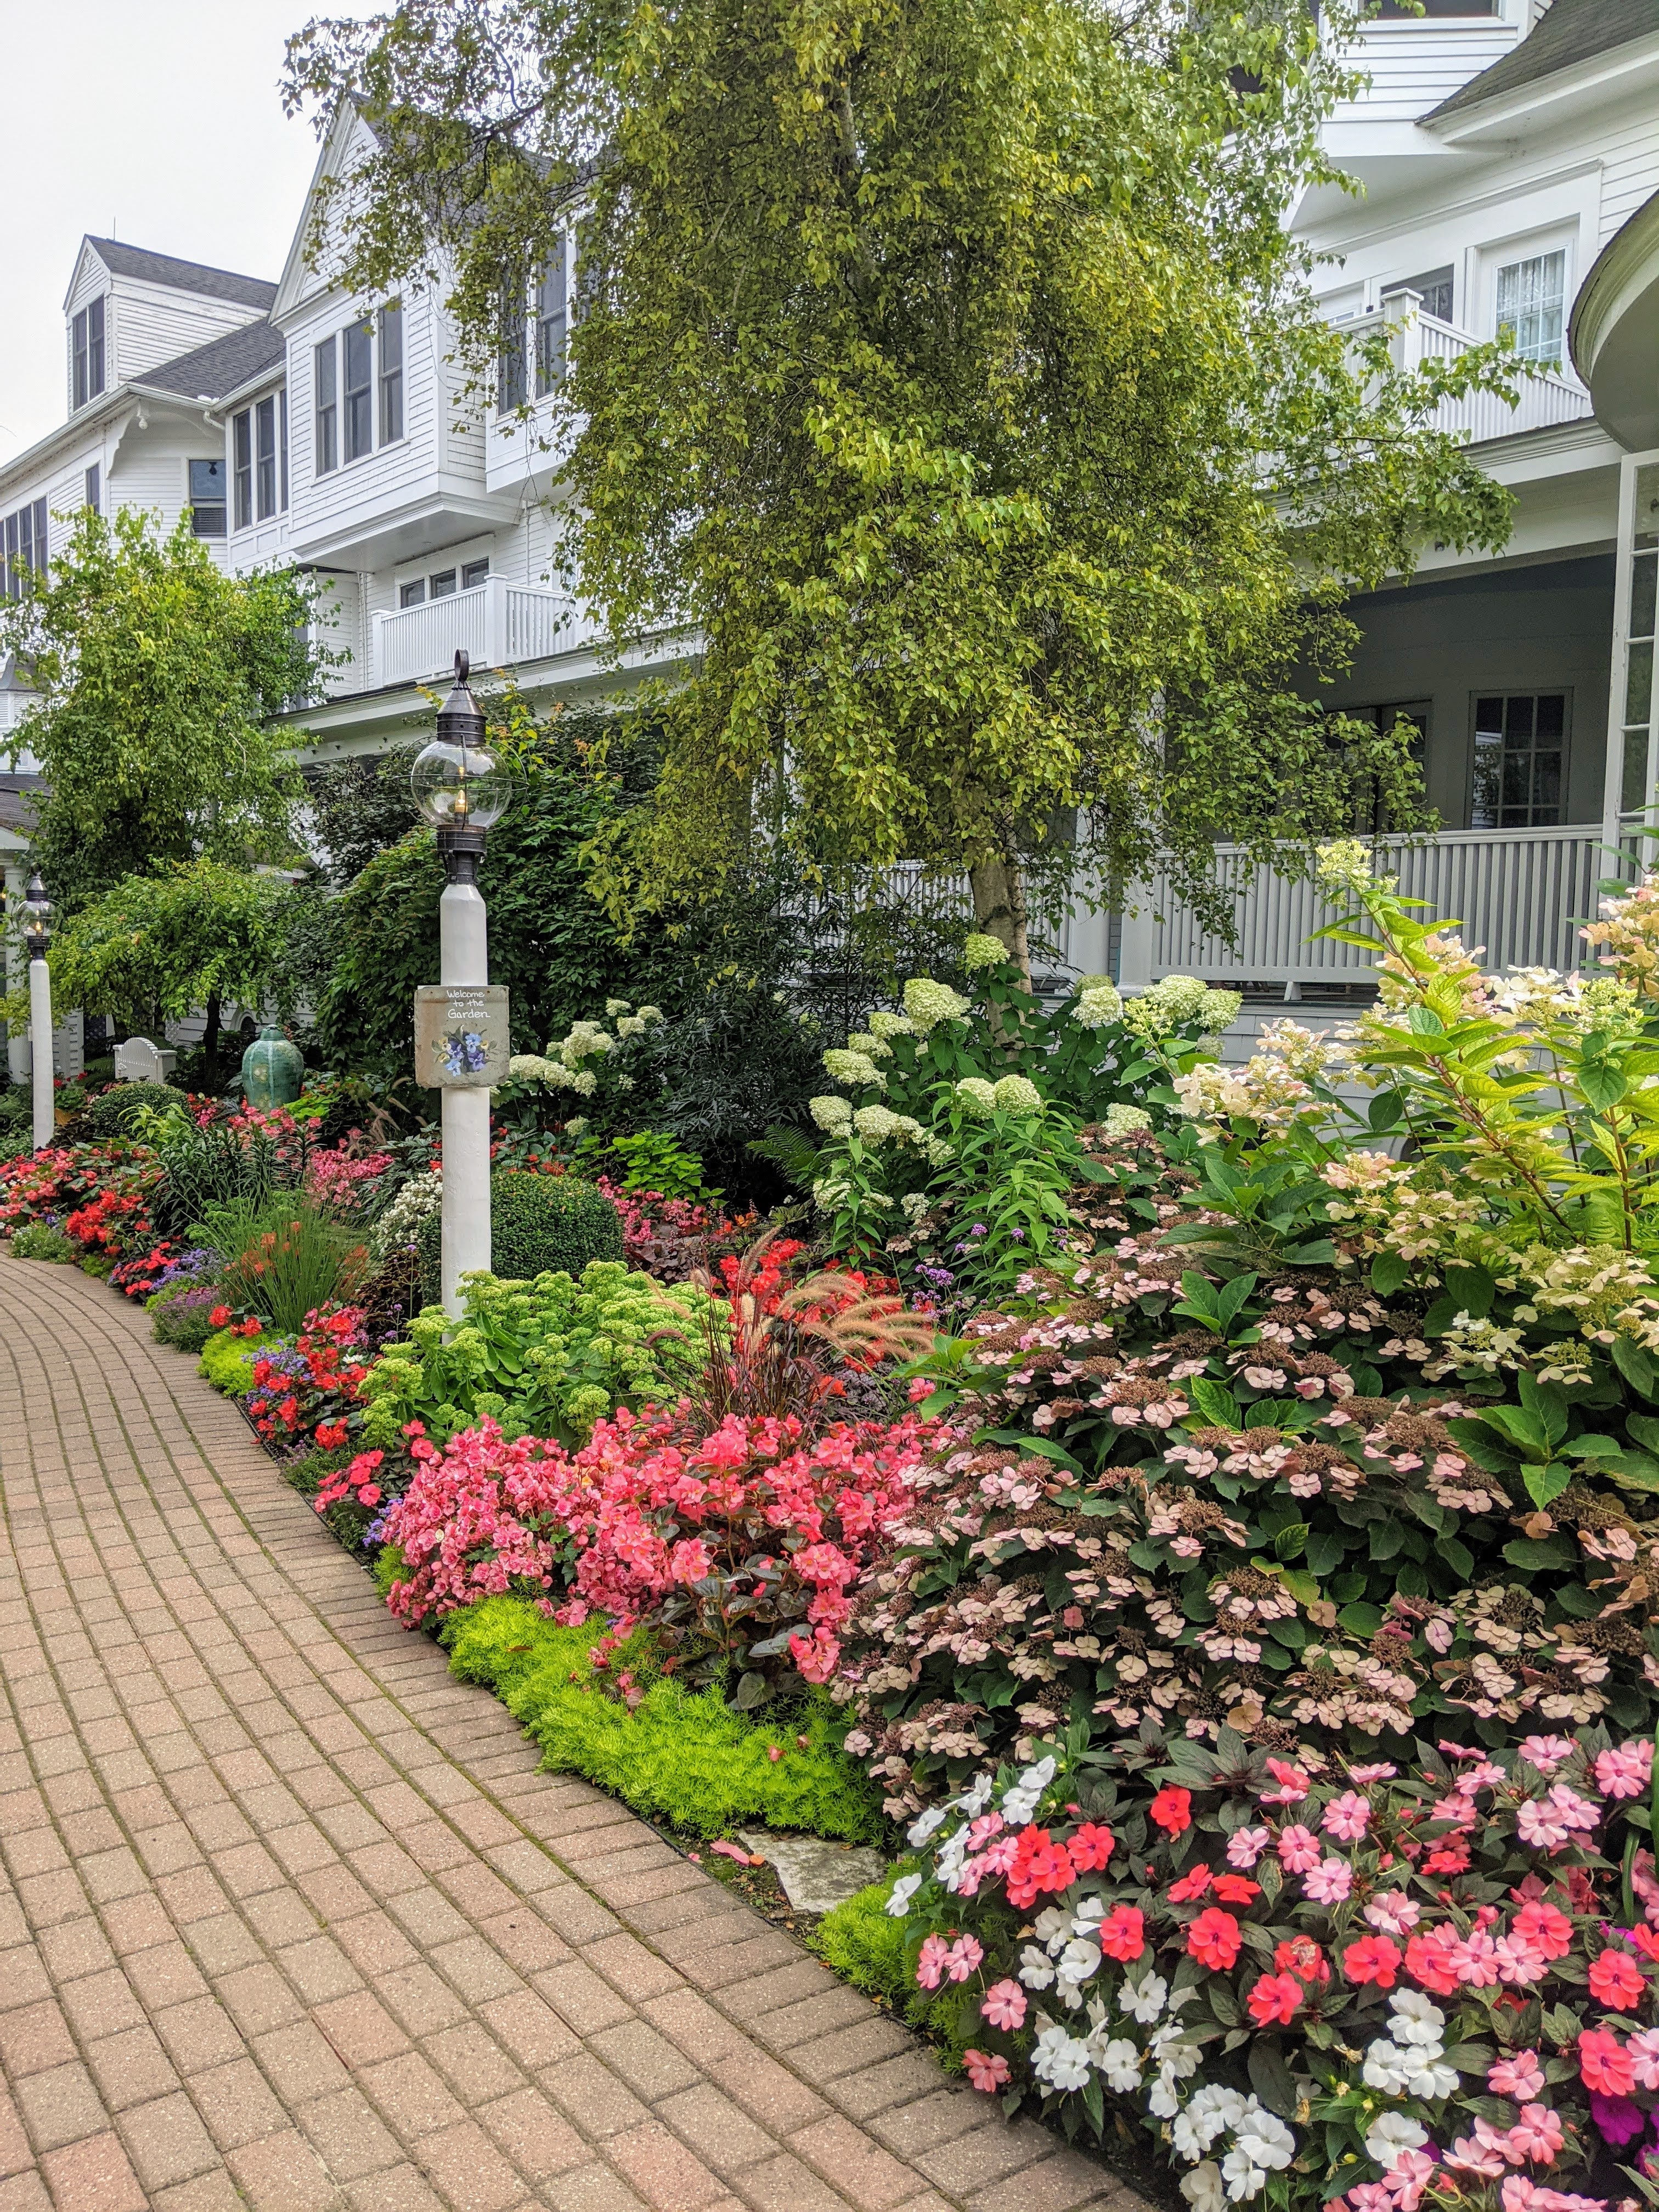
More Gardens of Mackinac Island
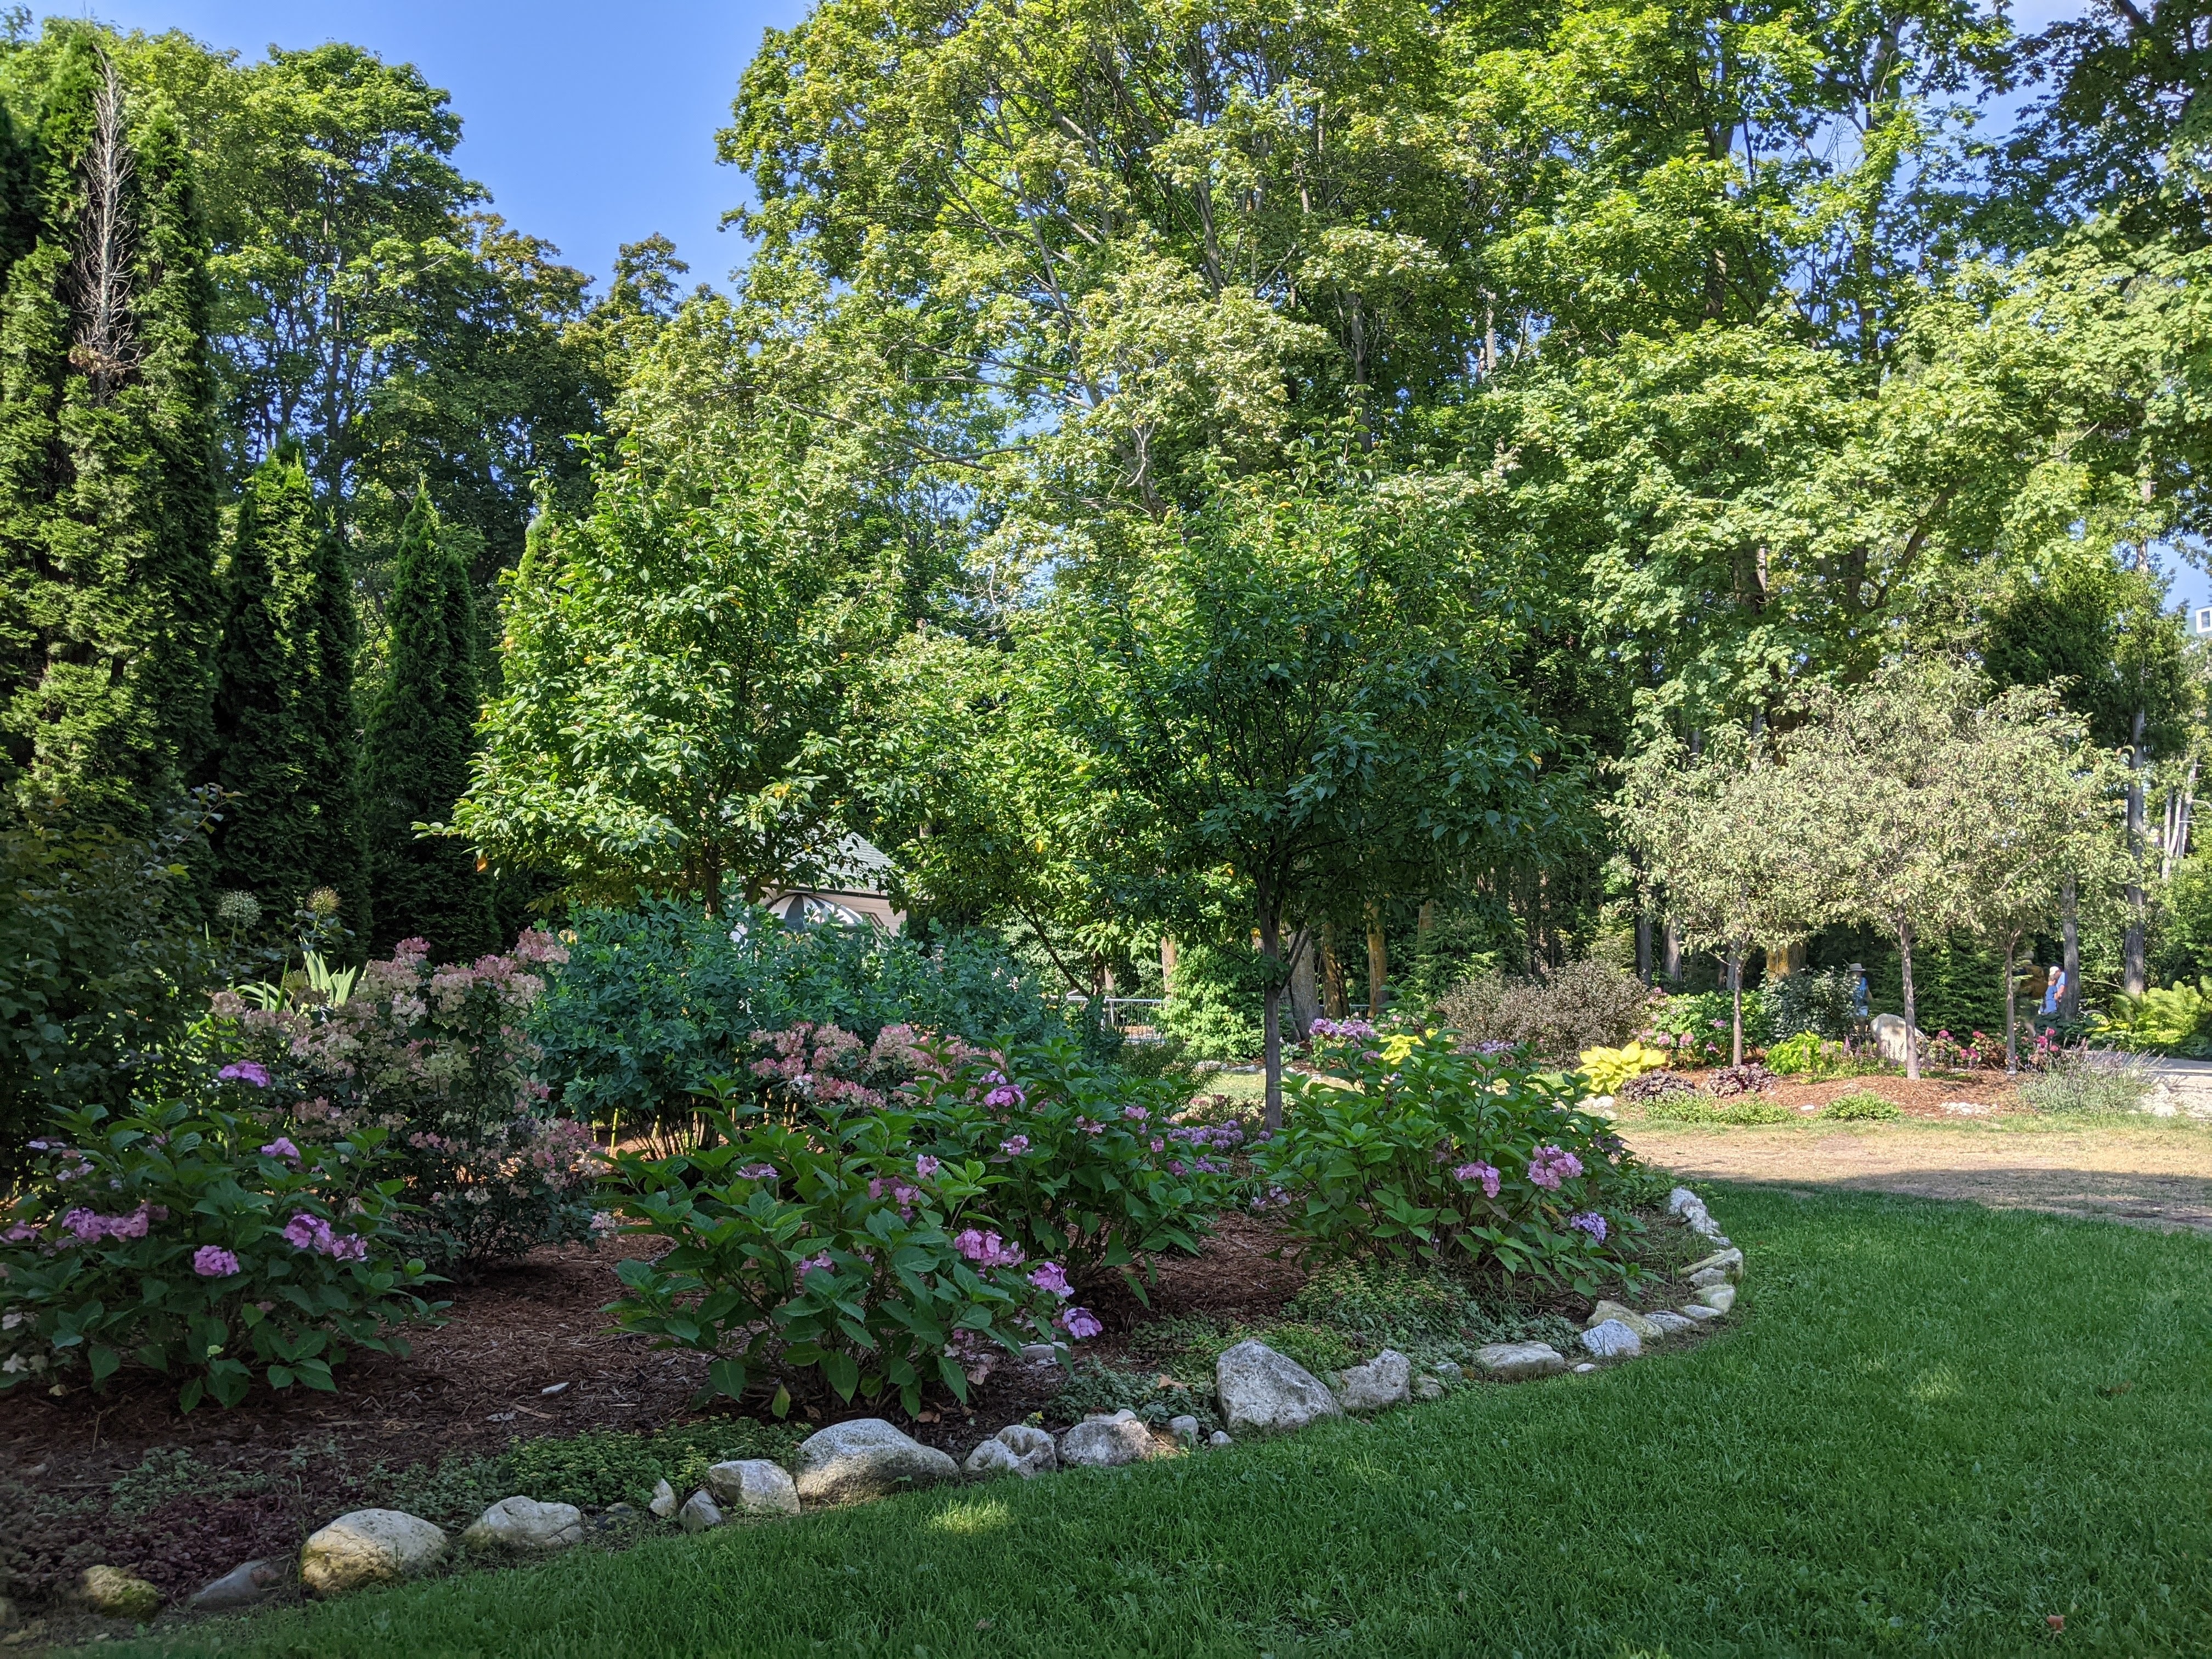
Here are highlights of the gardens that we saw as we walked around the island. Again, I recognized several from the garden walks that we had enjoyed when we had come here for the Proven Winners Grand Garden Show, three and five years earlier. Besides walking up and down the main downtown area, my husband and I toured several historic places, such as Fort Mackinac, the Biddle House, and the art museum housed in the Indian Dormitory.
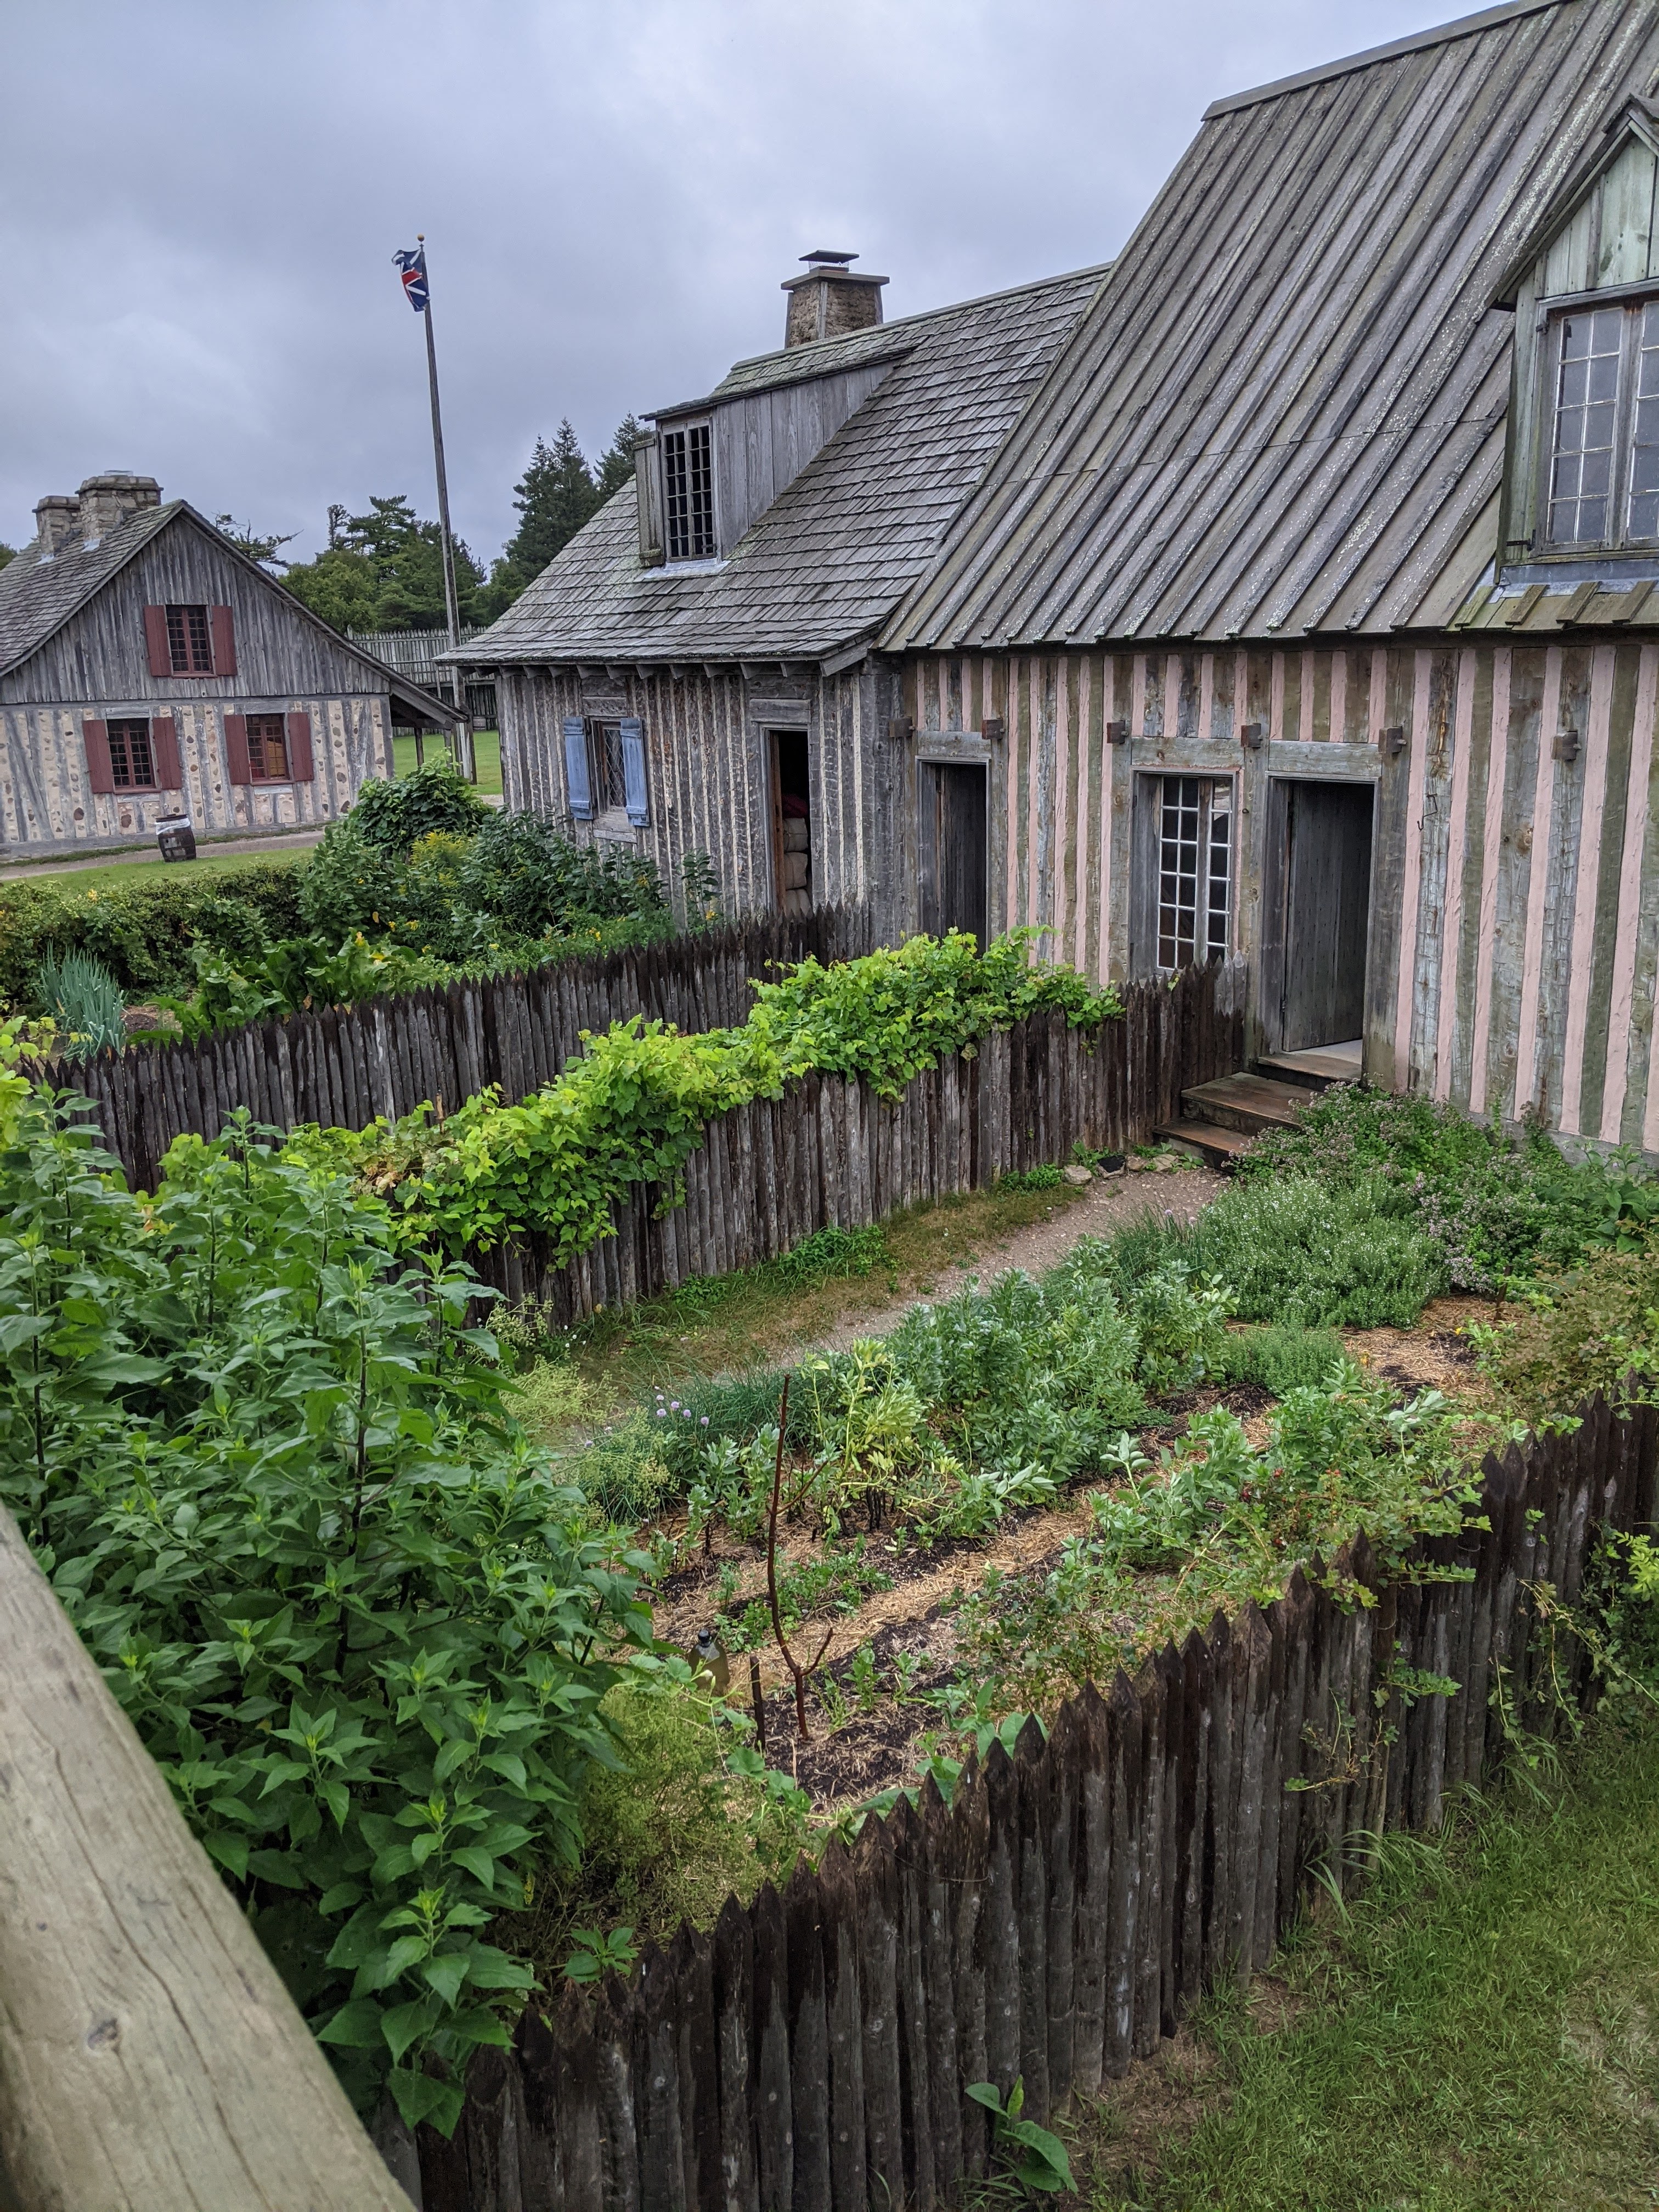
Gardens of Fort Michilimackinac
Garden of Brigadoon B&B
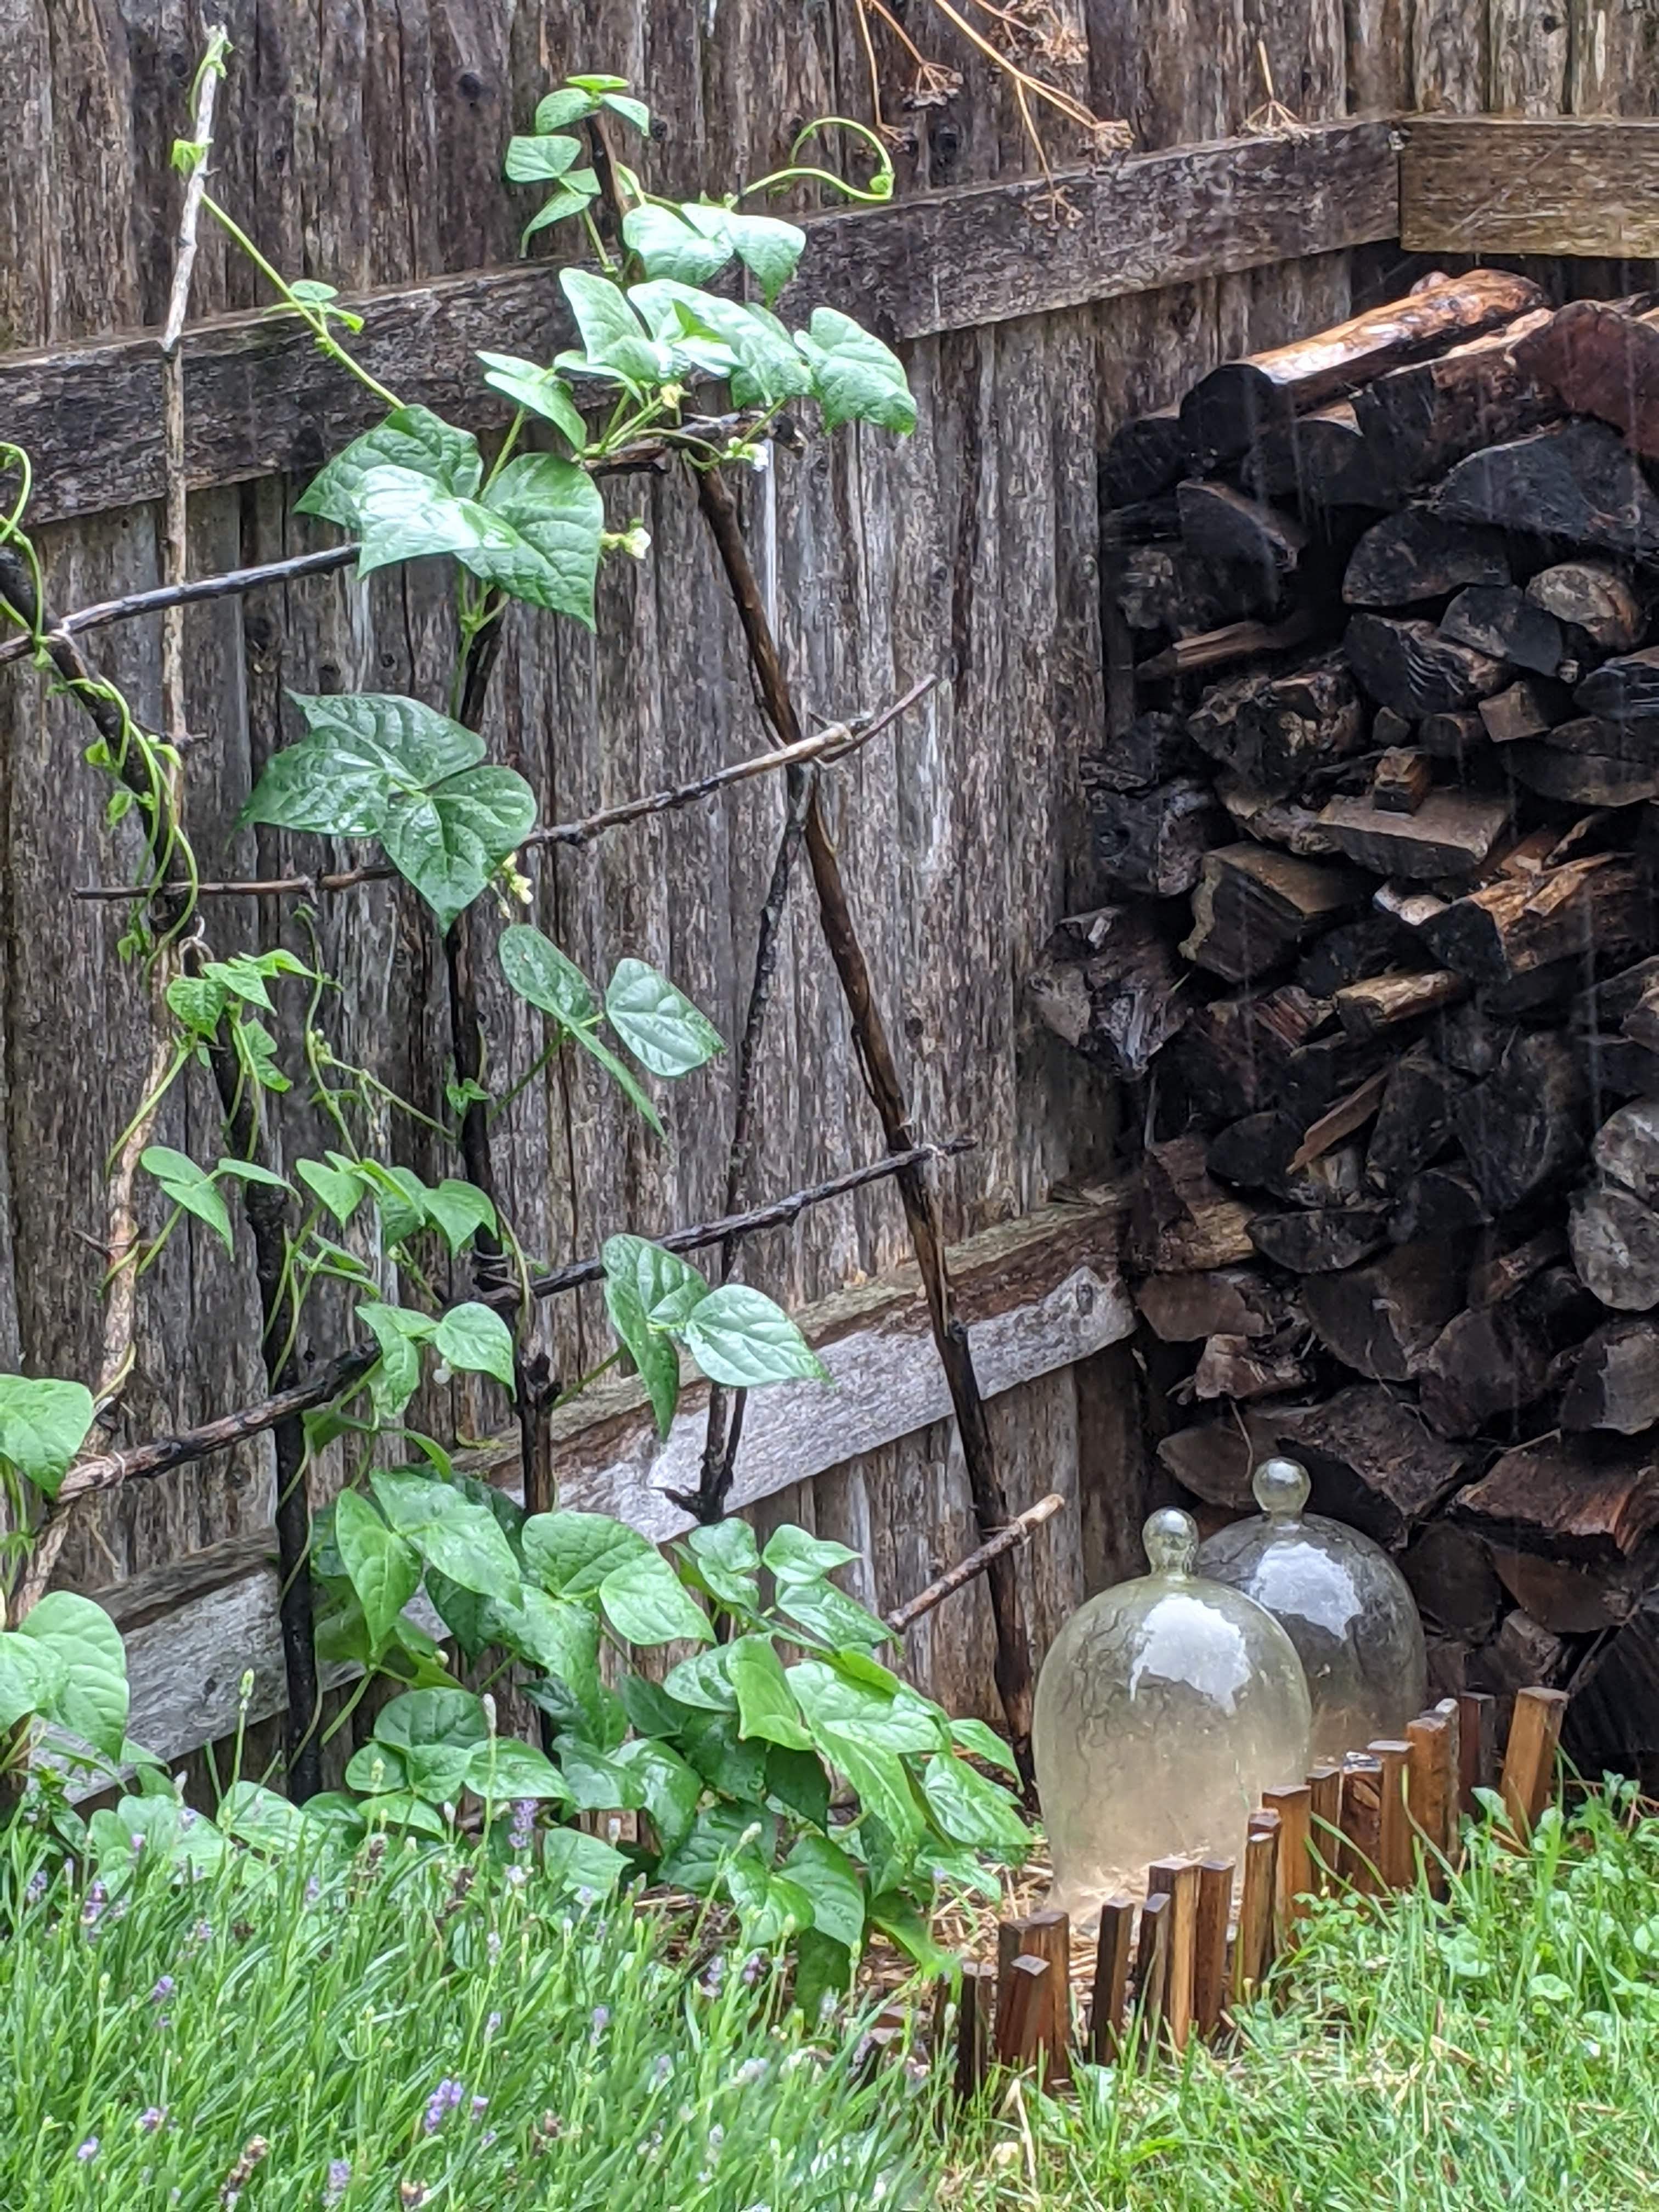
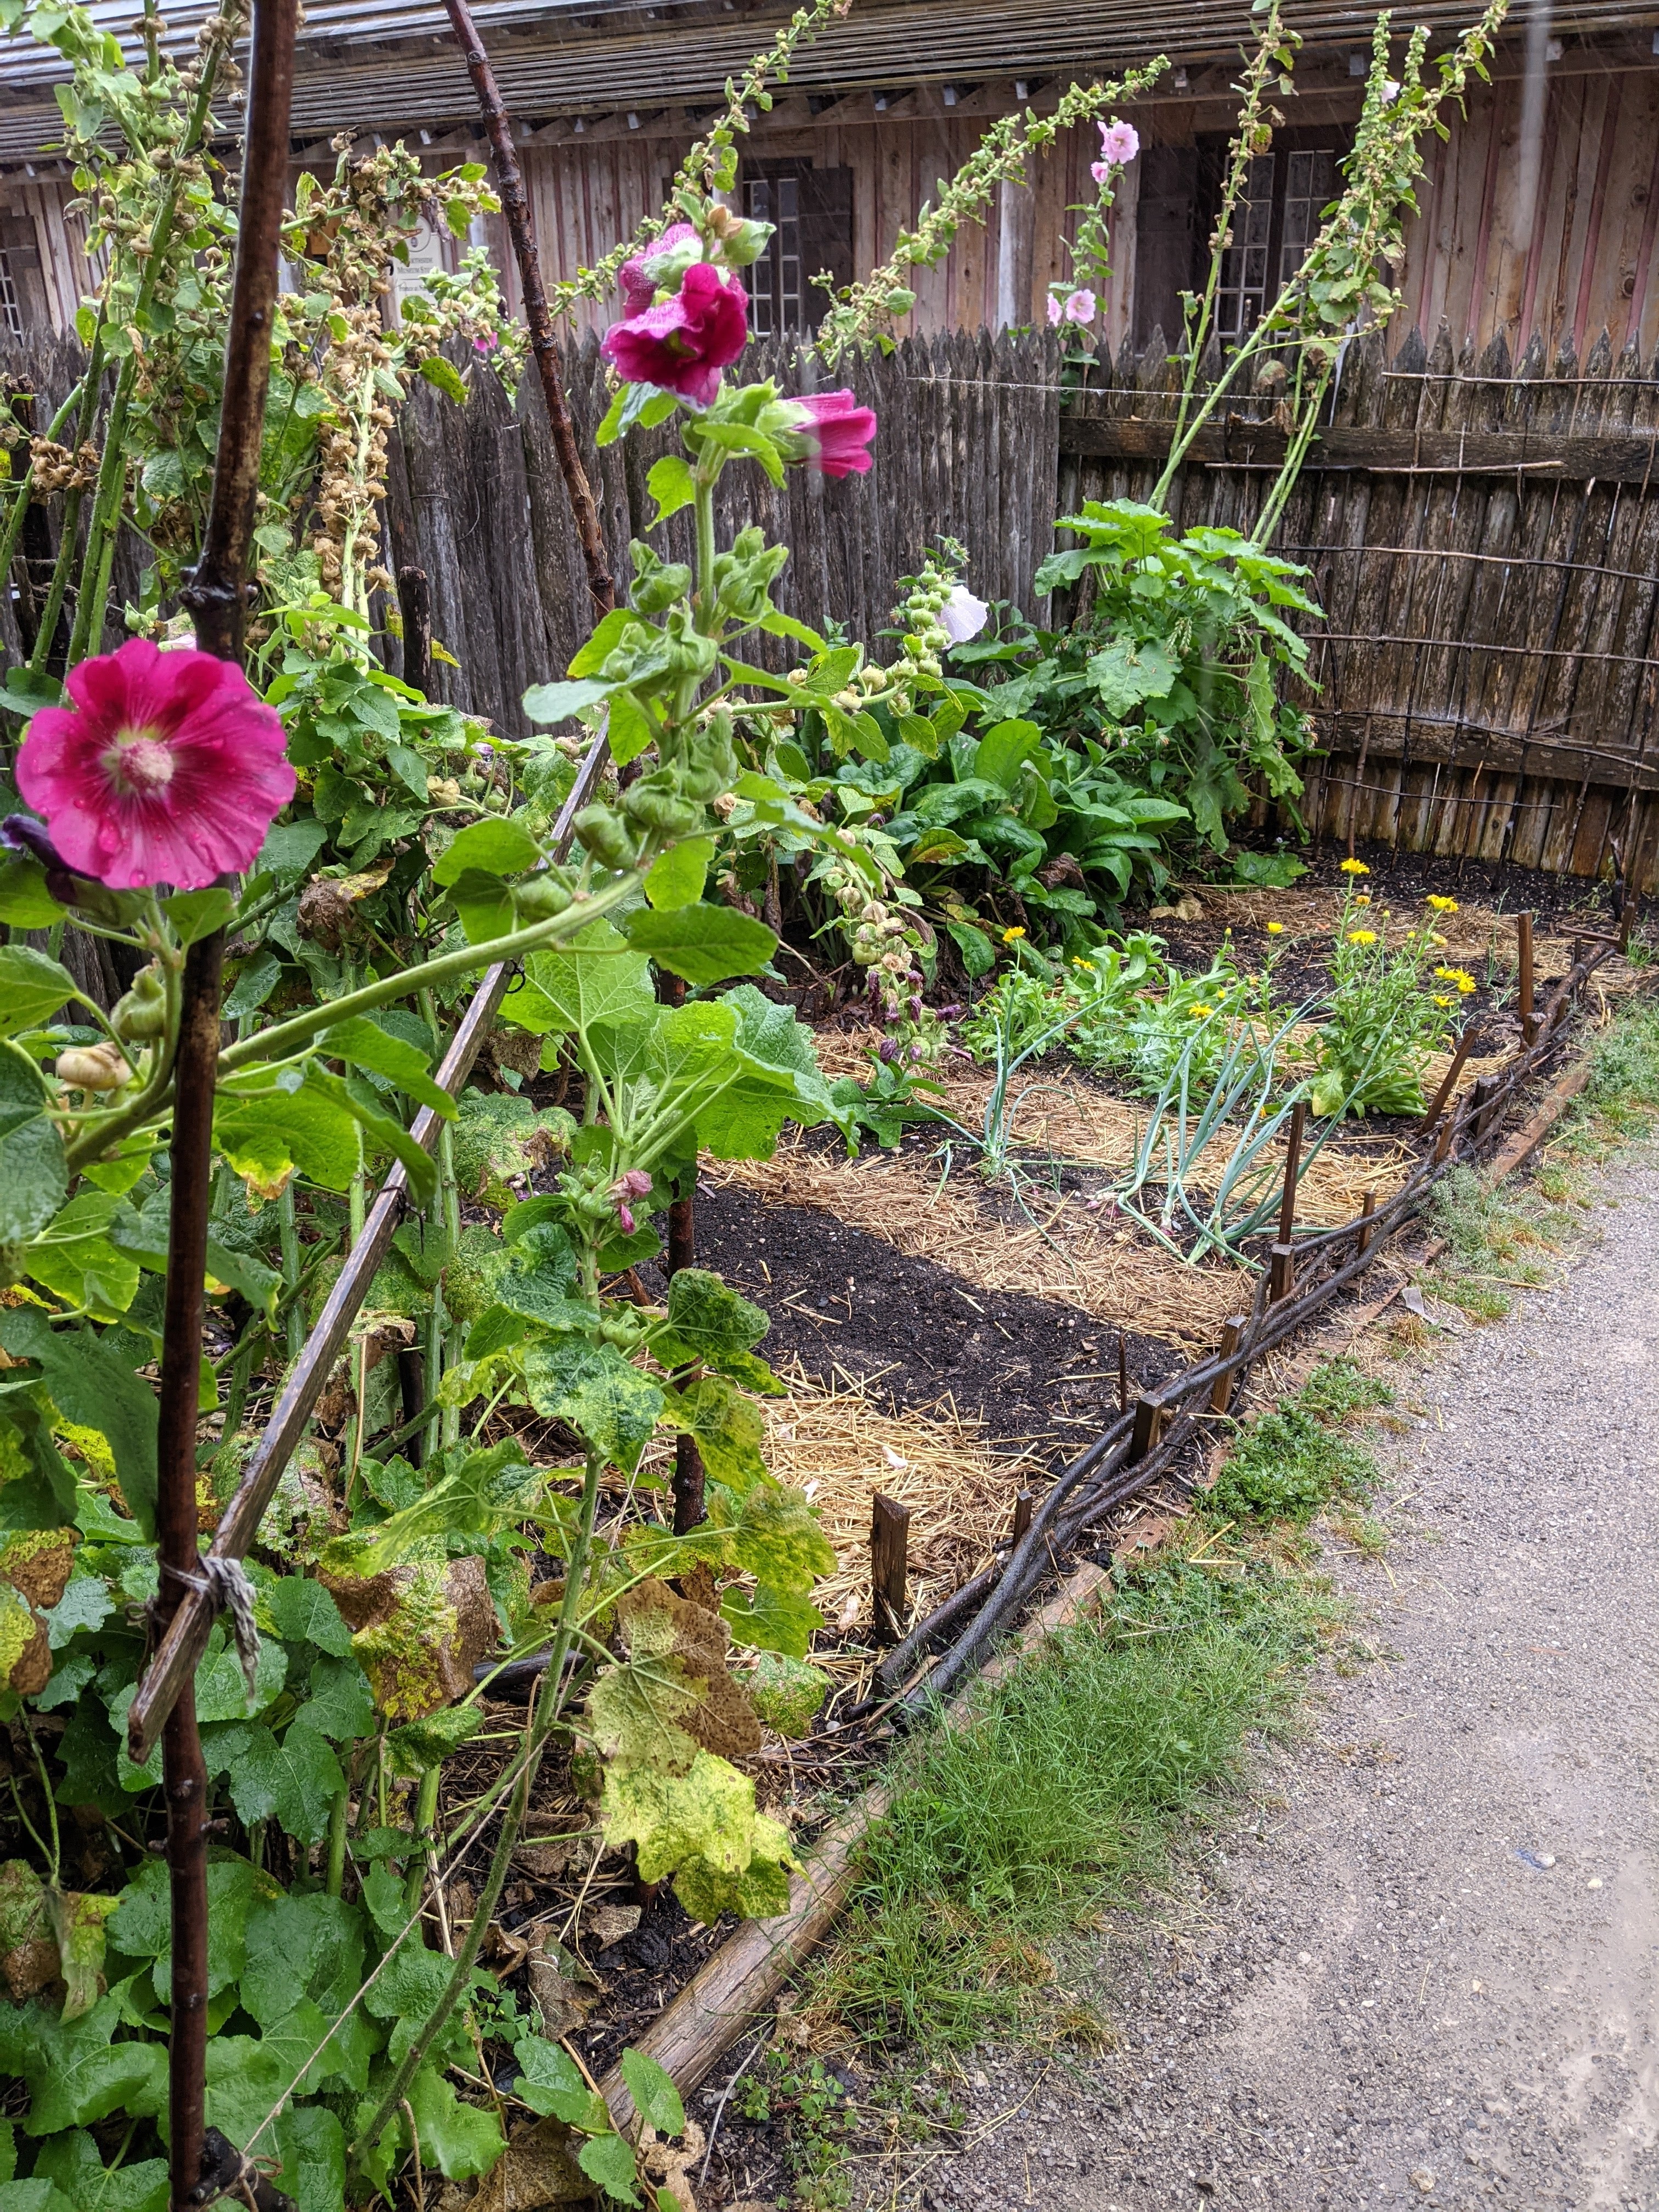
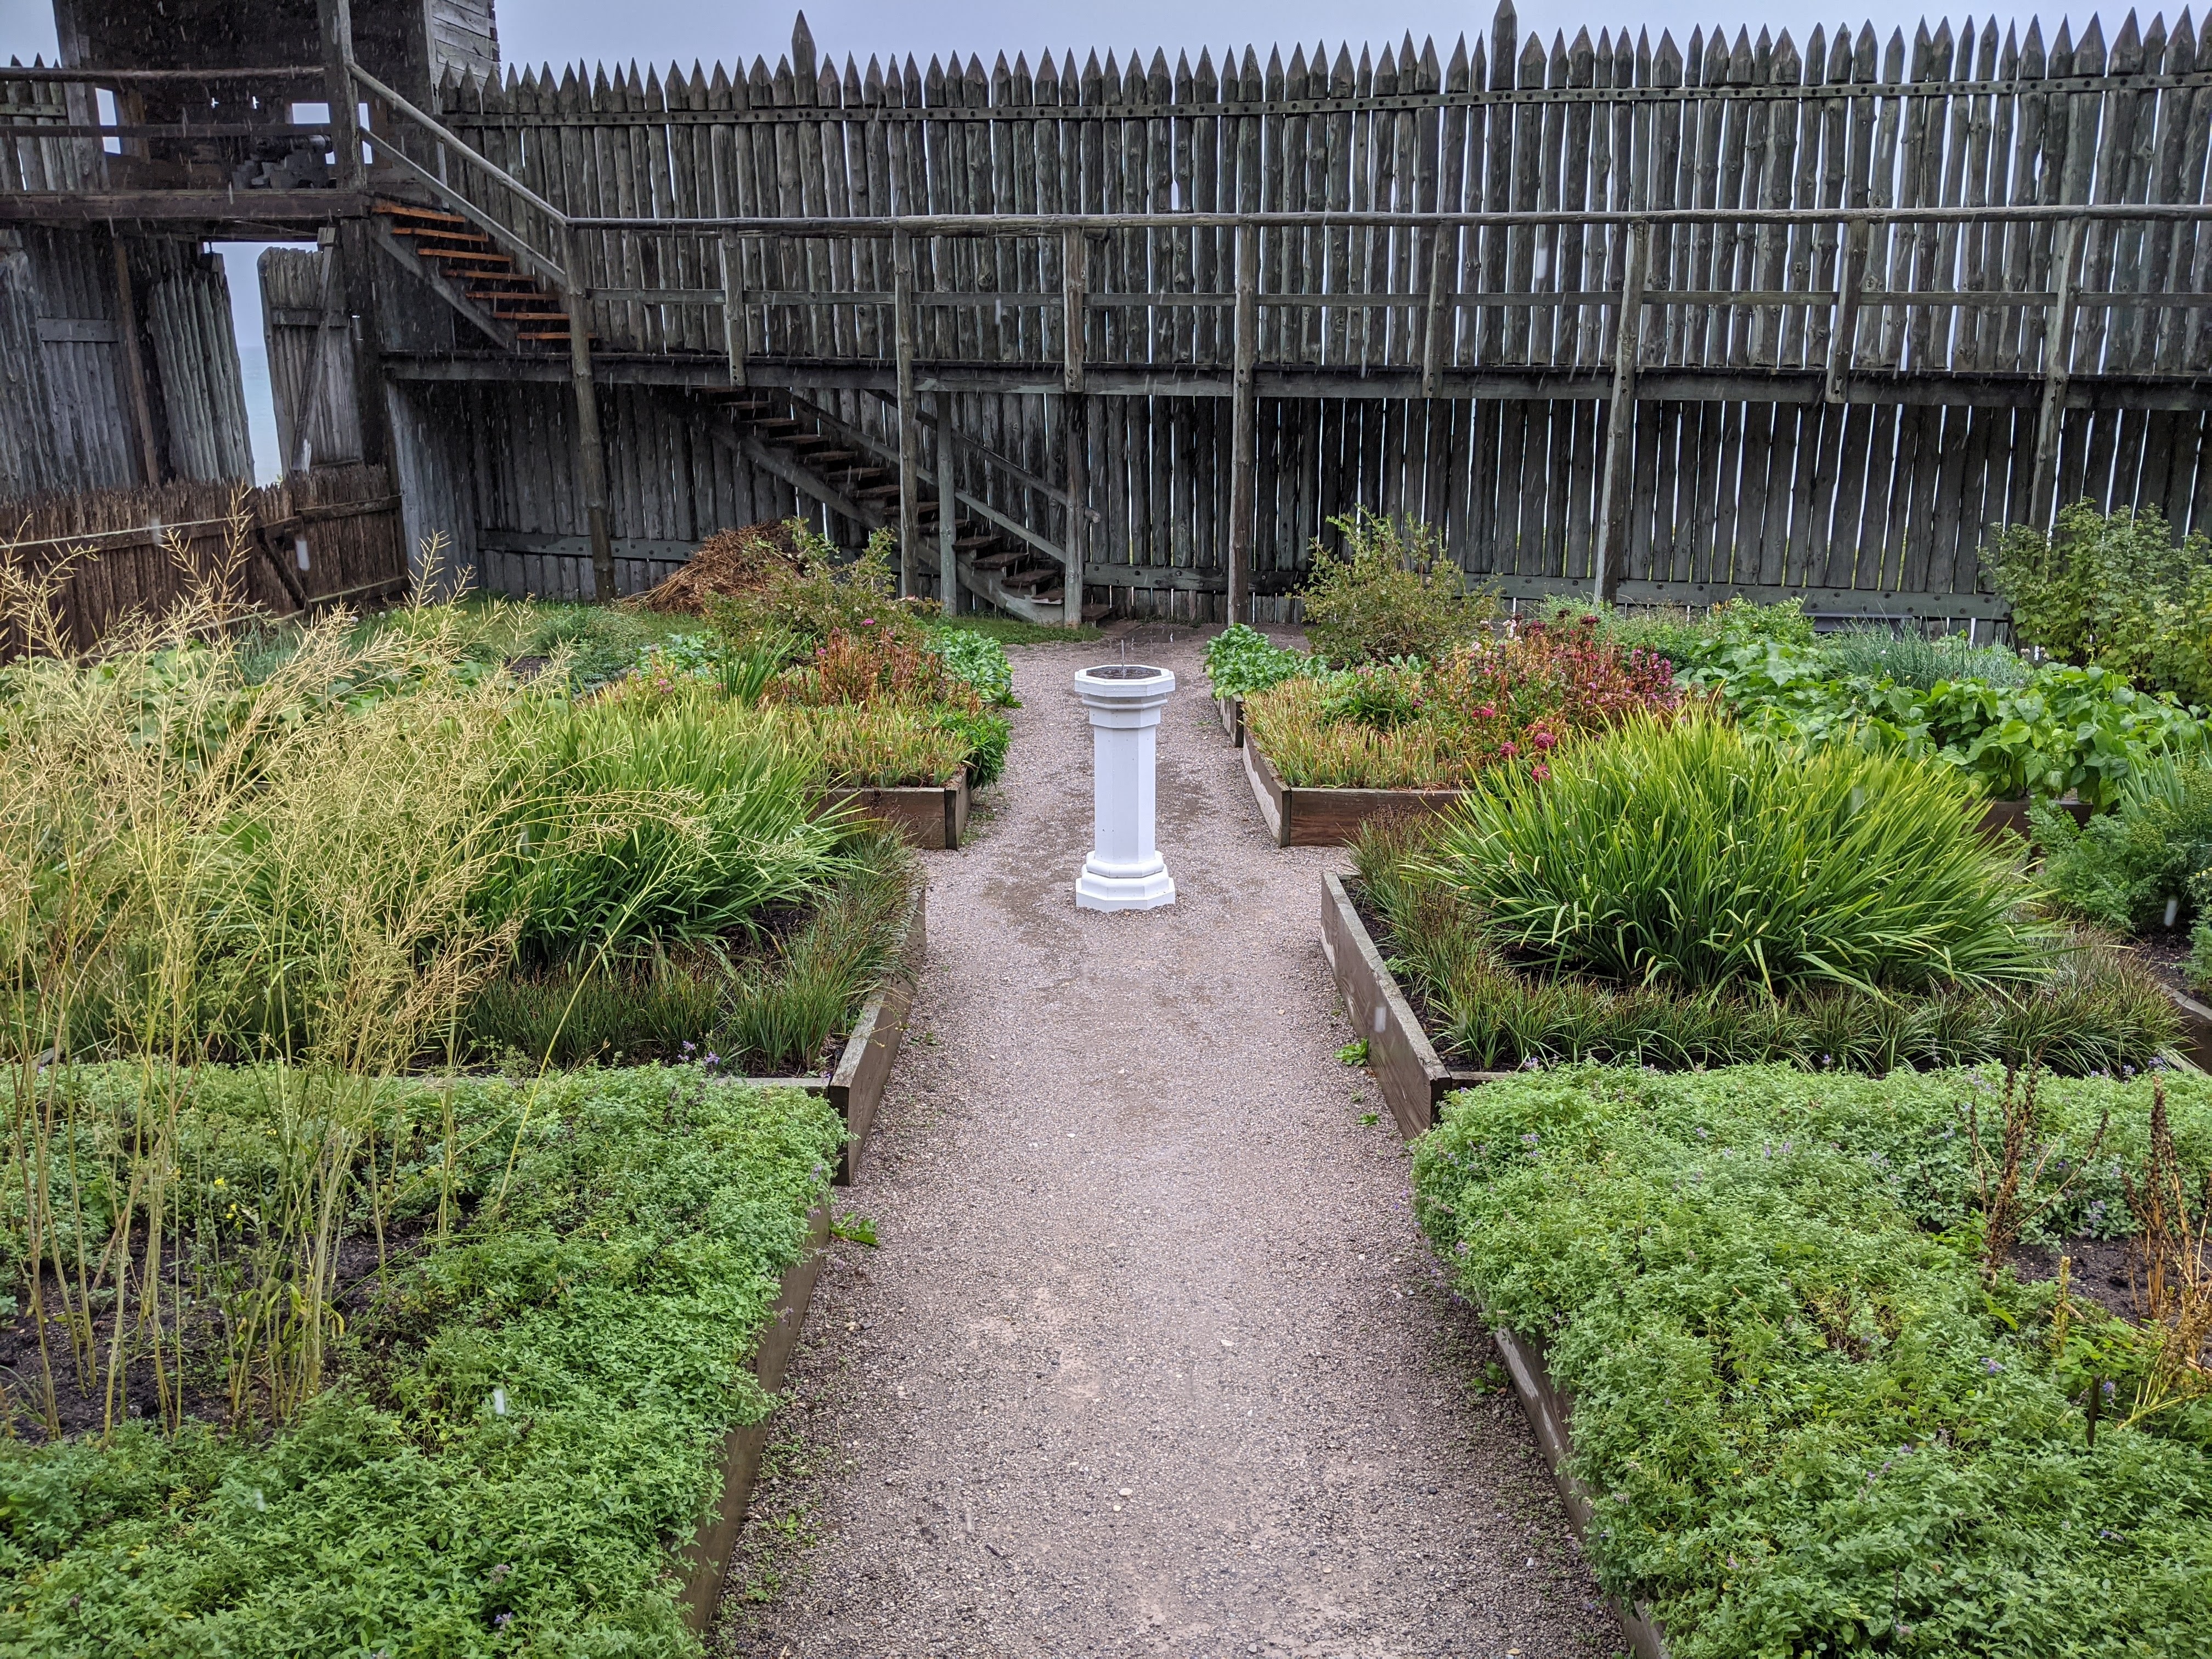
Before returning home, we went to Mackinaw City and stayed at another lovely B&B, Brigadoon. It’s the sister to the Bay View Inn, so it also had gorgeous decor and served nightly desserts as well as breakfast every morning. While there, we visited Fort Michilimackinac and Mill Creek. I had very much enjoyed the gardens of Fort Michilimackinac three years ago, so I did not want to miss going there again even though the day was cold and rainy. I’m intrigued by how the historical interpreters have planted gardens like those that the soldiers and other residents had in colonial times, and they use the harvests in their cooking demonstrations. They tend those gardens with the methods and tools that would have been used in the 1800s. I can relate to this very well because I use organic methods in my own kitchen garden.
Last Stop on My Grand Garden Show
After we returned home, I shared highlights on my social media from a local garden as the last stop on The Gardener Wife Grand Garden Show. Heather Blackmore had opened her lovely garden in Lockport to the community a couple weeks before our trip, and I had not yet shared the photos I had taken.
Joe Cillufo’s “Bike Reflection Teal” printed on a garden flag
And that brings The Gardener Wife Grand Garden Show to a close. I still have hundreds more photos and many memories to treasure. Not surprisingly, the souvenirs we brought back from this trip included several items for our own “Mackinac Island Garden” at home. We picked up stones from the beach to put in the “Mackinac Cottage Fairy Garden,” and I got a tiny bike, also for the fairy garden. To display in the larger garden, I got a coaster with red geraniums and a garden flag made from a local artist’s painting of a bicycle that is similar in color to the one that stands at the front of my garden. As you can see in the picture below, I hung it on the fence to the right of the wooden gate.
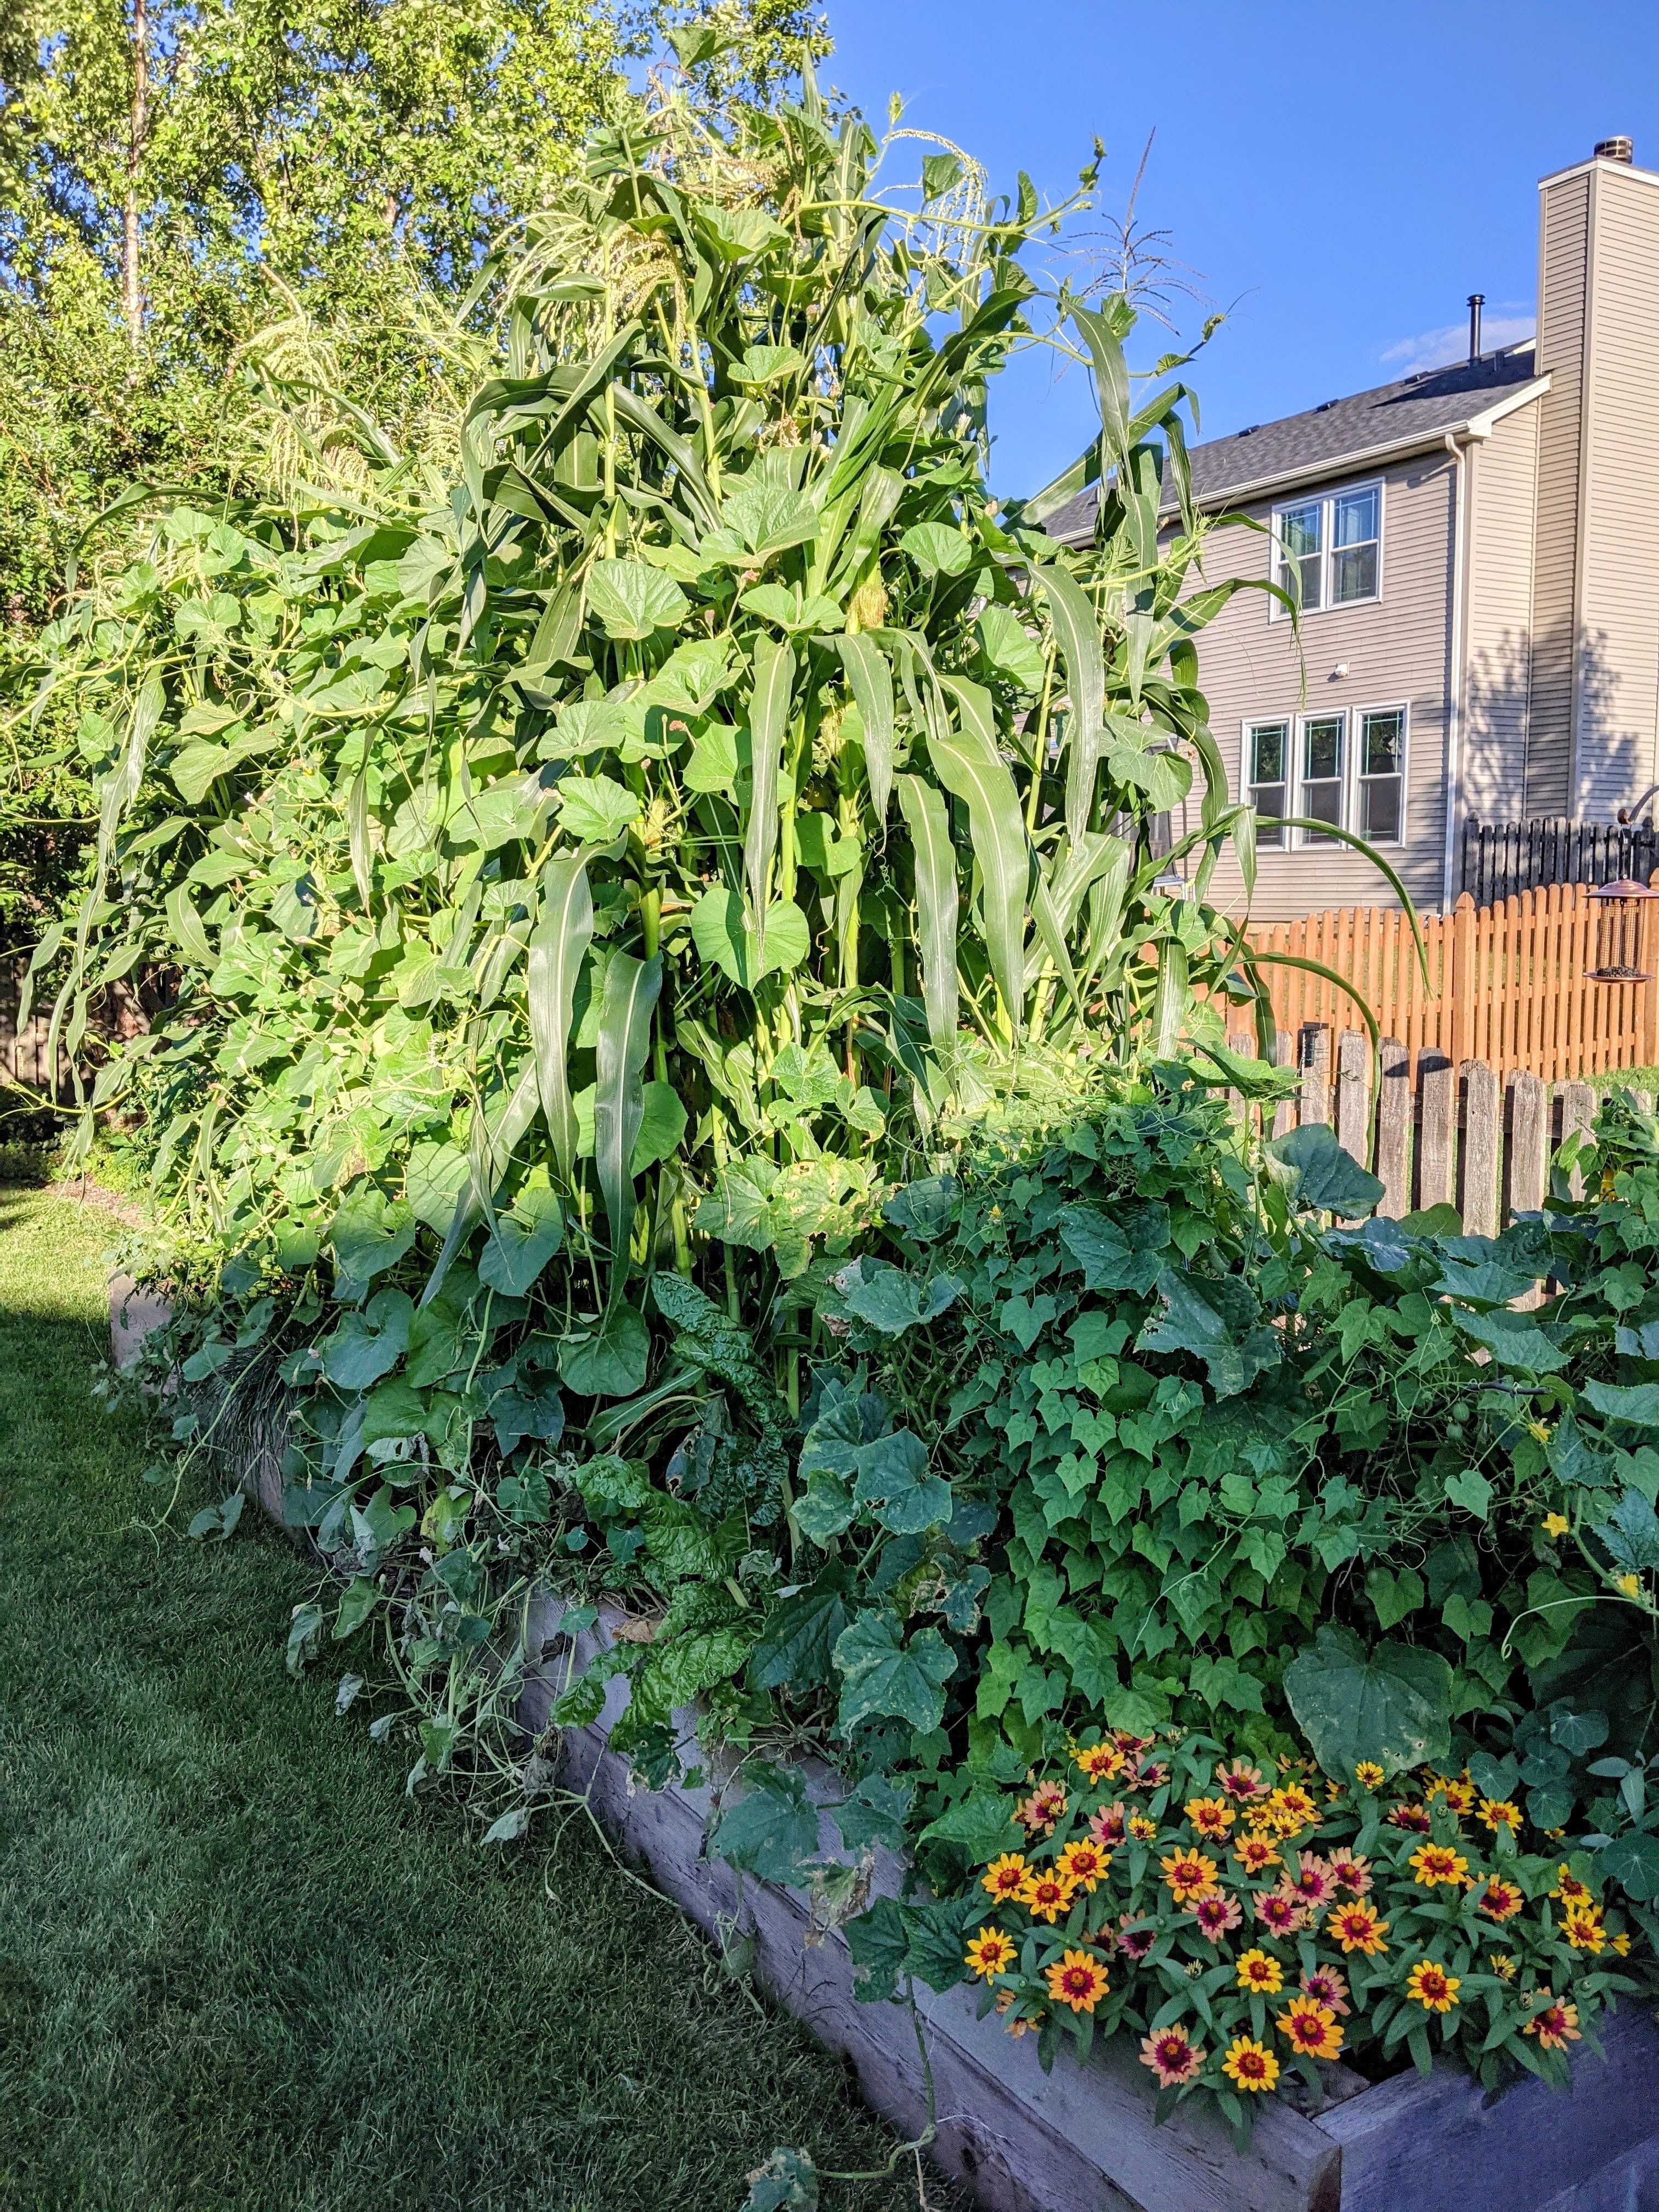
Our own “Mackinac Island Garden” in the side yard of our Chicago area home
Let me know if you have gone to the Proven Winners Grand Garden Show or any other big garden shows. In 2019 I went to the Philadelphia Flower Show, which is the largest flower show in the U.S. and the longest running one in the world. And this spring, April 2022, I went to Floriade in Amsterdam, an international horticultural expo that takes place every ten years in the Netherlands. Going to garden shows is an excellent way to find inspiration for our own gardens.
I may earn commissions for purchases made through any Amazon links in this post. See disclosure here.
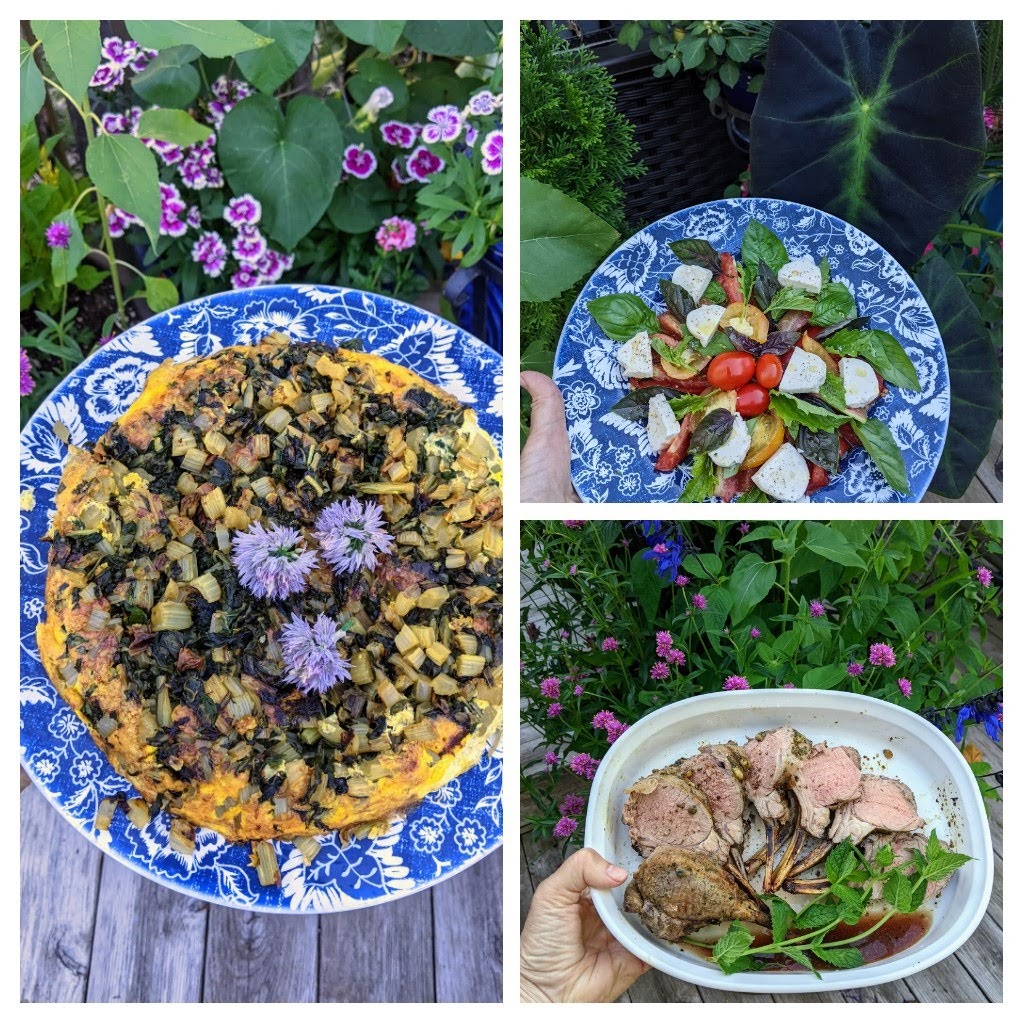
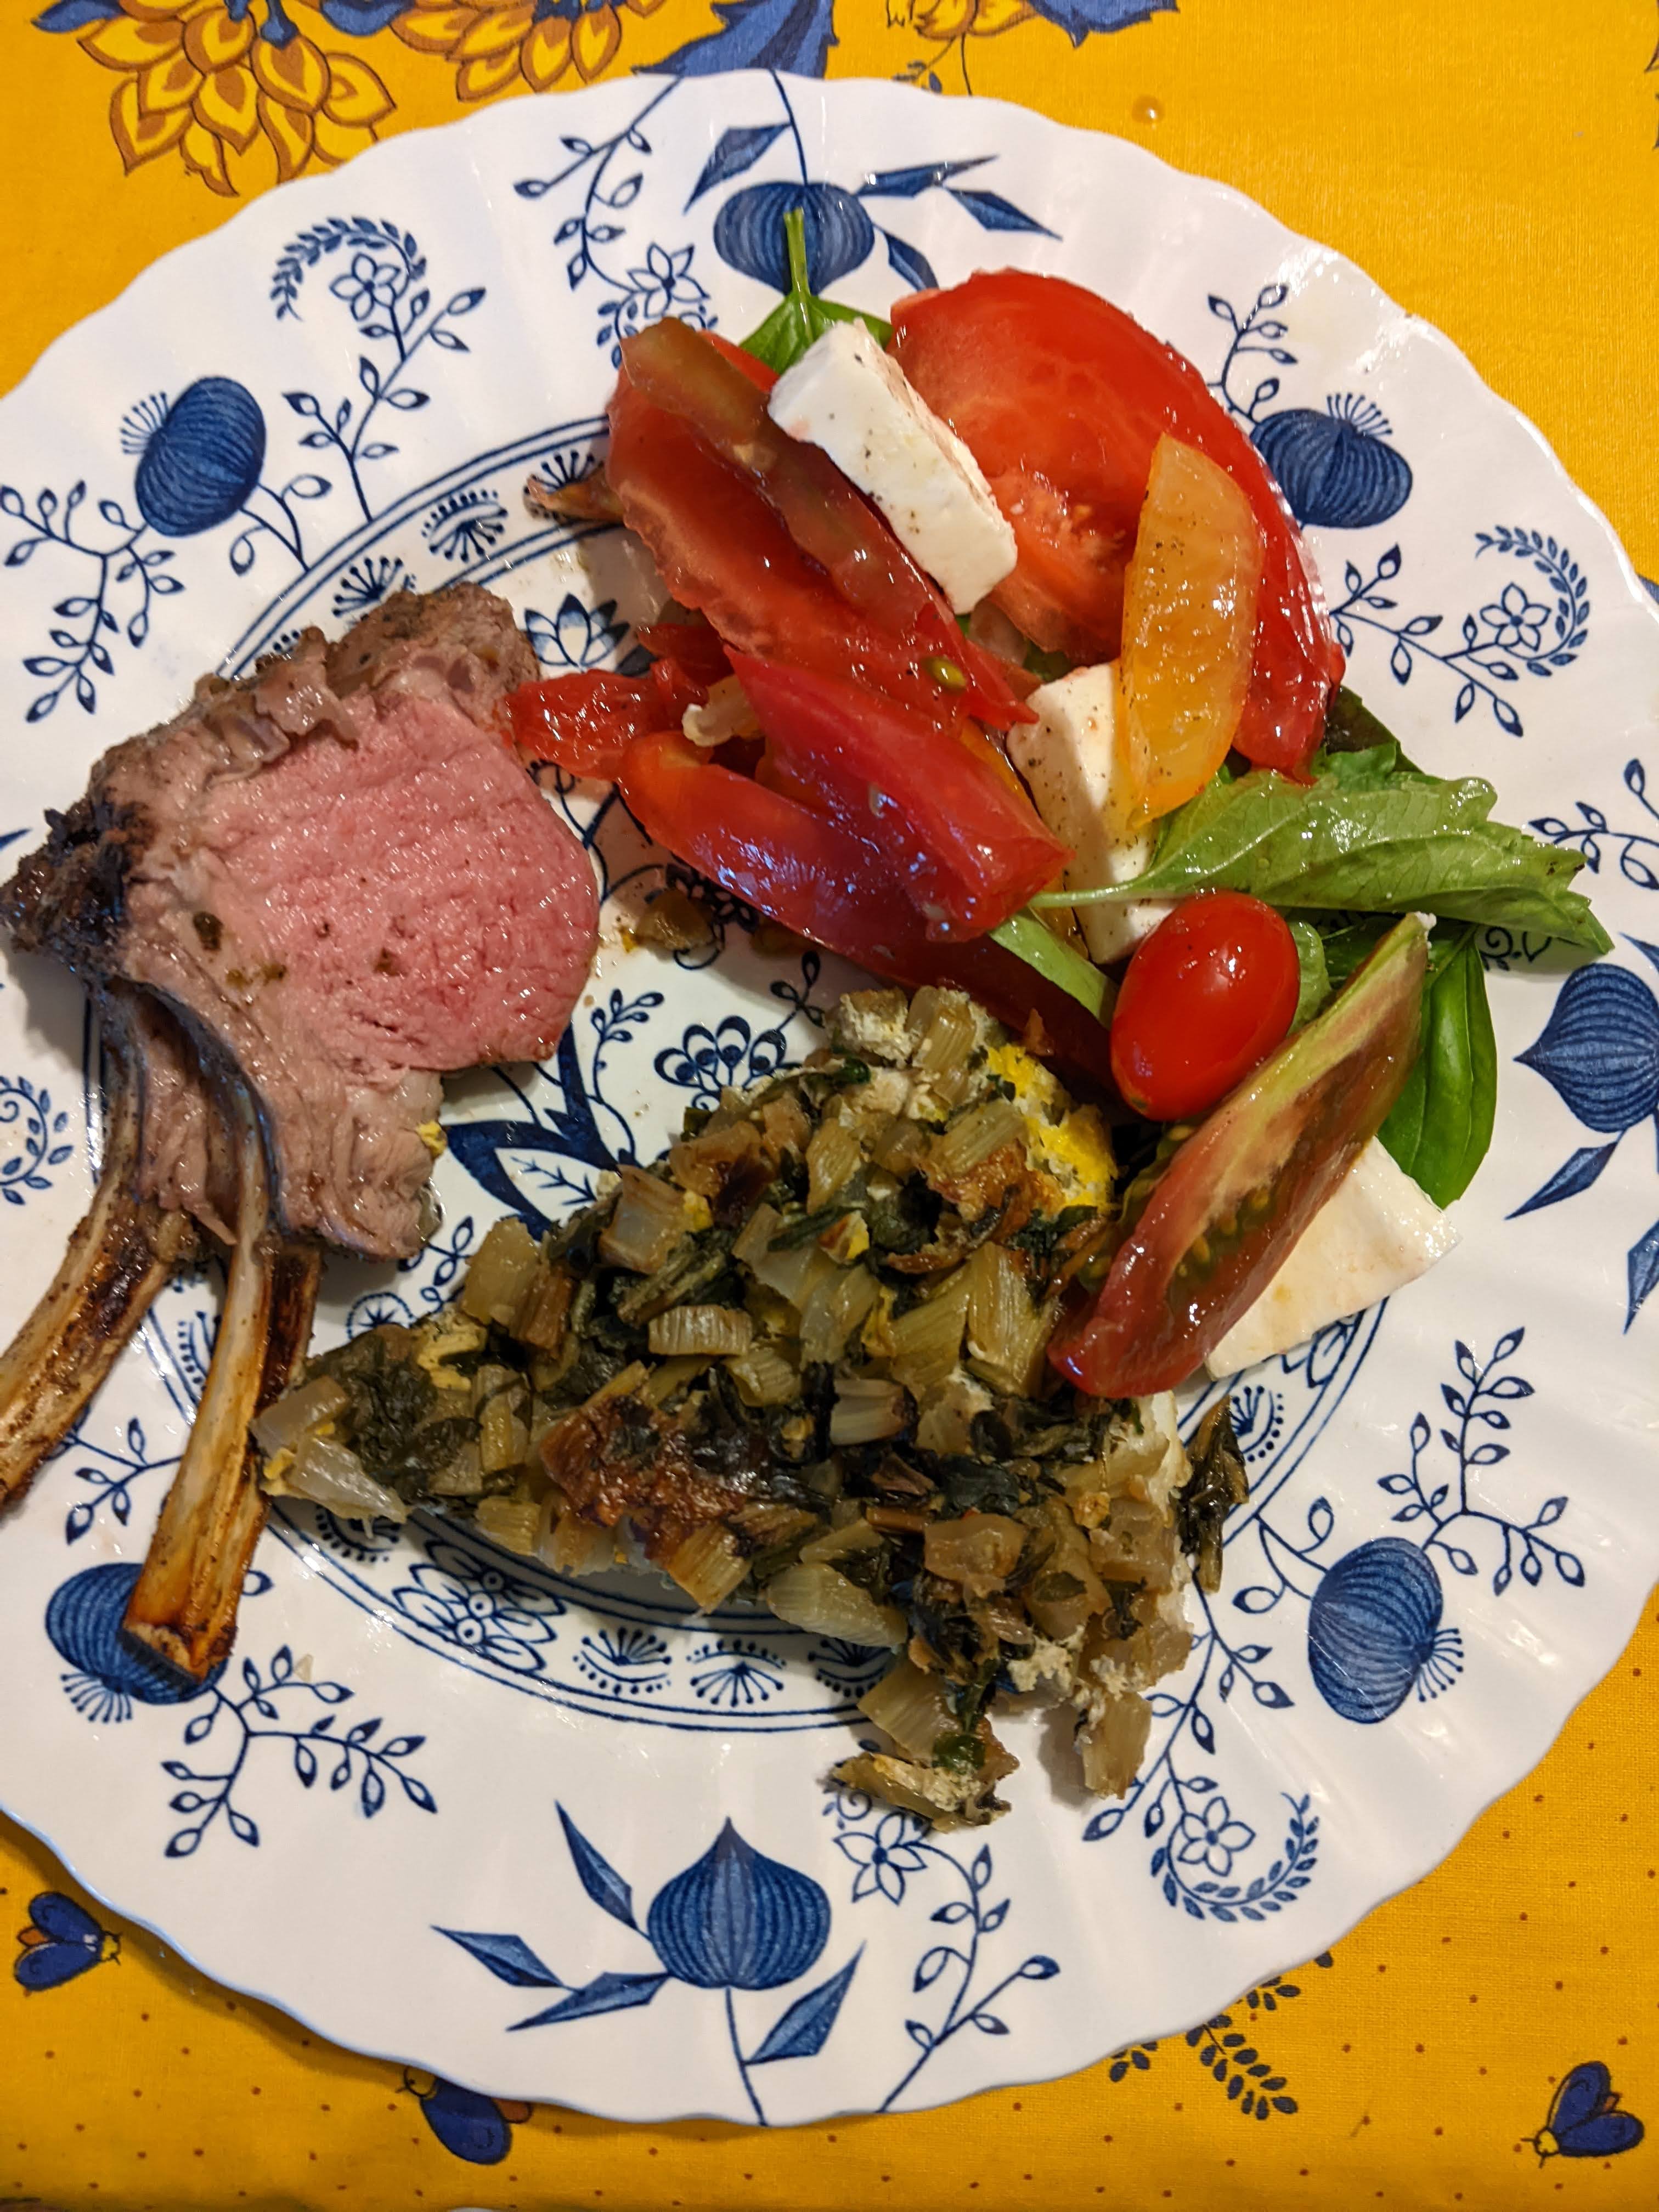
I am super pleased with last Tuesday night’s garden-to-table dinner here at Chez Rea. It may look like an elaborate meal, but it was not difficult to make. It was inspired by two gifts—fresh eggs and a rack of lamb—as well as by my garden.
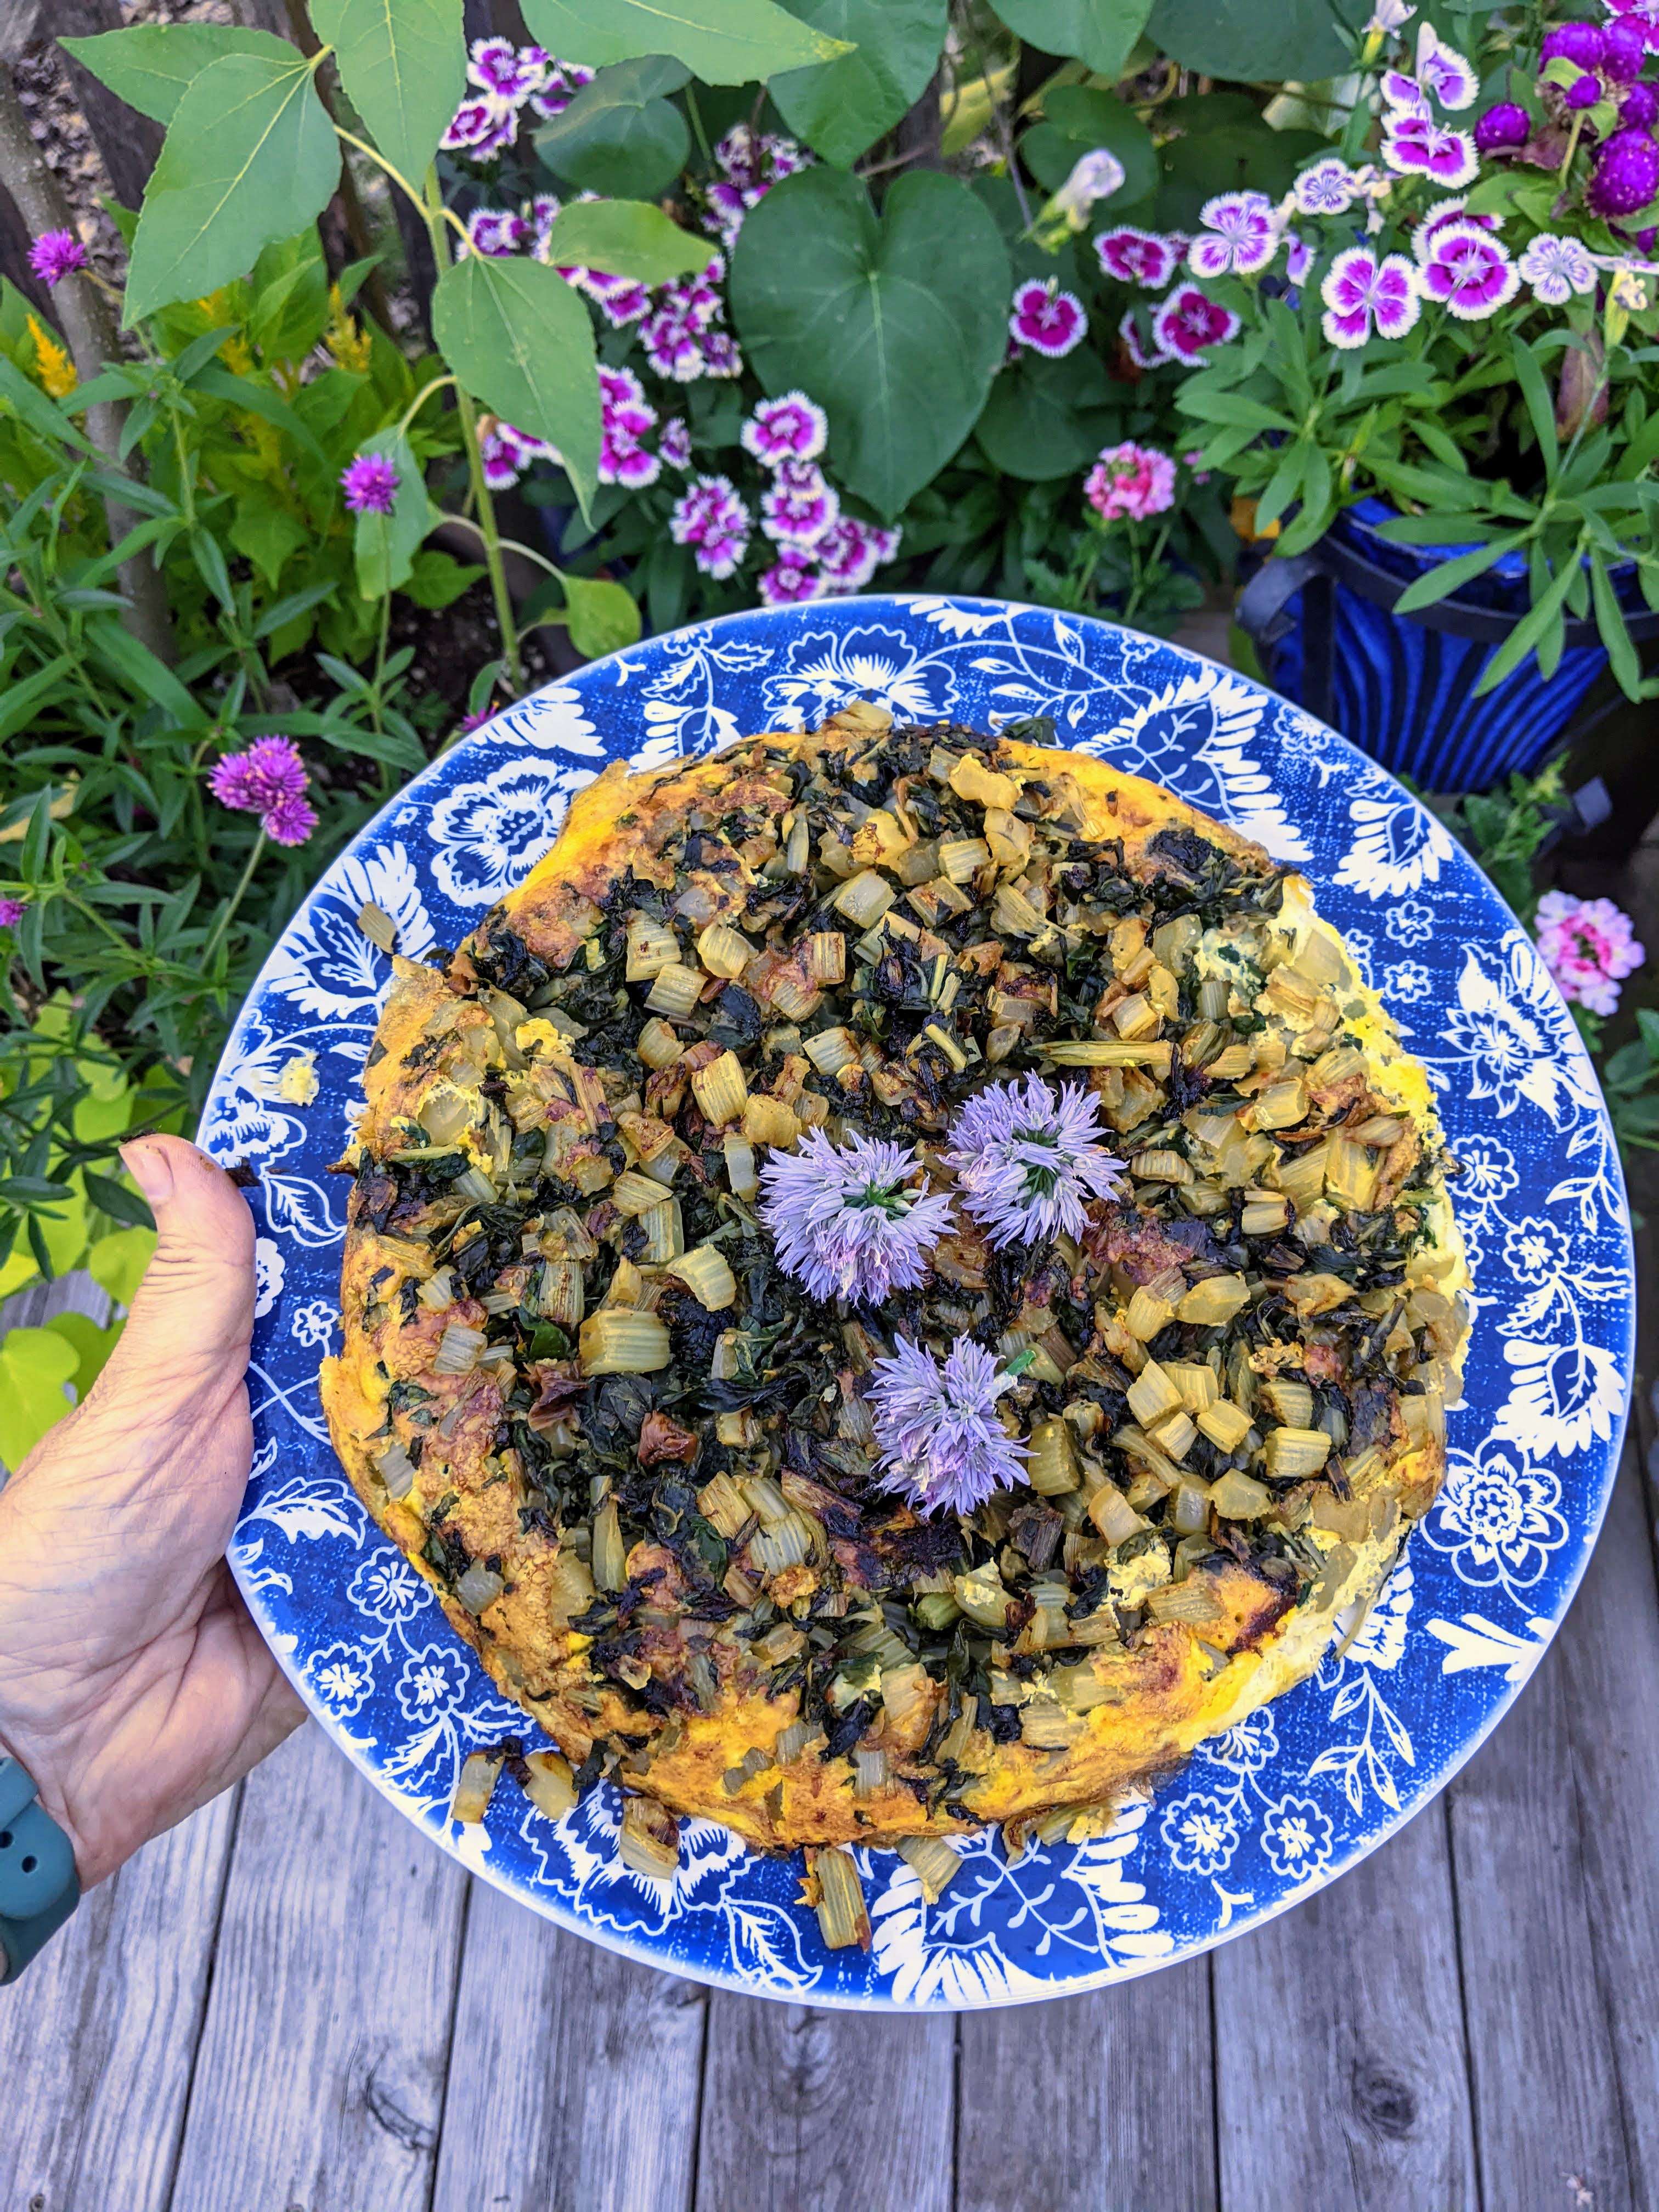
Swiss Chard Tortilla Española
Swiss Chard Tortilla Española
As soon as a dear friend shared eggs from her son’s chickens with me, I had planned make Swiss Chard Tortilla Española. This is a recipe which I’ve shared here before. It was my mom’s favorite way to cook Swiss chard, and so it became mine, too. What a treat to make it with home raised chicken eggs! Swiss chard is doing well in my garden this season. I got some very early in the year because several plants self sowed in the back corner of my kitchen garden. This was a blessing because I was slow to plant the seeds for this year. We went straight from using frozen Swiss chard to make my morning Garden Egg Cups to using freshly picked Swiss chard. Meanwhile, the seeds that I planted on June 3rd have grown into very large plants, so I harvested several giant stalks to make this dish. I also used dehydrated onions and leeks from last year’s garden since I didn’t have any onions ready to harvest.
Grilled Rack of Lamb
I have never bought a rack of lamb because they are very pricey. However, I got this one for free a few weeks ago from our church’s gleaners ministry. (What a blessing that ministry is!) I’ve cooked other cuts of lamb before, so I knew that lamb meat goes very well with garden herbs. I searched online for a recipe and found one that suited me so perfectly that I did not make any changes to it. This Grilled Rack of Lamb recipe calls for several things from my garden—rosemary, mint, and garlic. (My garlic from last year is still good! I will share in another post my improved way of storing cured garlic.) Since I had only a few hours to marinate the meat, I vacuum sealed the lamb with the marinade in a FoodSaver marinator container instead of marinating it in a zip close bag. When I grilled the rack of lamb, I found that I didn’t need to cover its bones with foil because of how the bones were curled away from the heat during most of the cooking time. Rather than using an instant read thermometer to keep checking for doneness, I used my automatic meat thermometer, which beeps when the food hits the desired temperature.
Caprese Salad
Caprese Salad
I felt like a caprese salad was the perfect way to round out this meal. I had made the first one of the season just the night before. This is one of my top three favorite things to make with fresh garden tomatoes. The other two are salsa fresca and bruschetta. I like to make my caprese salad with a variety of tomatoes and of basils. The tomatoes that I used on this occasion were Ukrainian Purple (I’m Ukrainian, you know!), Yellow Stuffer, and Fantastico (an AAS Winner—I started a bunch of these plants from seed this year). I sliced the tomatoes into wedges, except for the three little Fantasticos in the middle, and spread them around the plate, along with pieces of fresh mozzarella. Next I tucked in sweet basil, purple basil, and Spicy Saber basil (a new to me variety). Then I drizzled a high quality extra virgin olive oil and grated some Thai blend pepper (it’s what I’ve got in my electric pepper grinder) over it all. The finishing touch was sprinkling a bit of my favorite salt, fleur de sel (it’s not ordinary sea salt!) on top.
If we had had guests, I probably would have put a bunch of edible flowers on top, too. In any case, this was a wonderful meal for just my husband and me. Since the Tortilla Española is filling, we ate only half the lamb, two ribs each. We ate the leftovers the following night, along with yet another caprese salad. In addition, I got over my long time kick of having Swiss chard and onions in my Garden Egg Cups and asked Stan to make the next round with my freshly harvested broccoli.
This was the most elaborate meal I had made in a while. I have not been posting here on my blog nor sending out my newsletter for several months because I was taking a very intense grad school class. As I mentioned in my 2021 Update, I’ve been working on a doctoral degree that focuses on global and urban ministry. I did very little cooking during the weeks that I was working on my final project for that class. We lived on very simple meals, leftovers, and takeout food. Of course, even simple meals are very tasty when made with veggies, herbs, and fruits from my garden—so we certainly weren’t suffering! Meanwhile, I did the best I could with planting and maintaining the kitchen garden. After I at last turned in my paper, I eased back into cooking by making a couple shrimp stir-fries. No recipe—I simply put fresh garden veggies in my wok, along with anything else in the fridge that I thought would fit. Now Stan, who was in the same class and is pursuing the same degree as I am, and I are both enjoying some time off from grad school.
Thank you—especially to my newsletter subscribers—for your patience! It has been six months since I sent out my last newsletter, and yet no one has unsubscribed. Thank you very, very much for hanging in here with me! Please remember that you are always welcome to contact me, as some of you have done, whenever you have a gardening question or want advice. I respond to texts, emails, and social media comments and messages as quickly as I can. With this blog post, I am starting to ease back into garden writing, just like I eased back into cooking. I hope to do a couple more blog posts, and then I’ll write that next newsletter. What should I write about? What would you like to read about? Let me know by replying in the comment section below.
I may earn commissions for purchases made through any Amazon links in this post. See disclosure here.
New Dawn climbing rose on the arbor at the entrance to my backyard – June 2022
Roses are having a great year here, as you can see from the above photo. I have had this beauty, New Dawn climbing rose, for many years now. We installed a new metal arbor for it two years ago, shortly before I hosted a rose-themed bridal shower for Number One Son’s fiancee, Emily Rose. The New Dawn rose had just started to bloom right before the party, which was exactly two years ago today.
This was during the coronavirus pandemic, so holding the shower outside not only motivated me to get lots of work done on my garden but also lowered the risk of spreading COVID. We finally finished the courtyard style garden in our side yard that I had dreamed of for ages, and this garden party was the official opening of that garden, which I named the Mackinac Island Garden. It’s thrilling to see how much that garden has filled out in two years’ time, but I’ll share that with you in another post.
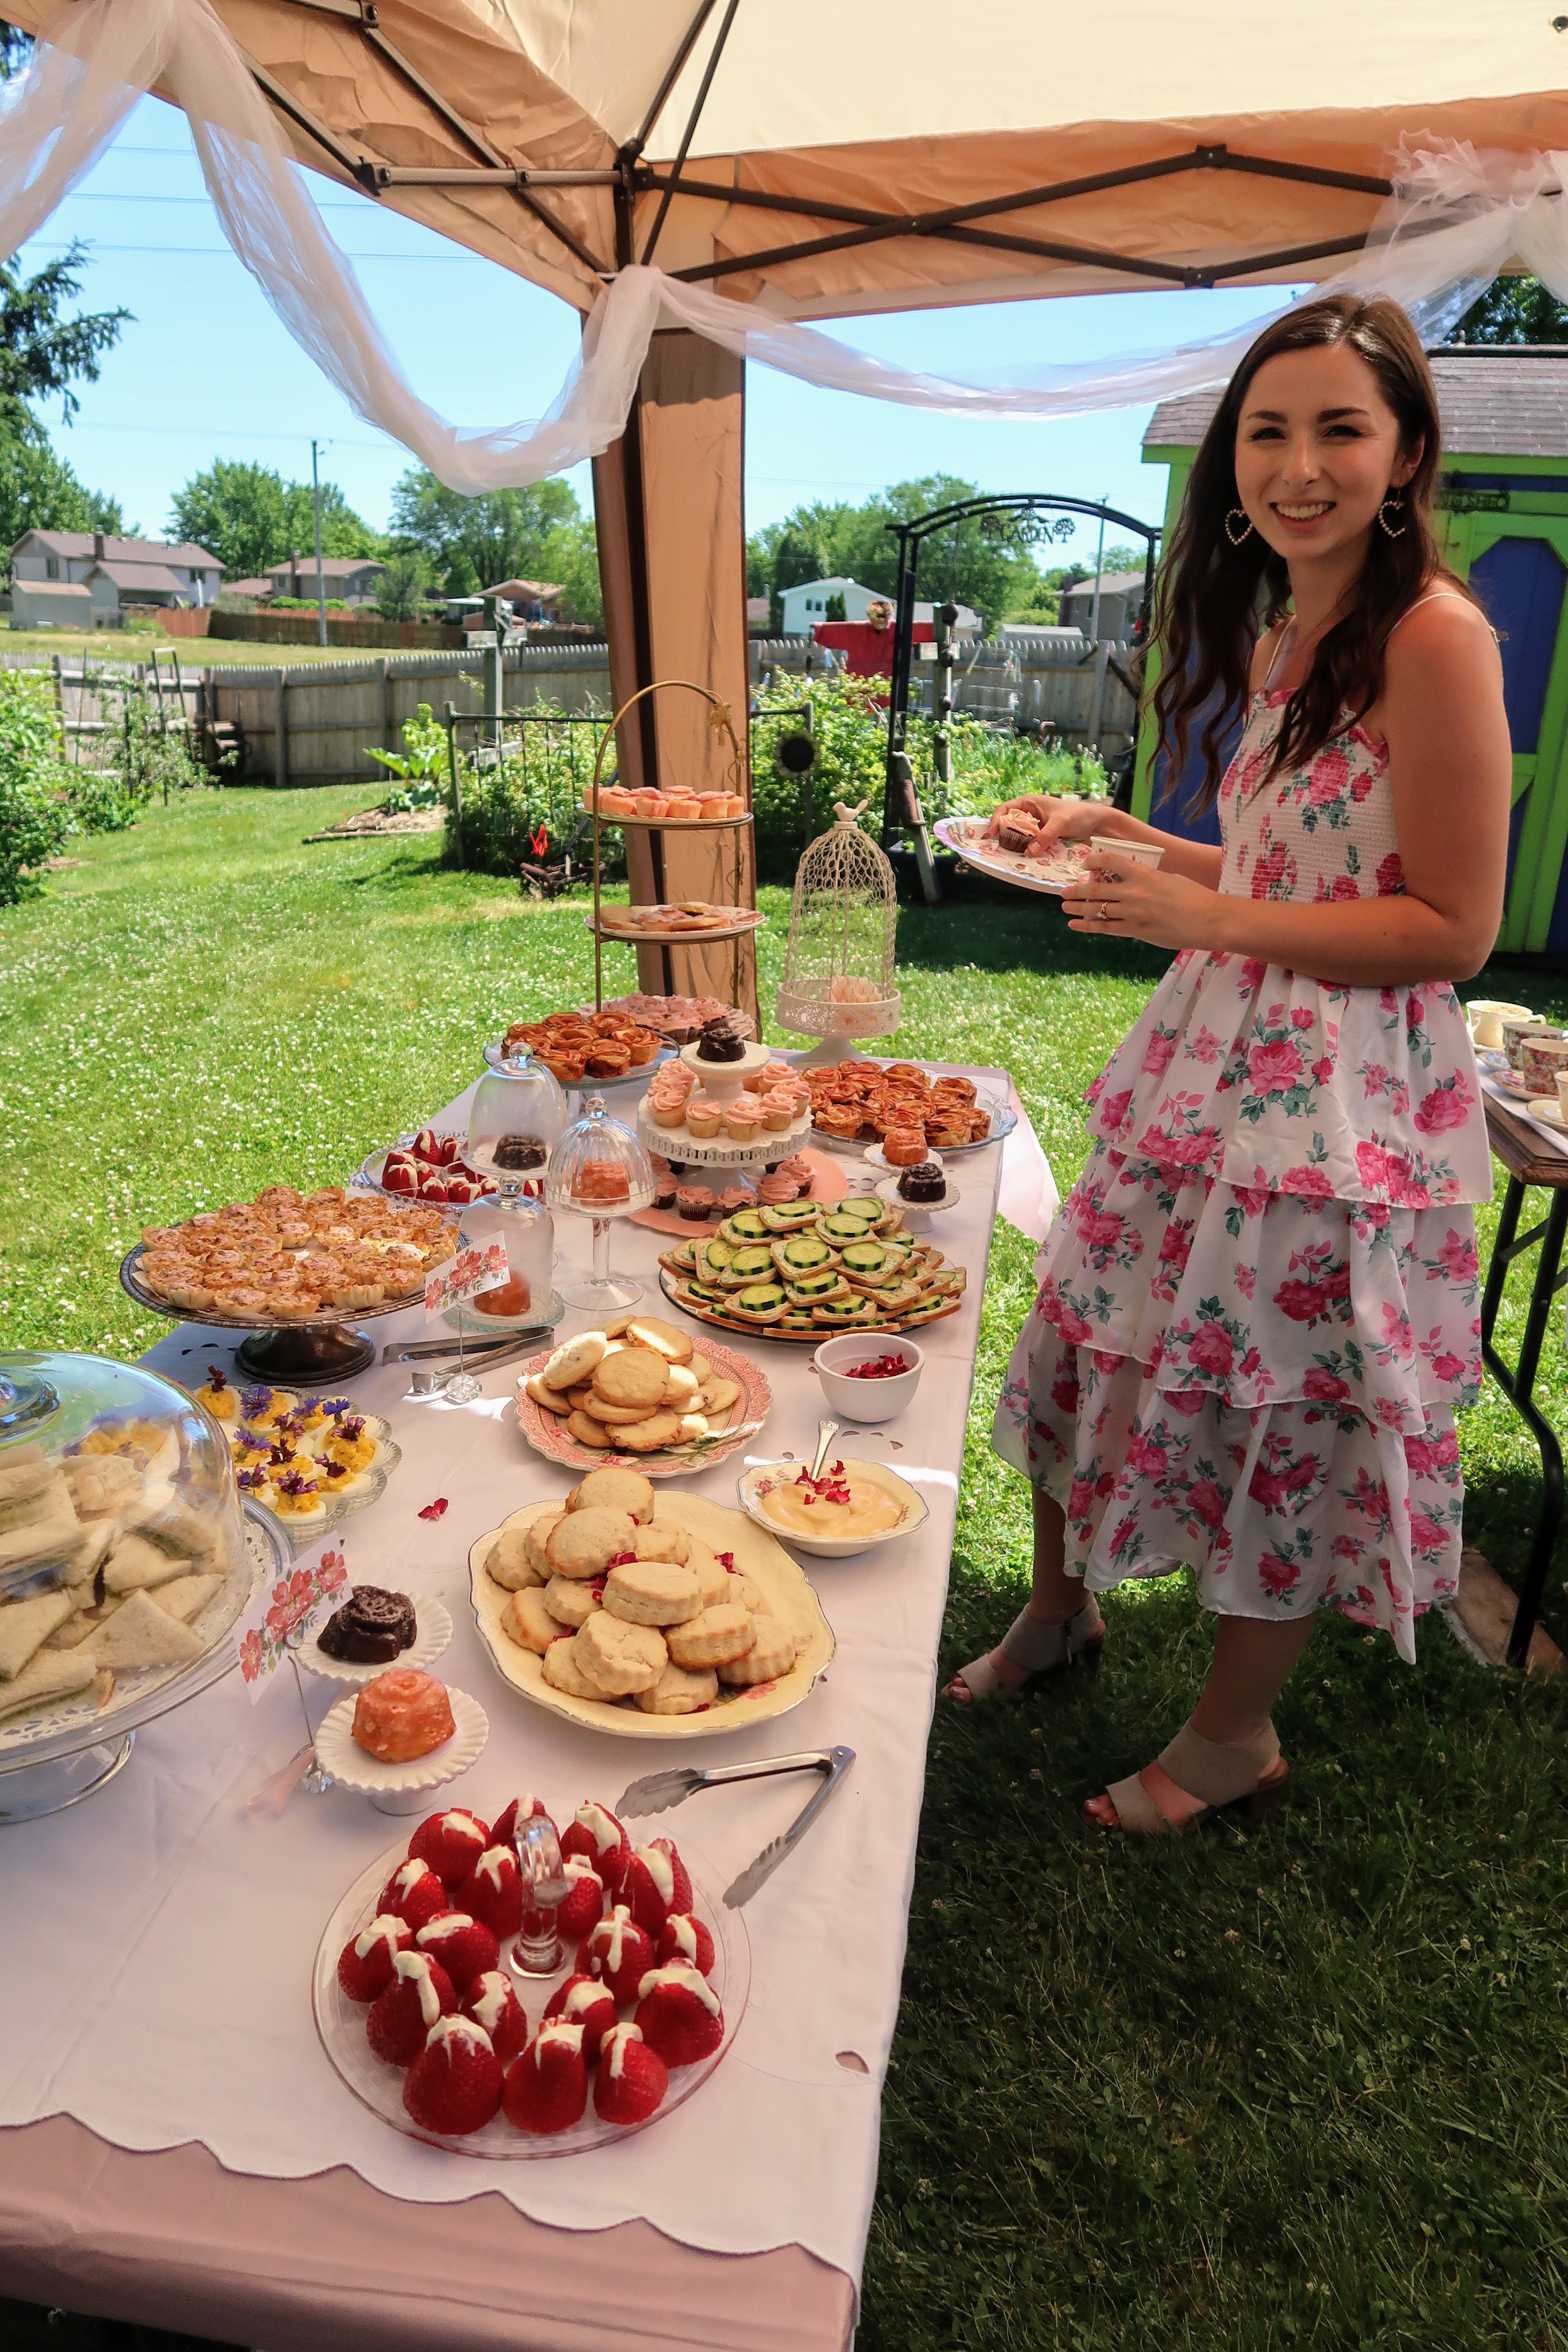
Rose Tea Party Menu
I chose roses as the theme for the bridal shower because Rose is my daughter-in-law’s middle name. I used roses and other edible flowers throughout the menu. These are ideas that you could use for any tea party, indoors or outside, or for any garden party—no matter what the theme. Here are the details.
Beverages:
You have to serve tea at a tea party, so I made rosehip tea and sweetened it just a bit with dried stevia leaves from my garden. I served this tea both warm and cold. I also made lemon balm water for those who prefer to drink water. I made edible flower ice cubes, too—a long-time favorite here at Chez Rea.
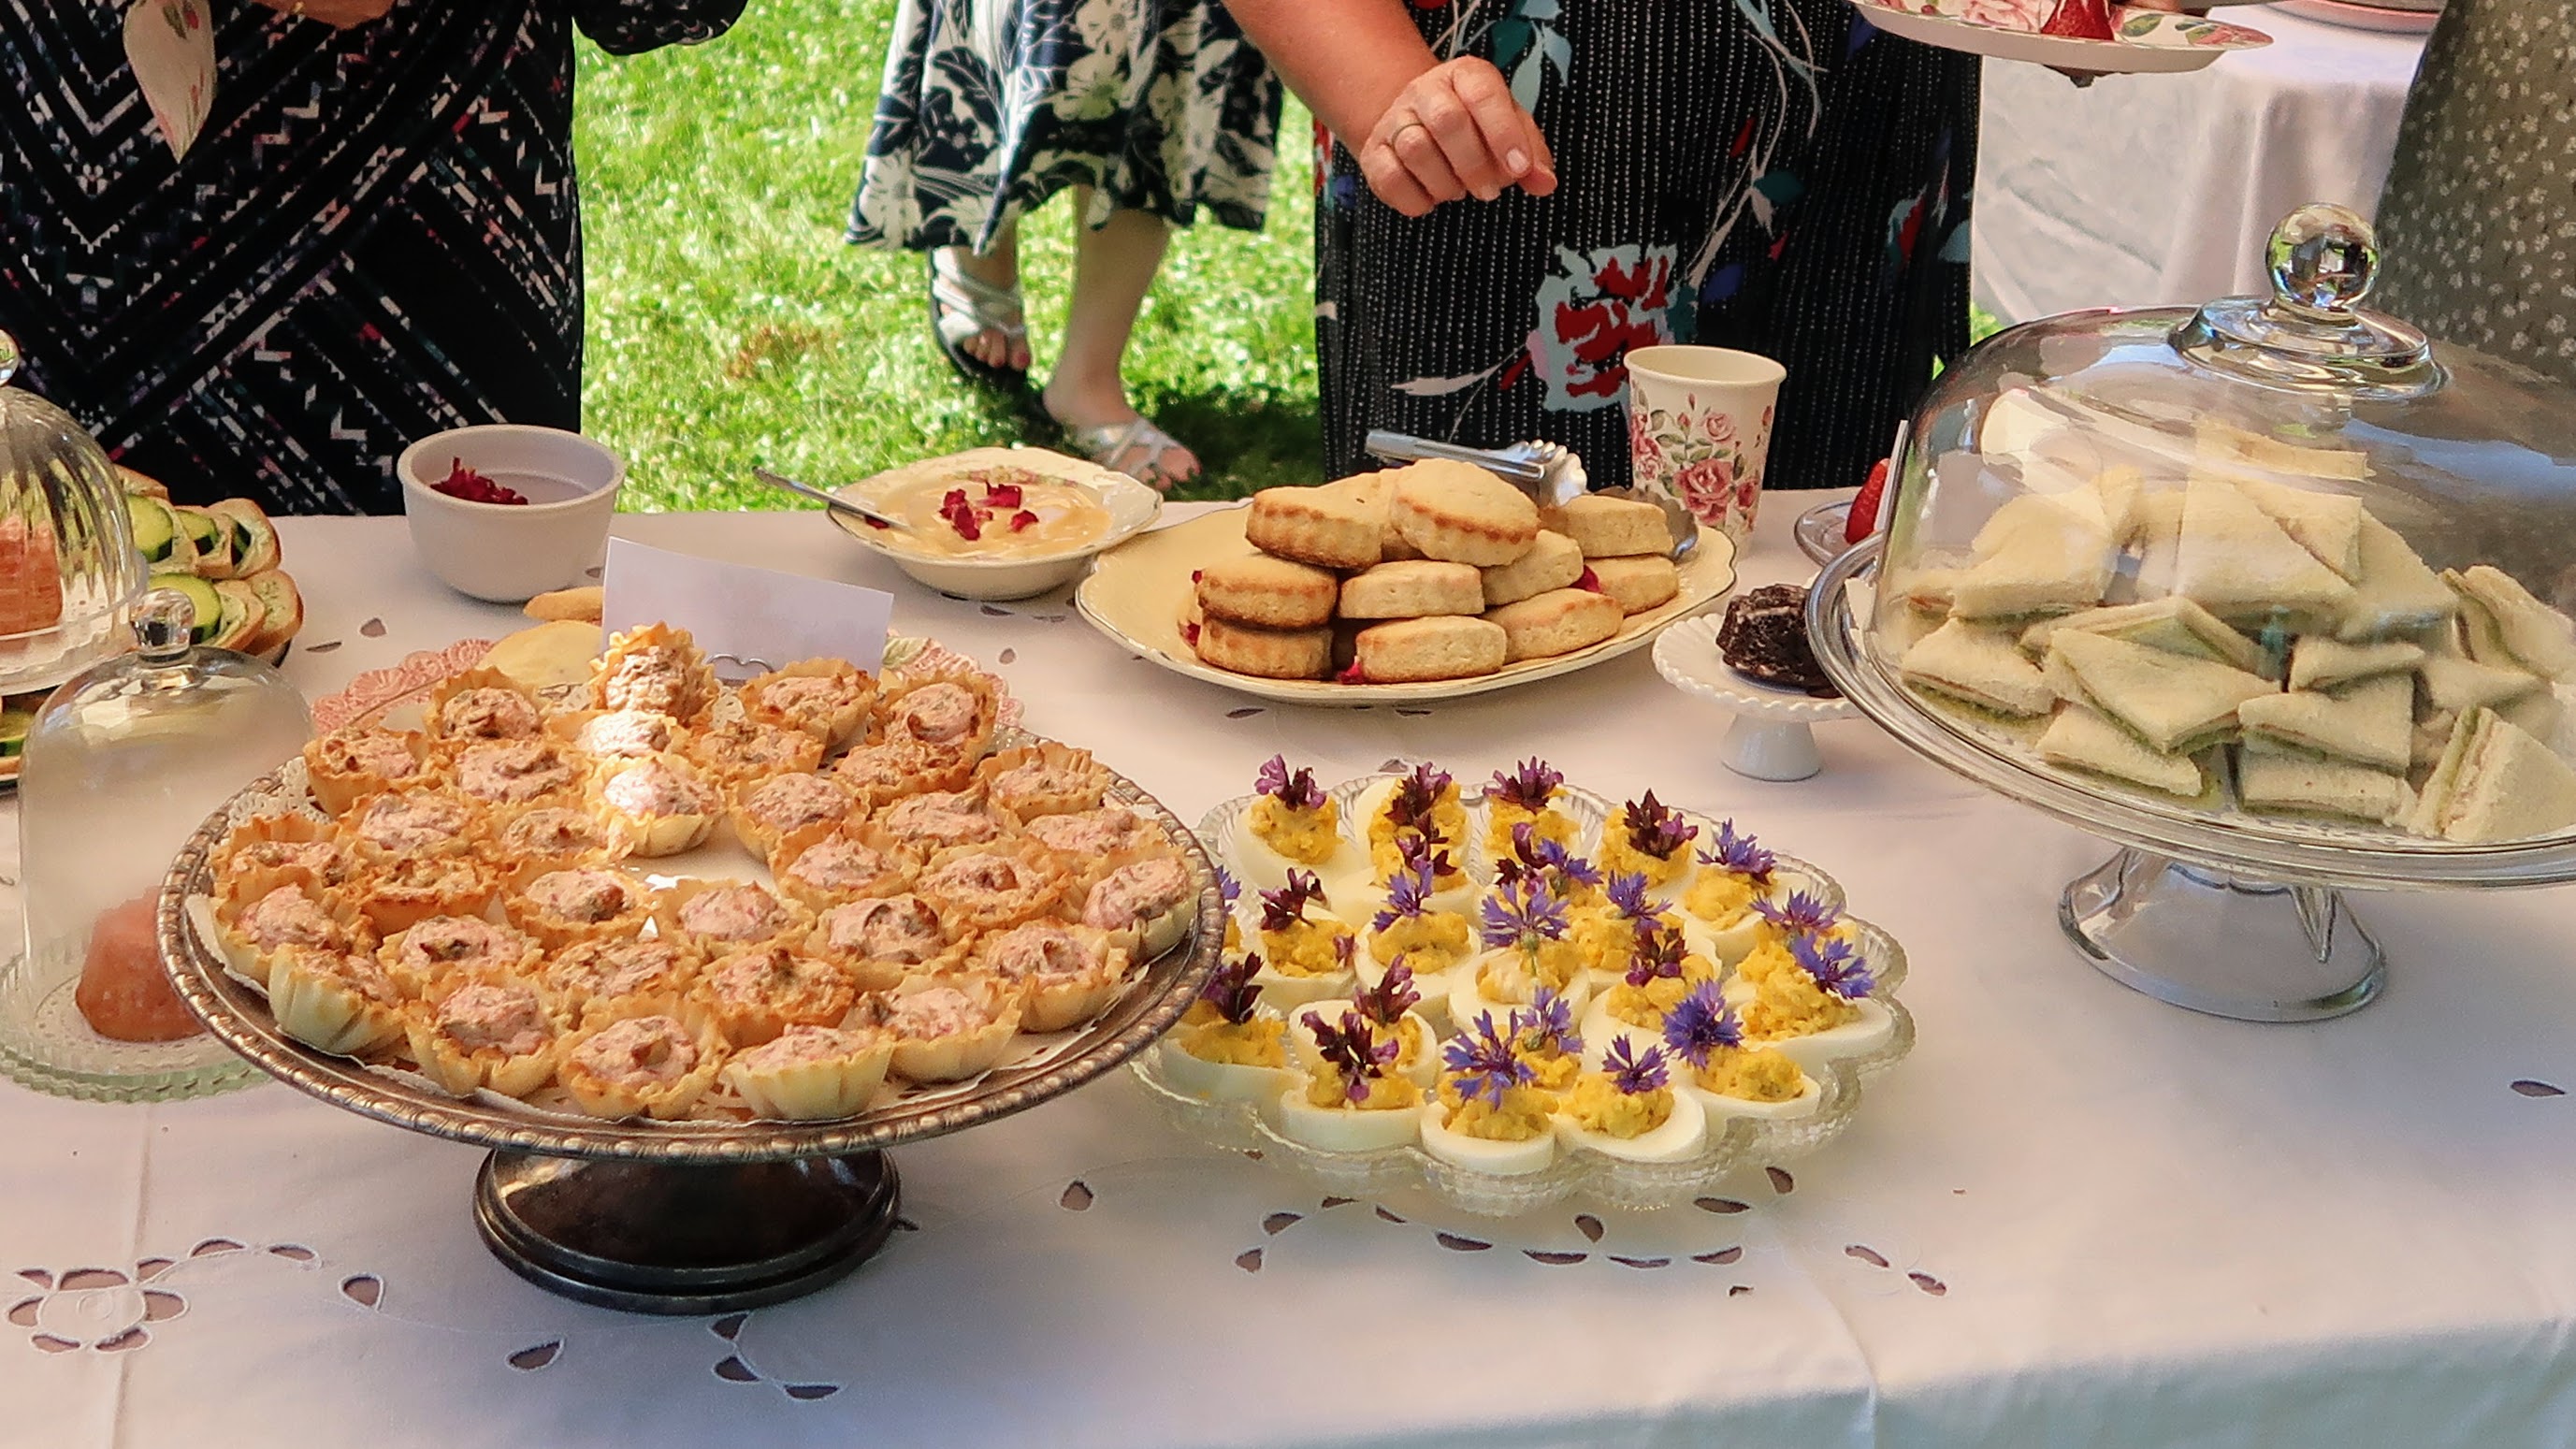
Savories:
Some of the savories served
Amaranth & Artichoke Tarts – I substituted fresh amaranth greens for frozen spinach in a spinach and artichoke recipe. Amaranth is easier to grow than spinach, and it looks prettier because it turns the filling pink.
Deviled Eggs – My mother-in-law made these, and we topped them with sage blossoms and Bachelor’s Buttons from my garden.
Garlic Scape Pesto & Chicken Tea Sandwiches – June is also garlic scape season, so I used my Great Scape Pesto to make tea sandwiches. I simply spread the pesto on white bread, added chicken deli meat, and then cut the sandwiches into triangles.
Cucumber Sandwiches – These were made with my favorite herb spread, “Chives and Dill.” If you’ve ever been to one of my herb talks, you’ve seen me demonstrate how to make that. Just use a food processor to blend cream cheese, chives, and dill. I also added mayonnaise to make it easier to spread on the bread.
Sweets:
Rose Cupcake Variations – I put crystalized rose petals on top of cherry chip mini-cupcakes iced with rosewater glaze. I also made rose swirls with buttercream icing on all of the chocolate mini-cupcakes and some of the cherry chip ones. And since I had a few rose shaped cupcake molds, I made some with both kinds of batter, cherry chip and chocolate, and coated them with rosewater glaze. These were displayed on small pedestals.
Rose Cream Scones – I followed a recipe from Tea Time Magazine and served these scones with Ambrosia Devon Custard. Before serving, I sprinkled both the scones and custard with dried rose petals.
Apple Roses – Our friend Holly brought lovely and tasty rose-shaped pies that she and her daughter had made.
Rose Butter Cookies – To make these, I added dried rose petals and a little rosewater to my favorite butter cookie recipe.
Strawberry Blossoms – Strawberries filled with a sweet cream mixture were made by our niece Dani with help from her little girl Alice.
Clockwise from top left: Rose Cream Scones, Apple Roses, Rose Butter Cookies, and Strawberry Blossoms
As delightful as this bridal shower was, the wedding was even better! Even though the couple’s plans had to be altered due to a worldwide pandemic, our family is thankful that God allowed our son Roscoe to marry his beloved Emily on July 18, 2020. Their wedding was beautiful, the bride was gorgeous, and the groom was so happy he cried.
I hope that the ideas I’ve shared here will help you to enjoy some social events this summer—big or small, indoors or out. Please share this post, and drop a line in the reply section below to let me know of you make any of these treats.
I may earn commissions for purchases made through any Amazon links in this post. See disclosure here.
Annabelle Hydrangeas in my “Shakespeare Street Garden” – 7/4/20
Annabelle hydrangeas are, in my opinion, the easiest kind of hydrangea to grow. They thrive in part shade, and they bloom reliably and beautifully all summer long. On their own, the flowers change from white to green. There’s no temptation for me, as there is with some hydrangeas, to try to change the pH of my soil in order to make them produce blue blooms rather than pink ones.
Pruning Hydrangeas
Pruning Annabell Hydrangeas
Annabelles are smooth hydrangeas, which bloom on new wood. That makes them very easy to prune: just cut down all of the old wood stems. I like to leave the dried flowers and stems up for winter interest. Then in early spring I cut them all down, as you can see in this recent video: Pruning Annabelle Hydrangeas.
You don’t even have to prune Annabelle hydrangeas at all if you don’t want to. If the plant is young and you want it to grow bigger, just remove the faded flowers. Mine are already well established, so I like to prune them hard in early spring. The new stems grow up thicker and the flowers that they produce are bigger. That’s why it’s important to have supports in place before these plants fill out. But if I don’t prune them for a year or two, it’s no biggie. The flowers will be smaller, but they are still plentiful and beautiful.
Blast from the Past
It’s an easy and satisfying garden task—so much so that I’ve posted videos about it twice before. One the earliest videos I ever posted, #10 in my series of Plant Tales, was also about pruning Annabelle hydrangeas. I feel pretty proud of myself whenever I get the early spring pruning done. Just a couple of years ago I posted a few more pictures in this short video of my Spring Prep.
Making Flower Arrangements
Because they bloom so generously, Annabelles make great cut flowers, too. I never feel bad about cutting a bunch to make a large bouquet. And a single flower on its own makes a nice display. I make arrangements using these big white blooms with cobalt blue vases and U.S. flags when I host our family’s 4th of July party every year.
My Annabelle hydrangeas have spread quite a bit over the years, so next I need to separate and dig some out. Then I can plant them elsewhere or give them away to someone else’s garden. Wouldn’t a gift of a hydrangea like this make you happy?
Annabelle Hydrangeas in my “Shakespeare Street Garden” – 6/21/21
I may earn commissions for purchases made through any Amazon links in this post. See disclosure here.
We got the big snow that we usually get at the beginning of February. But it feels nice and cozy inside because of the smells wafting from my slow cooker. Chili isn’t on today’s menu because I made some just a week and a half ago when it was super cold. I just realized, however, that I haven’t shared my chili recipe here even thought I posted my White Chicken Chili recipe a few months ago. So I’m going to take care of that right now. Chili is good at any time of year, of course, but I especially like to cook and eat it when it’s chilly outside.
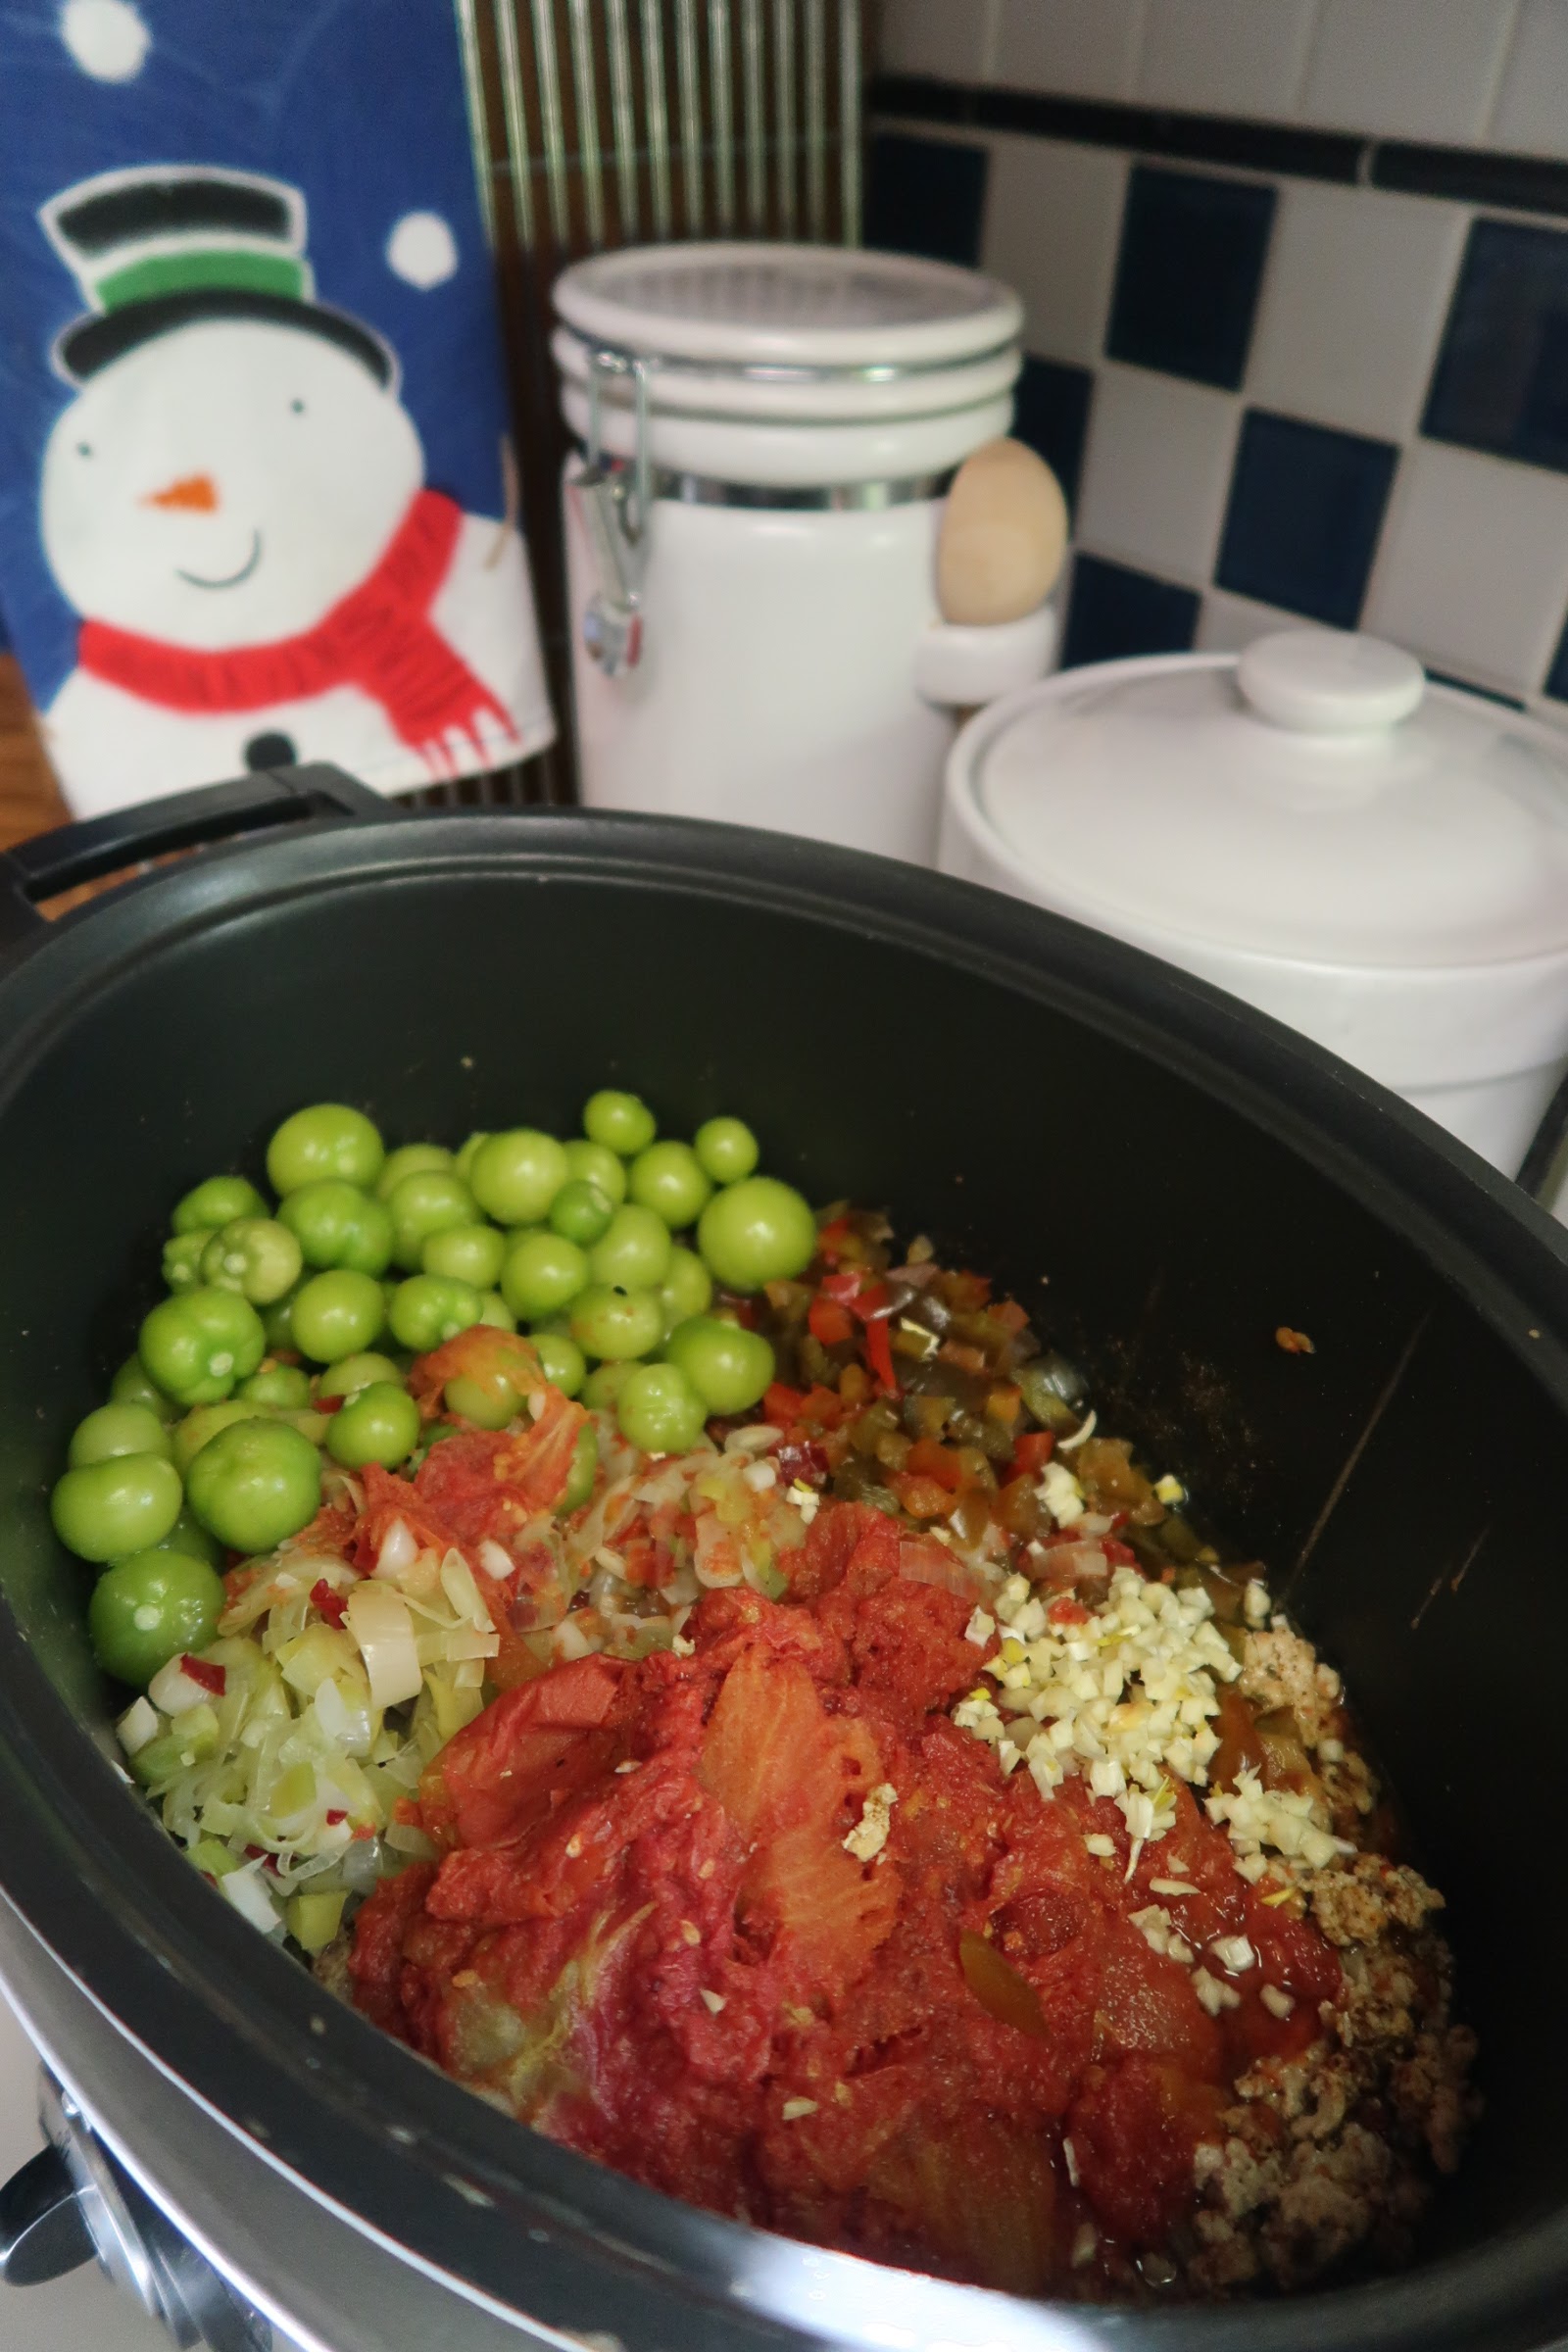
Gathering Garden Ingredients for Chili
Chili is also a great way to use the garden vegetables that I froze. However, my chili recipe did not start out as a way to use garden vegetables. I’ve adapted it from the recipe that originally came with my first slow cooker over 25 years ago. I’m actually a recipe tinkerer, not a recipe developer! Almost from the beginning, I substituted ground turkey for the ground beef, dried pinto beans for the canned kidney beans, and a salt-free herb blend for the salt. Later as a beginning gardener, I realized that chili is a great way to use the end-of-season tomatoes that were ripened indoors and then frozen whole. Those tomatoes don’t taste as good as the ones ripened outdoors, but they’re still homegrown organic tomatoes. The spices in the chili kick up their flavor. Since I grow more things in my garden now, I use my homegrown tomatillos, peppers, onions, and garlic, too, whenever possible. You could make adaptations like mine with your own favorite chili recipe if you get any of the ingredients from a garden, farmers market, or CSA.
Before Adding Beans
If you have to buy tomatoes from a supermarket, then I recommend that you get canned ones, diced or whole. Those will be tastier than anything in the fresh produce department. I also recommend that they be organic. I also recommend choosing organically grown bell peppers, hot peppers, and anything else on the Environmental Working Group’s annual “Dirty Dozen” list.
I don’t grow beans for drying, but if I did, I would also use them in this chili. I prefer the firmer texture of dried beans that are slow cooked. If you like your beans softer, then use canned beans. Another option for softer beans is to pressure cook dried beans.
Optional garden additions: If I have tomatillos and jalapeños or other hot peppers from my garden, I add them, too. I don’t grow squash, but I know that some people add squash puree to their chili. You can use whatever you like! If you don’t have a freezer full of garden goodies, you can still make this recipe with store bought ingredients.
DIRECTIONS:
*The night before: Sort and rinse the beans, and then leave them in a large bowl of water to soak overnight. Drain the beans before you add them to the chili. (*You can skip this step if using canned beans or if you’re going to pressure cook the chili.)
Preheat a pan on the stovetop. Add ground meat and brown. Drain the liquid, and add the browned meat to the slow cooker pot.
NOTE: If your slow cooker is like the Sear & Cook (my favorite) and has a nonstick aluminum pot that can be used on the stovetop, you will not need to use another pan to brown the meat on the stovetop. If using an Instant Pot or other multi-cooker, you may use its sauté setting to brown the meat right in its pot and then use its slow cooker function to cook the chili.
Add everything else to the browned meat in the slow cooker pot and stir to combine. Cover and slow cook on LOW for 7 to 10 hours. Keep warm for serving.
I usually serve this chili with cornbread. You can top it, if desired, with cheese, avocado, or sour cream.
Slow Cooked Garden Chili
I hope this chili will warm you up this winter! Let me know if you make it and like it.
I may earn commissions for purchases made through any Amazon links in this post. See disclosure here.
I’m not going to any actual seed swaps today as there have not been any near me since the pandemic started. Instead I’m just taking stock of my current seed stash. How’s yours? Let me know if you want to do a mail swap.
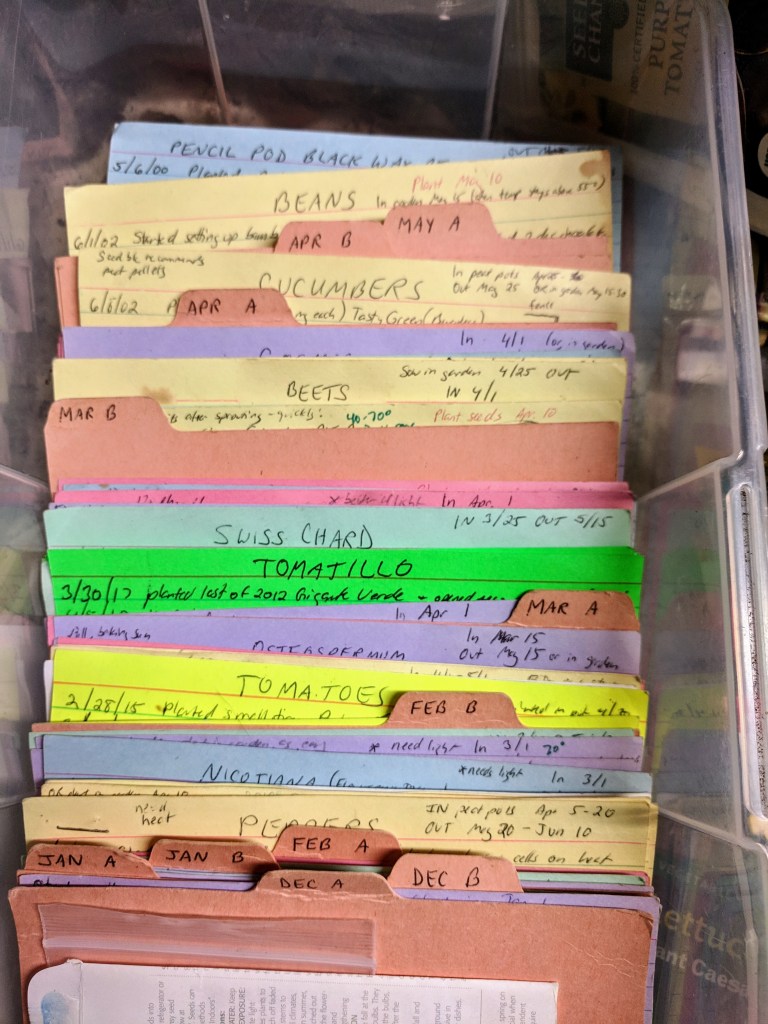
My Seed Stash 2019
I still need to reorganize my seeds. I like to organize them according to the dates that I will be using them. I keep notes on 4″ x 6″ cards about each variety, and I file these with the seed packets behind them. In the past I used dividers to divide each month into two sections, and this is the system that I still use for seeds that I want to start indoors. Last year I set up a separate box for the seeds that I want to winter sow and direct sow. This method makes it easier for me to stay on track. Whenever I have some time for seed starting or winter sowing, I know where to find the seeds that should be sown that week or month
My beautifully organized seeds are always a big mess by the end of summer. I should have reorganized them by now, but I was busy working on a big paper for grad school. However, I couldn’t resist the Menard’s 15%-off sale earlier this month, and I bought far too many seeds. Plus, as a garden communicator, I’ve received free seeds from Botanical Interests, All-America Selections, and Renee’s Garden—what a blessing! I look forward to sharing how their seeds perform in my garden.
Once I get all of my seeds organized, I will be ready to start using them. I cut way back on indoor seed starting the last two years, and I increased my winter sowing. I am, however, planning to do a little more more indoor seed starting this year—but not as much as back in the days when I would sell off my extra seedlings. I’m still in grad school, and I have to set some limits. In fact, I need to be careful about not planning to plant too much this year. Instead of taking off the spring quarter from school like I did last year, I have registered for an international immersion course which will include a trip to Amsterdam. That means I will have much less time for tending my garden and for garden writing. But you’ll probably see a post or two about gardens in Amsterdam!
I’m still recovering from my last class, a domestic immersion course that involved a trip to Philadelphia. Just last week I turned in the final project, which included a 45-page paper about transformational ministry and community gardening in Joliet. So National Seed Swap Day has snuck up on me. It’s a good reminder, though, to organize my seeds ASAP. I need to make the best use of the time left before my Amsterdam class starts.
“Anyone who thinks that gardening begins in the spring and ends in the fall is missing the best part of the whole year; for gardening begins in January with the dream.”
Josephine Neuse
How are your gardening plans going this month?
I may earn commissions for purchases made through any Amazon links in this post. See disclosure here.
I’ve emailed this greeting to my newsletter subscribers. If you don’t see it in your inbox, please check your Promotions tab and/or your spam folder. (And be sure to add Debbie@thegardenerwife to your contacts list so you don’t miss any more emails from me.) If you still don’t see it, then I hope you’ll sign up for my newsletter here.
The Gardener Wife Newsletter
Hi folks!
I wish all of you, my dear newsletter readers, a very Merry Christmas! May your whole holiday season be filled with love, joy, and peace.
Gathering for the Holidays — love My family is still not gathering in the numbers that we used to before the pandemic. We are not under lockdowns this year, but due to having COVID or being exposed to someone who had it, some folks still cannot travel or visit. But I’m grateful that we have vaccines now and that many of us are able to meet in person and go to church, concerts, and other events again. While it’s wonderful to get together with those I love, I’m still assured of God’s love even when we can’t do that. “For I am sure that neither death nor life, nor angels nor rulers, nor things present nor things to come, nor powers, nor height nor depth, nor anything else in all creation, will be able to separate us from the love of God in Christ Jesus our Lord” (Rom. 8:38-39 ESV). Christmas is a time to remember how God showed his love for us by giving us Immanuel, born to die for us.
Preparing for the Holidays — joy
Having the gift of God’s Son and his love, I can have joy during good times and bad, whether my garden produces successful harvests or not. During this holiday season, I’ve enjoyed preparing our home, indoors and out, for our festivities. I was joyful even when working by myself on these holiday tasks. I’ve been practicing video editing, so I put together several short videos as I worked. It was fun to share these videos on social media, and here I’m sharing my garden-style holiday decorating with you.
Coming soon to my YouTube channel: Snowman Collection Display Holiday House Tour
I hope these videos inspire you to find more joy than stress in your own holiday preparations.
Looking to the Future — peace
I thank each of you for subscribing to my newsletter and welcoming me into your email inbox. I’m especially grateful that you’ve stuck with me even though I sent out only four newsletters this year. I’ve slowed down—as I had predicted I would in my January newsletter—because I’m in grad school now, working on a doctorate degree. My studies will continue in the coming year, so you still won’t get regular emails from me. However, you are welcome to subscribe to my blog, where I post shorter updates, and/or to follow me on social media if you like. And don’t hesitate to contact me if you have any questions or comments to share with me. Please let me know if you have any suggestions for making my newsletters even better when I do get back to writing more.
To subscribe to my blog, click on the “Follow The Gardener Wife” button at the bottom of any page on my website, www.thegardenerwife.com.
The above example shows what you’ll see at the bottom of any page on my website. Scroll downward and click there, not here.
This is a time of uncertainty for me in many ways. I’m concerned about keeping up with my studies as I care for my family, home, and garden, and I’m concerned about what to do after I graduate. This is also a time of great anxiety and unrest in the world. While it’s tempting to work quietly in my garden and just feed my family, I know that God desires more for his people. That’s why I’m learning about global and urban ministry and why I hope to continue writing and speaking—about caring for people and souls as well as about caring for gardens and plants—after I finish this degree. We can have God’s peace even during the most difficult times.
May God bless you and your loved ones with successful gardens and with the peace that the angels announced to the shepherds long ago. “Glory to God in the highest,and on earth peace among those with whom he is pleased!” (Luke 2:14 ESV).
I made it to the Philadelphia Flower Show for the first time in 2019.
Debbie Rea and Tovah Martin 2019
It is reputed to be the best in the country, and I loved it. I posted a live video of my first impression there, and later I made a video of the highlights from that show. I took about 600 photos, so there was a lot more going on. There were, however, some things that I’ve enjoyed at the Chicago Flower and Garden Show which I missed at the Philly show—cooking demonstrations by local chefs, tablescapes by local florists, and extra garden talks in seminar rooms in addition to the stages on the showroom floor. At one of those showroom stage talks, I got to meet author Tovah Martin. She spoke about “Indestructible Houseplants,” which is the topic of one of her many books. I’ve enjoyed her writing about plants and gardening ever since the early days of my favorite magazine, Victoria. She has a new book out this year, The Garden in Every Sense and Season, about ENJOYing the garden—one of my main themes here on this blog and in my newsletter.
I loved these arches in the raised beds of a display at the Philadelphia Garden Show 2019.
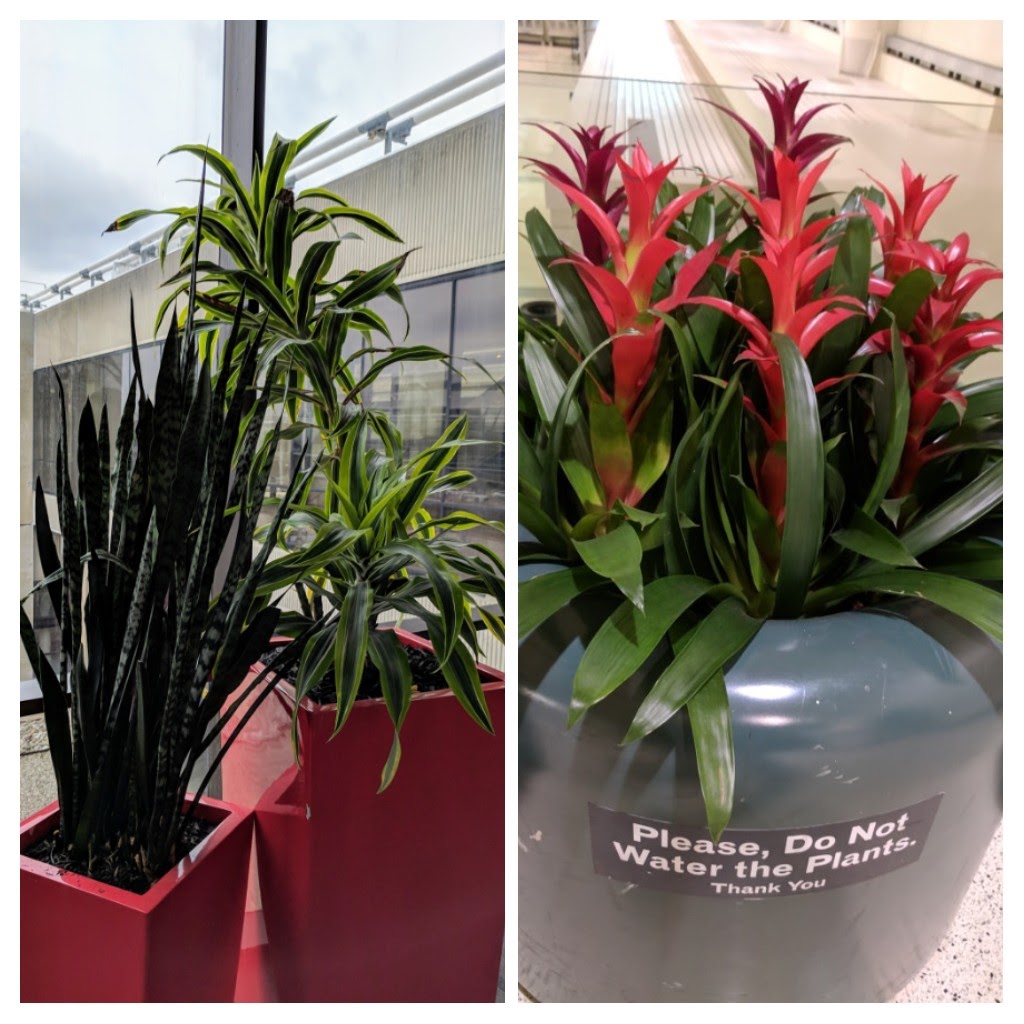
Speaking of indestructible houseplants, I was amused by the signs I saw on the plant containers at Midway airport when we flew to Philadelphia: “Please, Do Not Water the Plants. Thank You.” It’s true, as I’ve pointed out when giving houseplant care tips in my newsletter, that houseplants are more likely to die from overwatering than from under watering.
Philadelphia airport plants on the left & Midway airport plants on the right
Little did I know that the Philadelphia Garden Show would be cancelled the following year, 2020, due to the coronavirus pandemic. But this year, 2021, the show went on. It was held outdoors, and so it was postponed a little so the weather would be better. I would like to have seen that show because my experience at the only outdoor garden show done in Chicago, about ten years ago, was wonderful. I thought it was much better than the indoor Chicago Flower and Garden Show.
I did, however, go to Philadelphia in October as part of a grad school class that my husband and I are taking at Bakke Graduate University. During our urban immersion class, we got to see a completely different side of the city of Philadelphia than we had seen when we had come for the Philadelphia Flower Show two years ago. I spotted several nice urban gardens as we walked around various neighborhoods. And since we had Saturday afternoon off, my husband and I found a public garden to visit. I will save the details of this trip for another blog post.
Do you have a good garden show near you? Have you traveled to any garden shows? Please share in the comments below.
I may earn commissions for purchases made through any Amazon links in this post. See disclosure here.
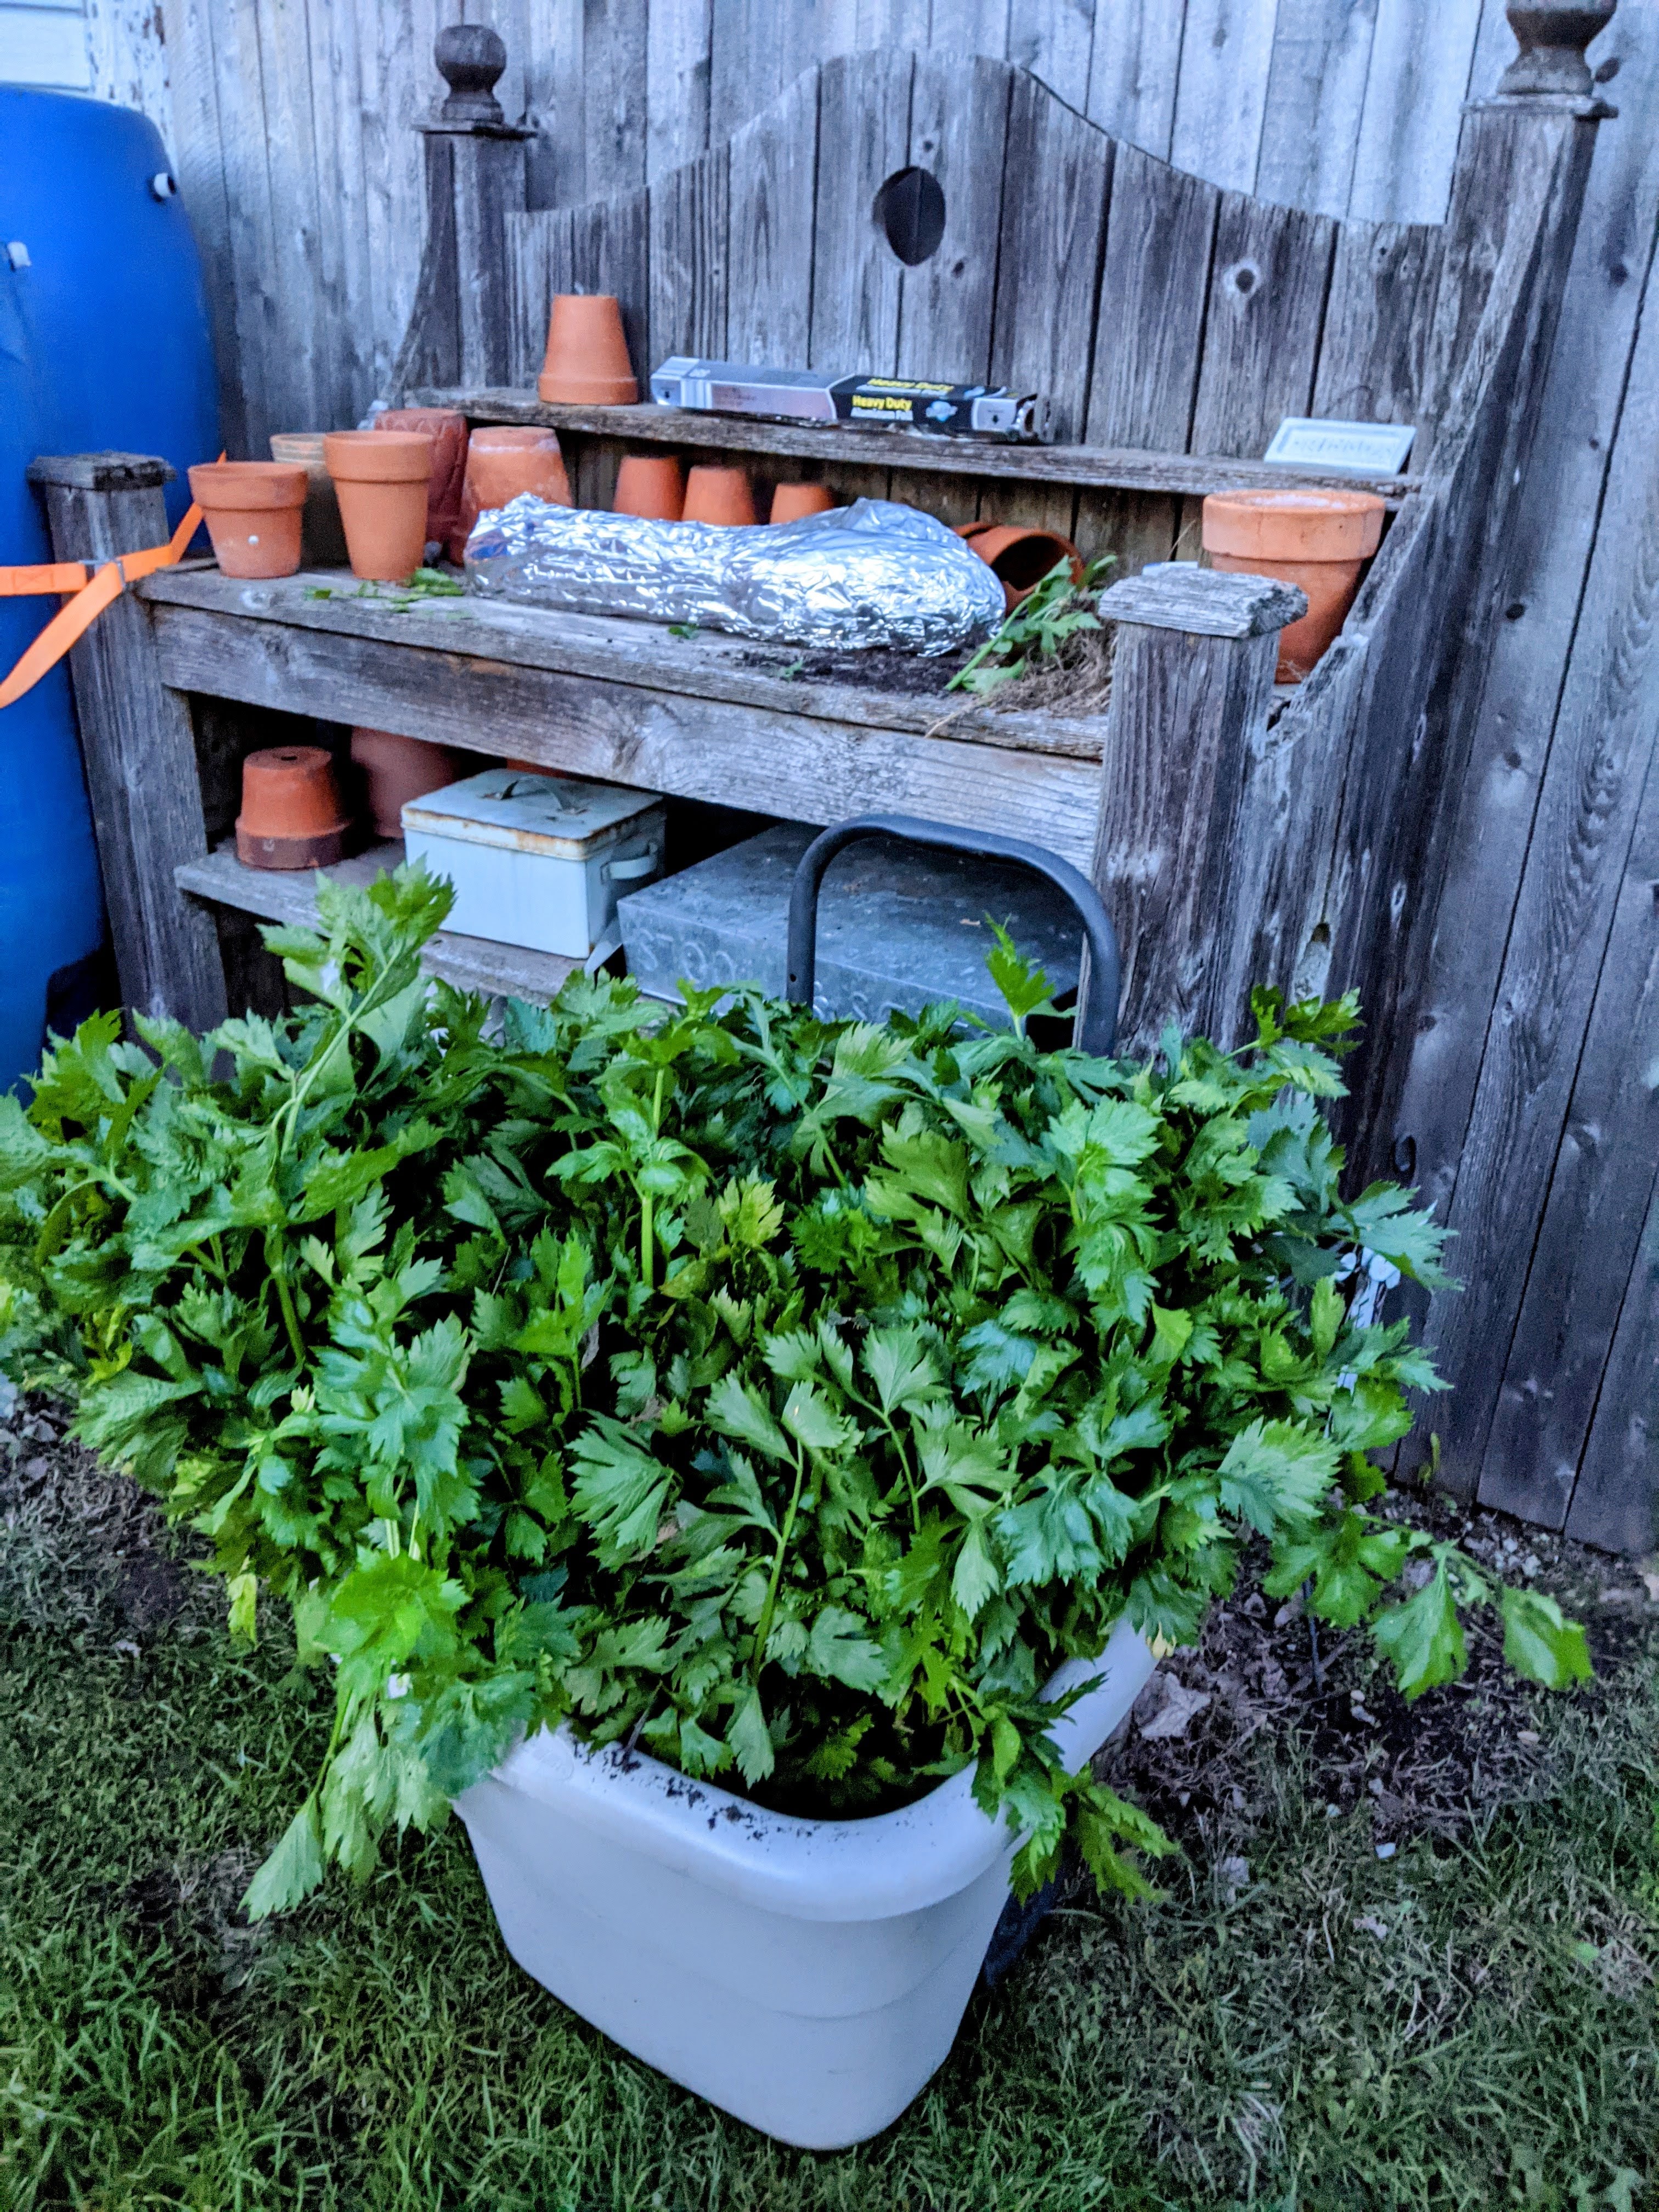
This year’s celery harvest was a success! After a few light frost alerts and before our first hard freeze, I pulled up all of the remaining plants. The trick now is to use or preserve them all. (Note to self: start using more celery earlier in the season.) I prepped and stored a lot of it in our basement fridge. Then I began cooking with it and dehydrating some to use later.
I highly recommend growing your own celery, if possible, because its flavor—like that of tomatoes—is so much better than the store-bought kind. One first time grower said this: “Stalks were small, but the flavor was so full and multifaceted compared to store-bought celery that it was totally worth growing anyway. It smelled amazing, too.”
Another reason to grow your own celery is that conventionally grown celery is relatively high in pesticide residues, even after it has been washed. It is usually on the Environmental Working Group’s annual “Dirty Dozen” list. So if I have to buy it, I prefer to get organic celery, which costs more. Thus, growing my own celery saves me money. Growing celery increases my salary!
Increase in Celery = Increase in Salary
The Gardener Wife
Celery Harvest
Celery Storage Tips
Whether you grow your own celery or not, these tips should be helpful to you.
For quick use: Wash, cut up, and store celery in refrigerator boxes designed for fresh produce. Mine are made by Tupperware, but you can find similar ones for less.
For short term storage: Wrap the entire head of celery tightly in aluminum foil. I cut off most of the leaves from my larger plants, if necessary, to make them easier to store, but you don’t have to. You can cut any yellowed leaves away later when you use the celery. Foil wrapped celery, stored in a refrigerator, will last for several weeks—or even longer as I’ve shown in this video.
For long term freezer storage: Wash and slice the celery. Measure it out into one-cup or half-cup portions, and put into small plastic bags. I use fold-over sandwich bags. Put these bags, loosely twisted shut, into a large vacuum sealer bag and vacuum seal them. Store in the freezer. You can toss the frozen celery directly into soups, stews, and slow cooker recipes, or you could thaw it a bit for use in any hot dishes.
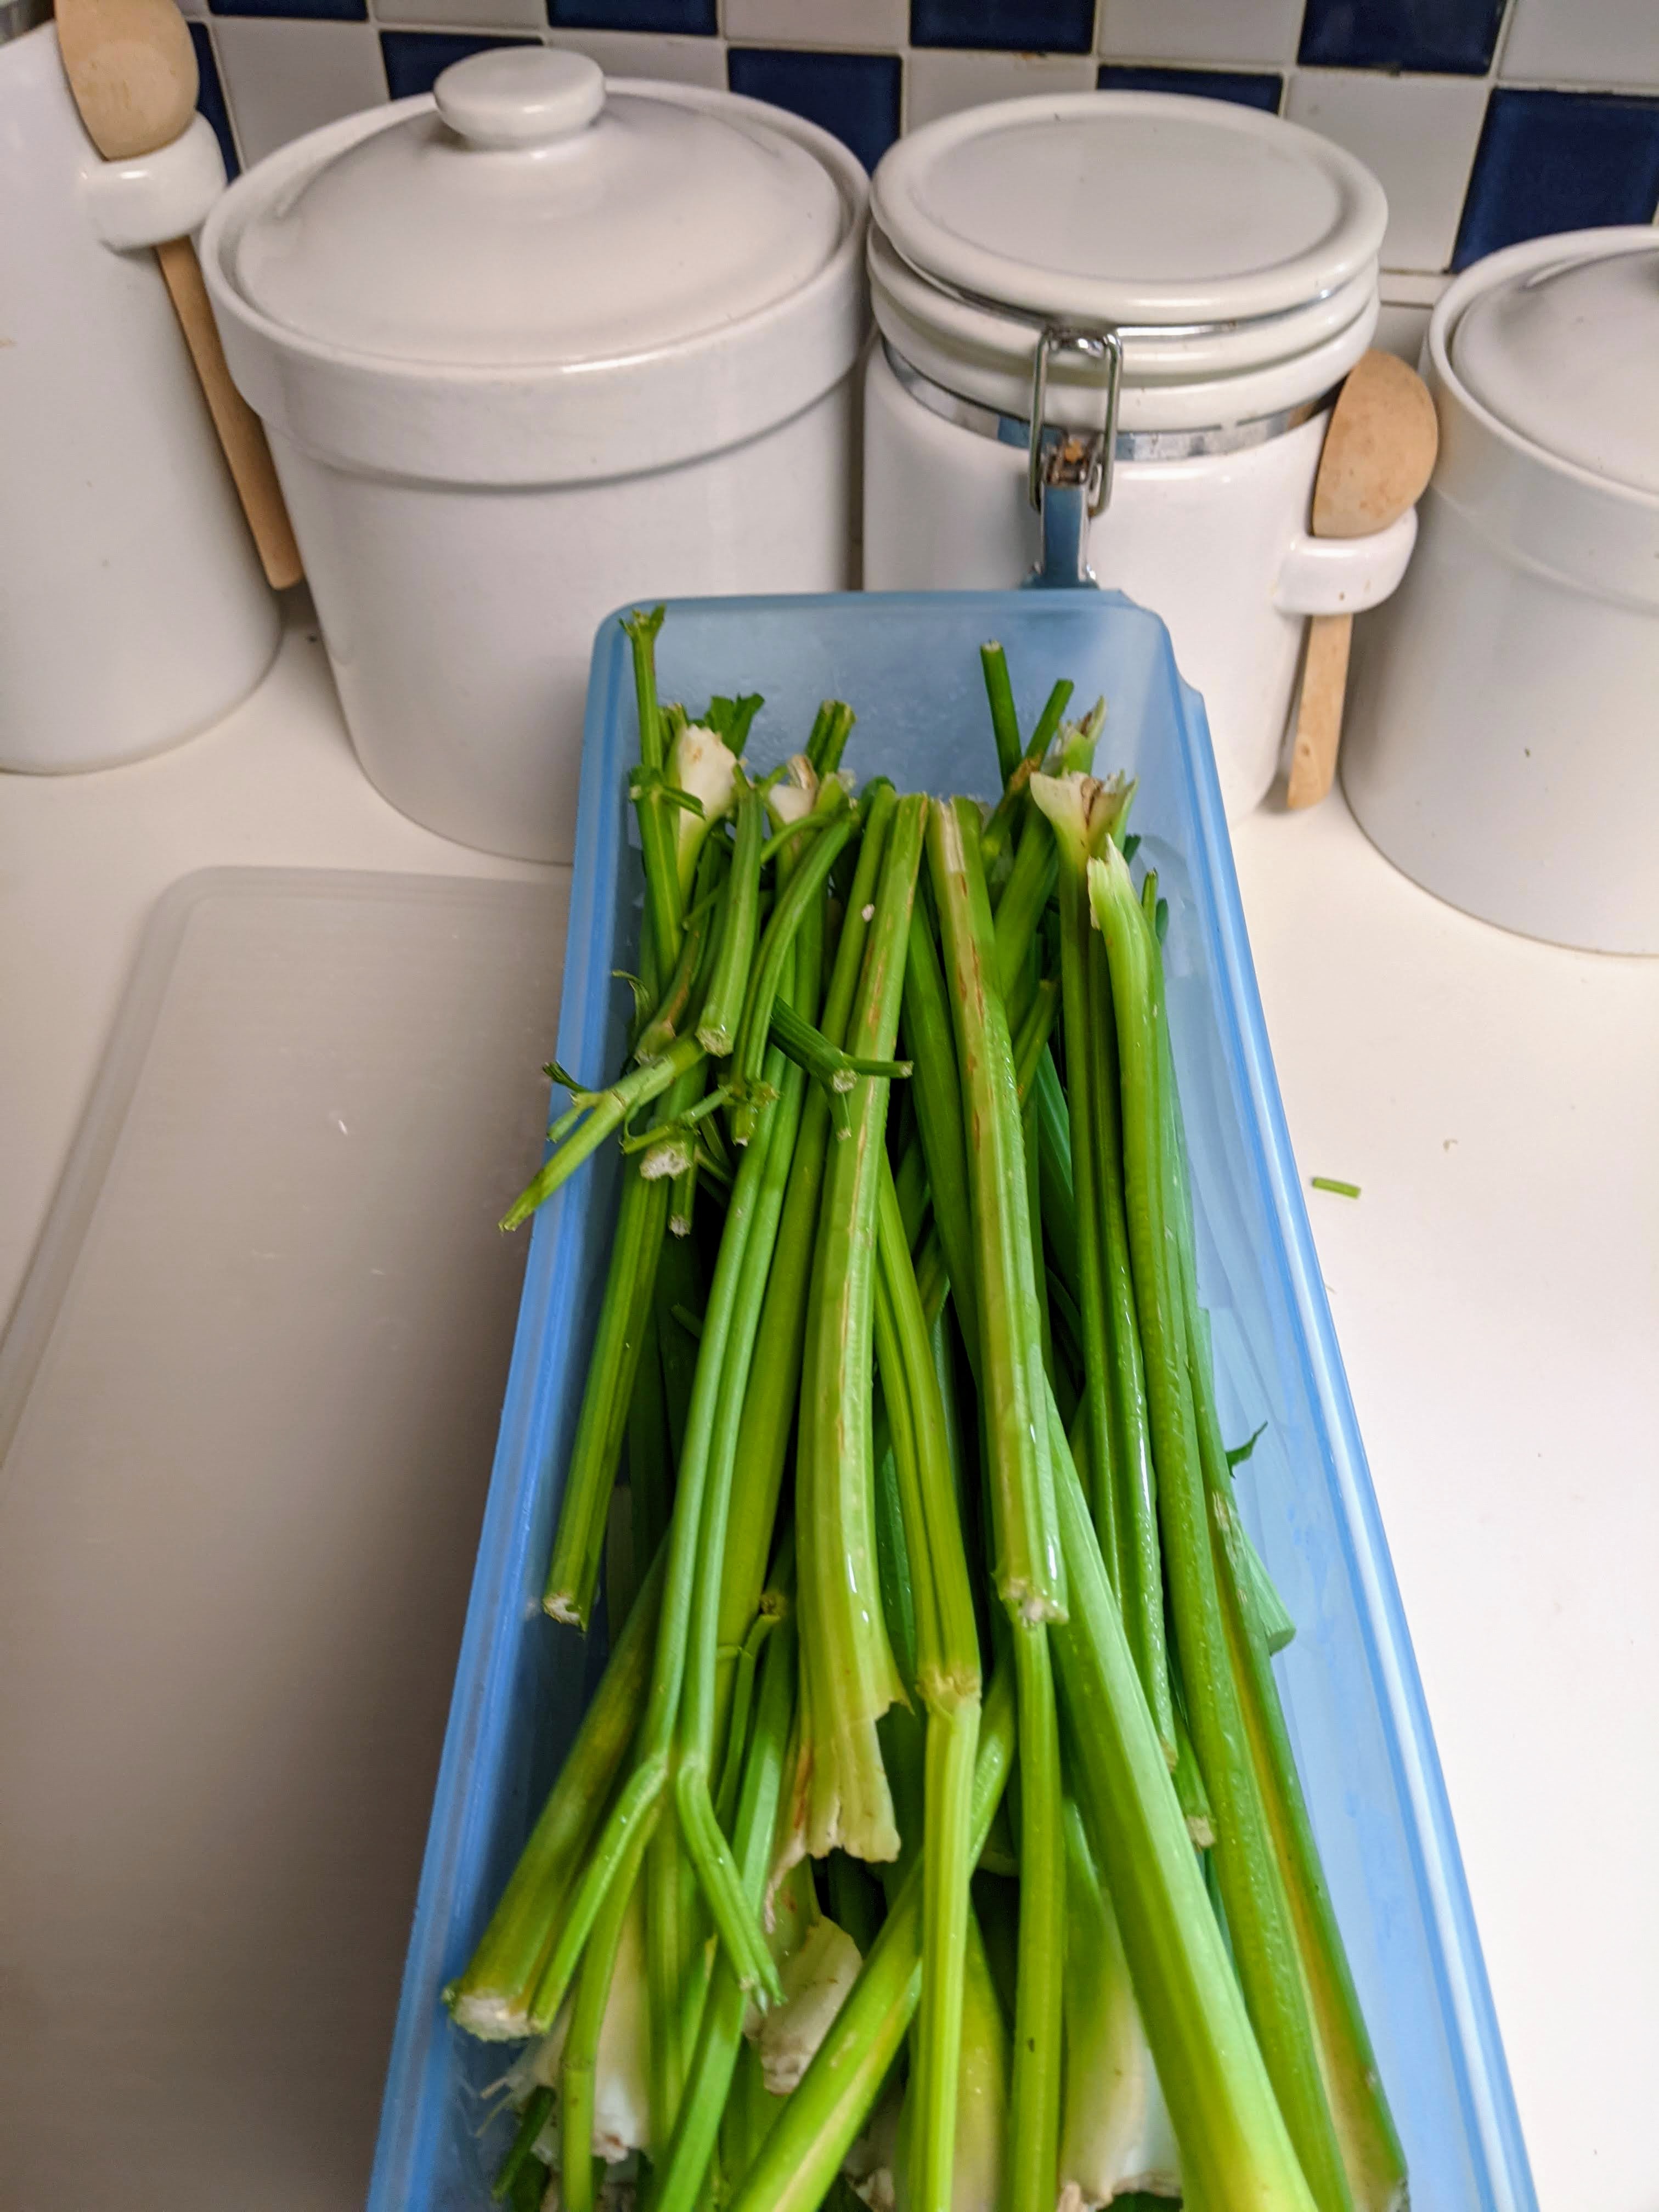
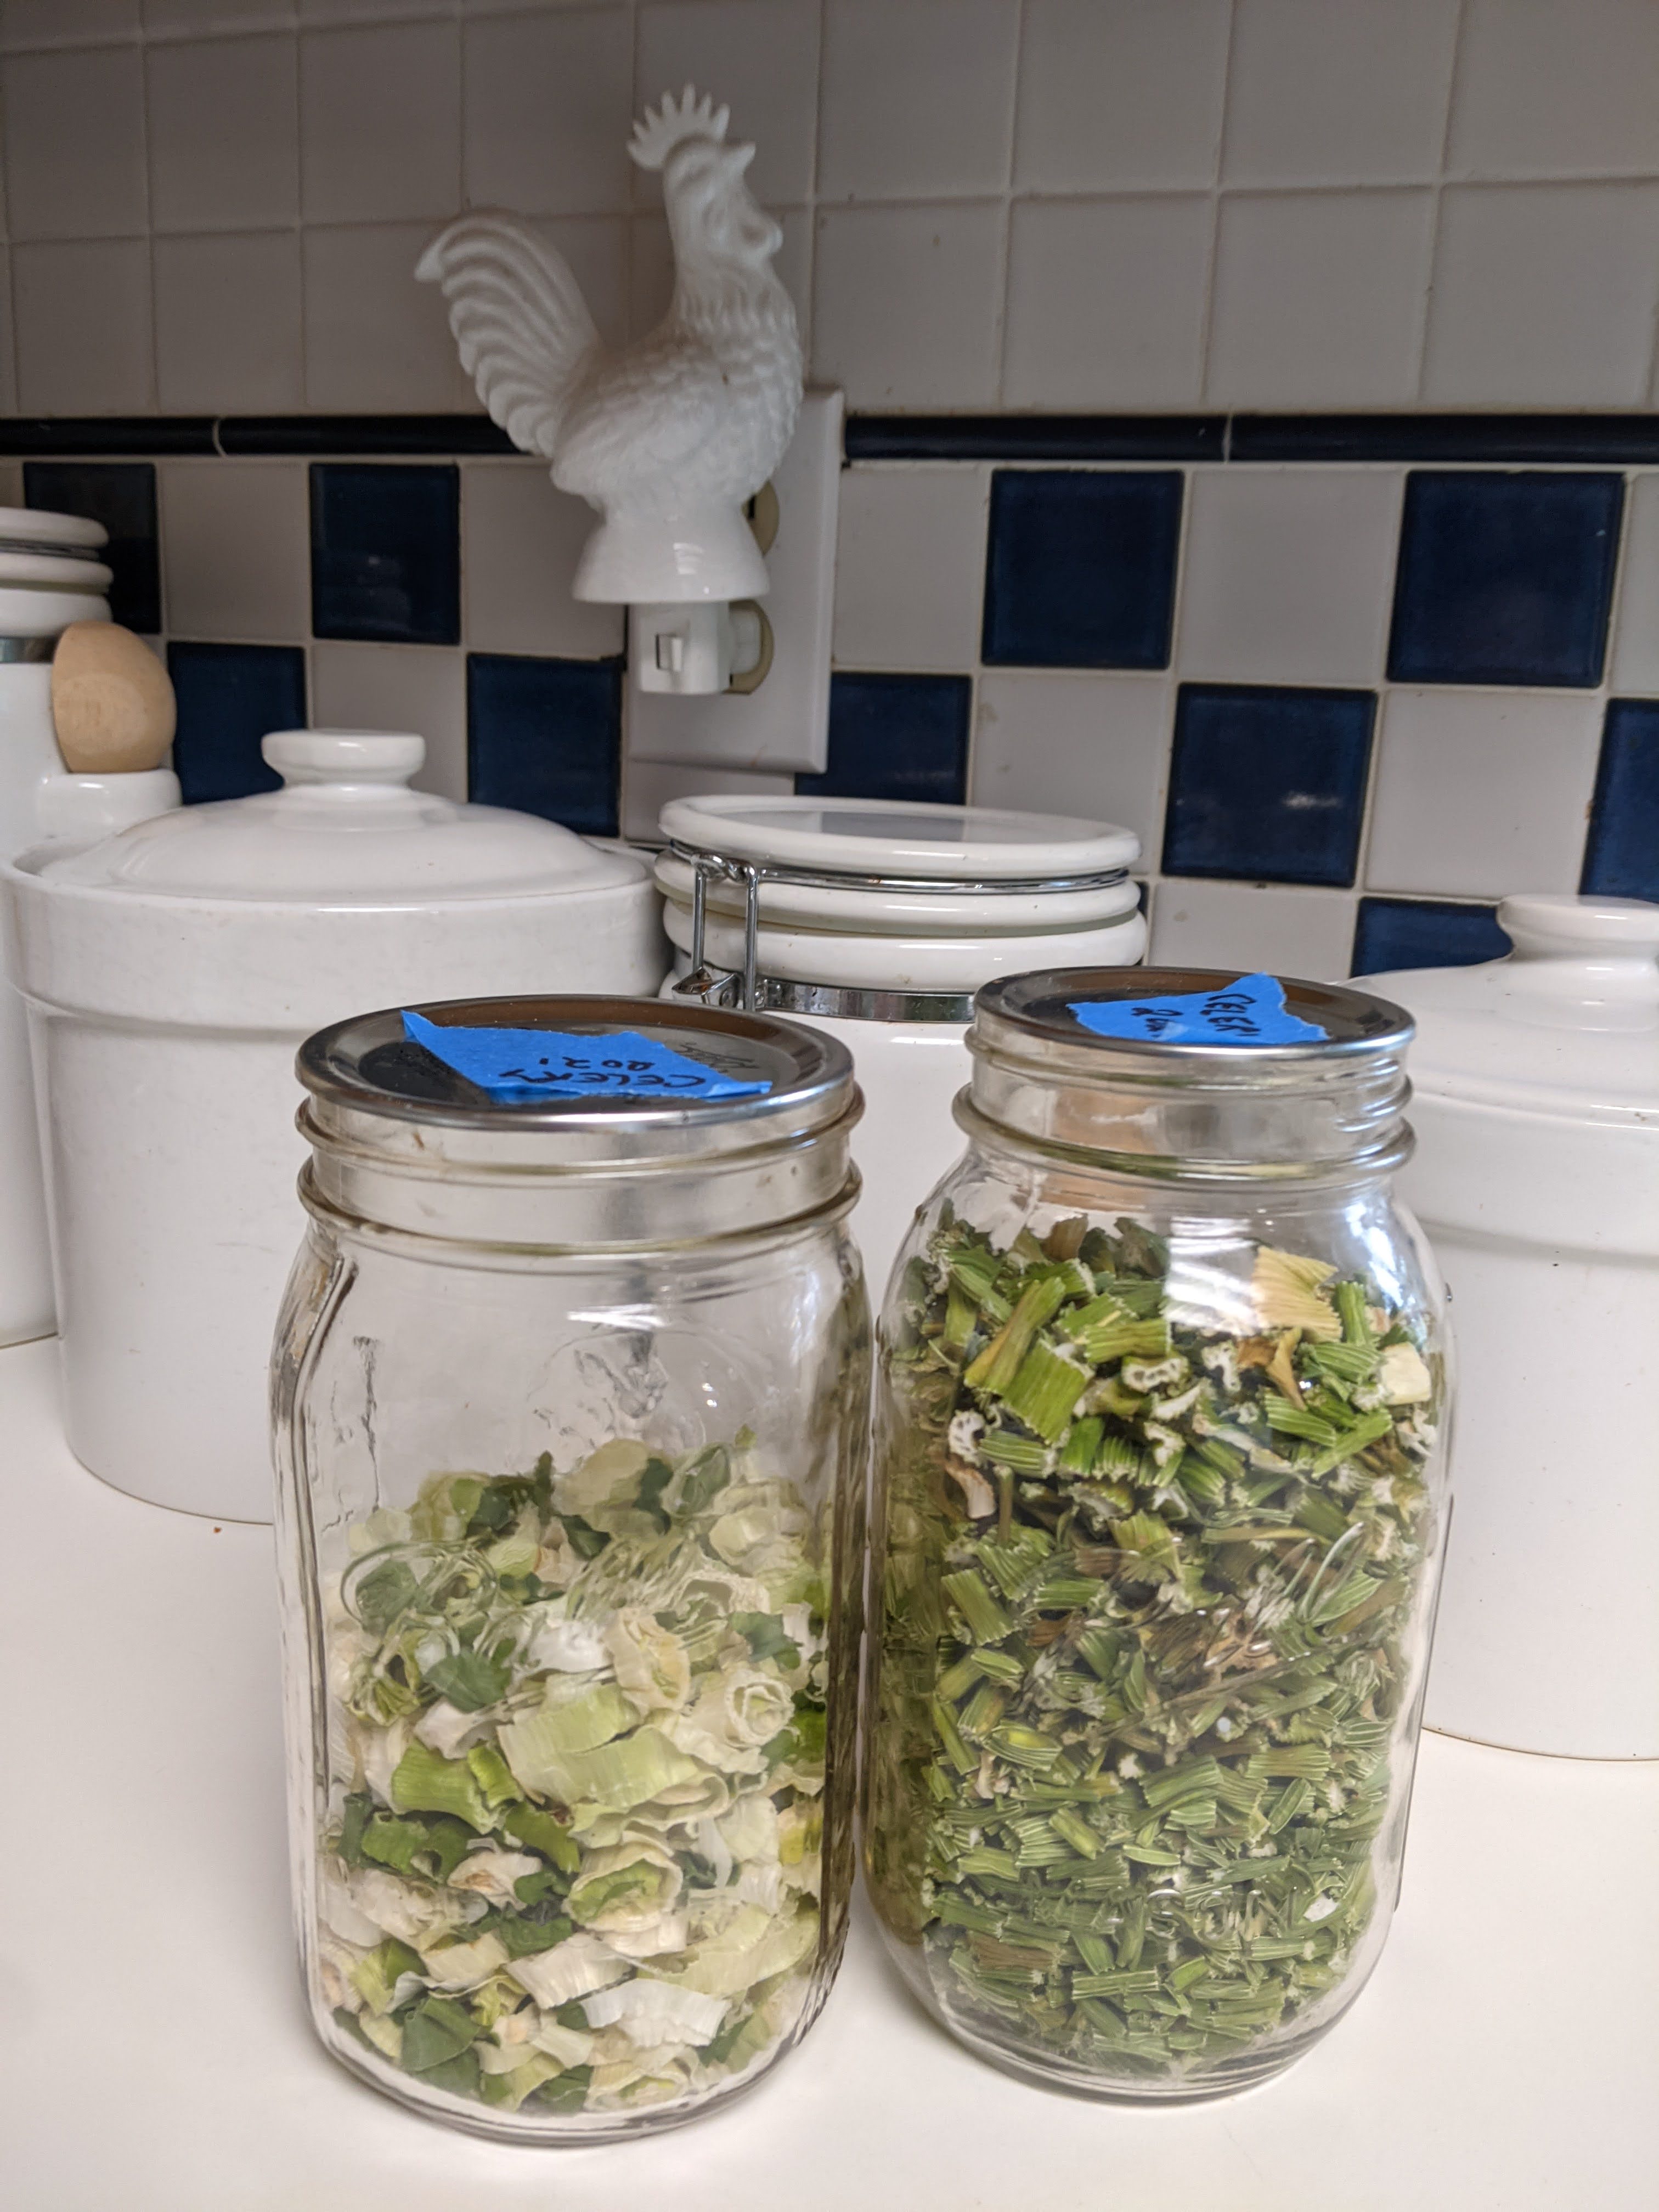
For long-term pantry storage: use a dehydrator to dry the celery. You can also dehydrate celery leaves to make celery flakes. Wash and cut the celery to the size you want. Blanch it, if desired. Dry it with paper towels, and then spread it out on dehydrator trays. Follow your dehydrator’s directions to dry the celery. When it’s done, I use an accessory jar lid kit with my FoodSaver to store my dehydrated celery in vacuum sealed canning jars. To use the dehydrated celery later, you could reconstitute it or drop it, as is, into soups or other recipes which have liquid ingredients to plump it up. You can also grind dried celery into a powder or use the crushed flakes as a seasoning.
I used the freezer method in previous years, but this year I decided to try dehydration because I am pressed for freezer space and I heard it produces better results. It seems counter intuitive, but I’ve also learned that blanching actually helps vegetables to dry faster. University extension service guidelines recommend blanching celery to preserve its color, protect its vitamins, and destroy any harmful bacteria that could be present. On my first time dehydrating celery, I was in a hurry and I did not check these guidelines, so I skipped the blanching. My dried celery looks green enough, and I am happy with the results. If I decide to dehydrate more of my celery, I will try blanching it and then compare the results. Blanching is also recommended for freezing celery so it will hold up longer in the freezer, but I think that vacuum sealing mine works just as well.
While I like to have a good supply of homegrown organic celery stored in the freezer or pantry for the winter, its texture is never going to be nice and crunchy again. That’s why my goal is to use as much of this harvest as I can now, while it’s fresh. I’ve been making lots of potato salad and Waldorf salad lately. We’ve also been munching on celery sticks as snacks—delicious with or without a dip. If we were still eating sandwiches for lunch, I’d make tuna salad sandwiches, too. I might make a stir fry tonight, and next week I’ll make tuna pasta salad. I should also make stock or soups to eat now or freeze for later. And of course I’ll be using homegrown celery in our turkey stuffing. I can also use the bunching onions and leeks that I’ve recently harvested in many of these recipes. Eating from the garden is one of the best parts of growing your own food.
Do you have any other ideas to share with me? What are your favorite dishes that have celery in them?
DEHYDRATOR RECOMMENDATIONS:
I still have and use my mom’s old dehydrator, which does not have a temperature control or a fan to circulate the air evenly. You could get a similar one with both of these features for a pretty low price.